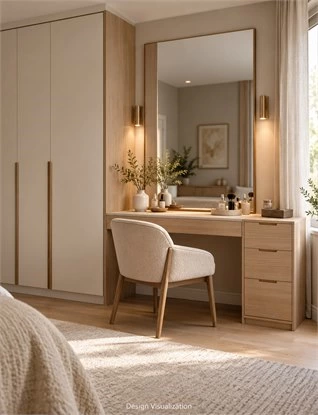
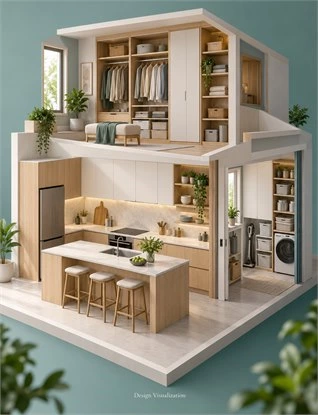
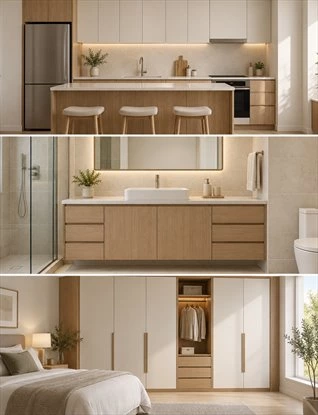
A built-in dressing table works best when the chair, mirror, drawers and wardrobe are planned as one usable arrangement. Start with the seated position and the storage you need, then compare locations with the chair pulled out and neighboring doors open. An attractive empty recess is only the beginning of the design.
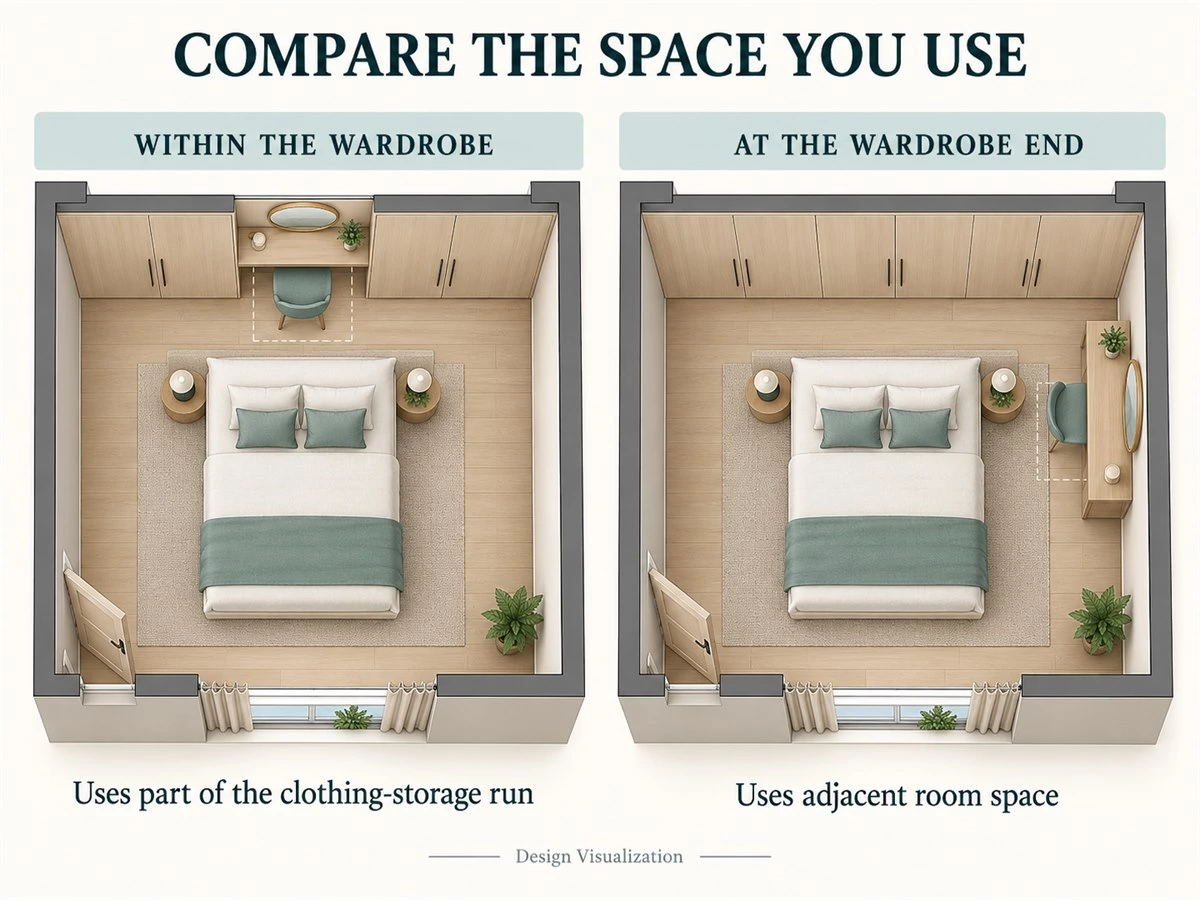
The main choice is often between a dressing opening within the wardrobe run and a lower unit connected to its end. The first takes space from the clothing layout; the second uses adjacent room space. Neither is automatically better. The right option depends on what you store, how you get ready and which routes must stay accessible.
This guide helps you choose a layout, organize personal items and coordinate the mirror, lighting and devices before requesting a specific proposal. It covers bedroom and dressing-room furniture rather than bathroom basin vanities. Use the comparison and practical checks below with your actual room measurements, selected seat and equipment information.
Choose the Right Location for a Built-In Dressing Table
Begin with the room in use. Mark the bed, entrance, window, wardrobe and the routes people actually take, then assess possible dressing positions. The most useful location is one where the grooming task and surrounding activities can coexist.
Start with the Bedroom and Dressing Routine
Decide what will happen at the table: applying makeup, putting on jewelry, preparing hair or simply setting out daily essentials. Record whether the user sits or stands, which items are needed at each stage and whether someone else will be accessing clothing at the same time.
A shared dressing room needs a different test from a single-user bedroom. If one person sits at the table while another retrieves clothes, show both positions on the plan. This identifies whether the proposed table belongs within the wardrobe run or should sit outside its busiest access area.
Compare a Wardrobe Recess, Wardrobe End and Adjacent Wall
Shortlist a recess within the wardrobe, a lower unit at its end and a separate adjacent-wall position. For each, mark what changes: a clothing compartment removed, an adjoining wall occupied or a chair extending into the route beside the bed. Include retained furniture rather than judging the cabinetry in isolation.
For example, a recess may look contained on the elevation but replace the hanging zone you use most. An end-connected unit may retain that hanging space yet obstruct the room entrance. Keep or reject each location with a written reason. The broader custom wardrobe design guide provides context for the surrounding storage plan.
Assess the Window Position Without Assuming It Is Best
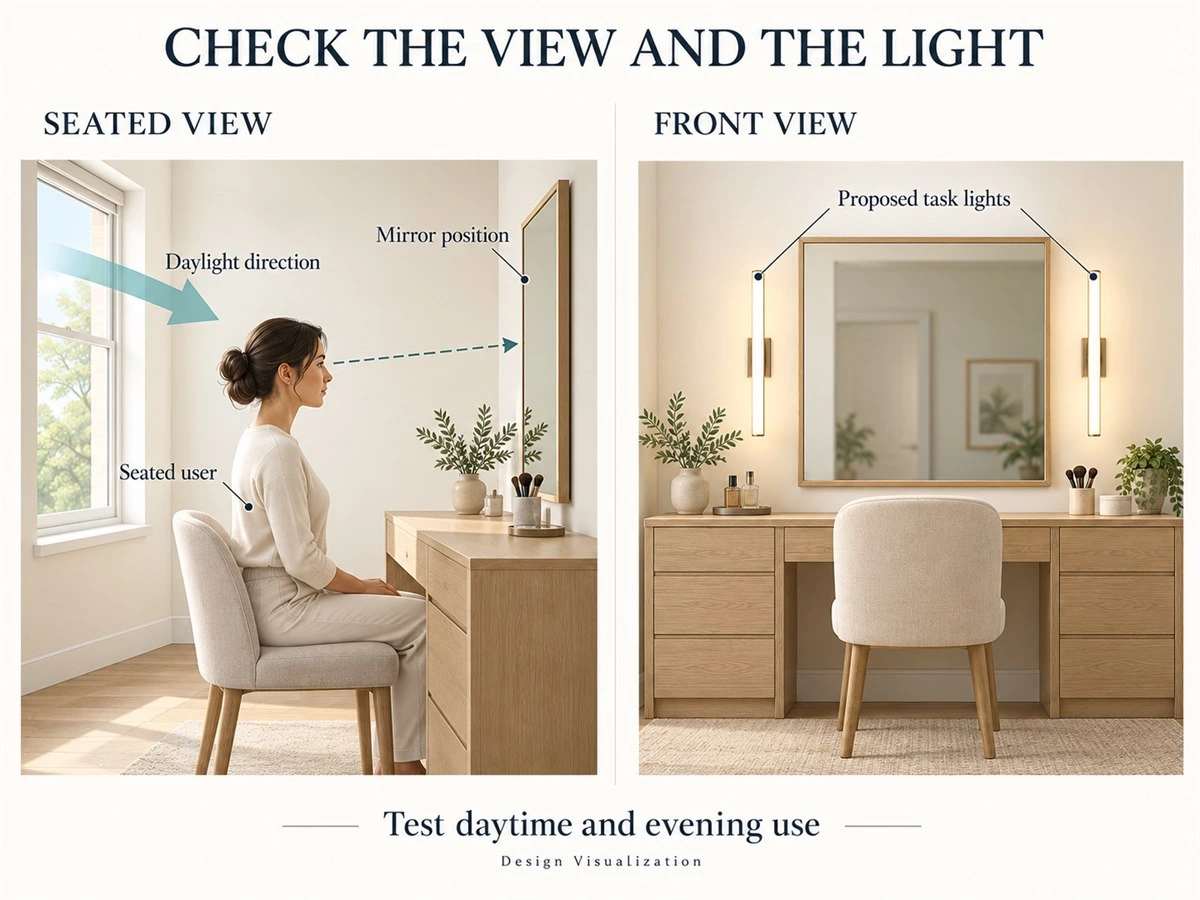
Review the window from the intended seated position. Check how daylight reaches the face and what appears in the mirror, then test the arrangement when the table will actually be used. Include evening use, window opening, curtains or blinds and access for cleaning.
ALLURE's warm-toned closet with a window-side dressing table documents this type of location. It is a design reference, not a measured lighting study. Your mirror still needs a suitable position and mounting proposal; a window wall does not automatically provide either.
Compare Wardrobe Integration Layouts
A wardrobe with dressing table combines activities that compete for the same room. Compare the function gained with the clothing storage or floor area used, and make those changes visible before choosing the preferred elevation.
Recess the Dressing Table Within the Wardrobe Run
A recessed arrangement places a dedicated grooming opening among the surrounding wardrobe sections. Identify exactly which hanging, shelf or drawer compartments it replaces. Then reassign their contents on the proposed interior drawing; moving the same belongings into an unspecified remaining area is not a complete storage solution.
Review the mirror, surface and any upper cabinetry around the actual user. Check whether the chair or an open dressing-table drawer obstructs adjacent wardrobe access. A recess is worth considering when the remaining clothing layout works and the seated activity fits the space in front of it.
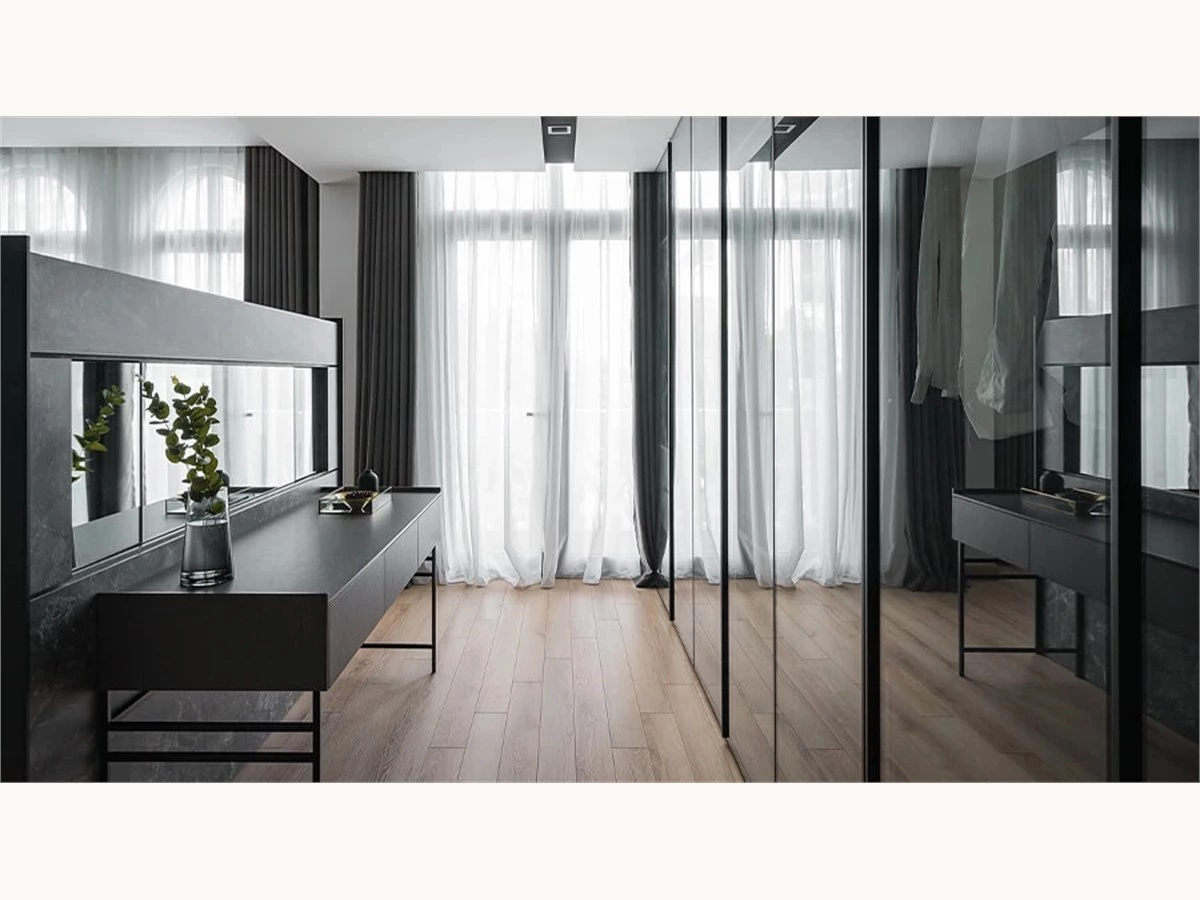
Connect a Lower Dressing Unit to the Wardrobe End
An end-connected unit can retain the principal wardrobe run while extending the grooming function into an adjoining area. The room must accommodate the lower unit, the occupied chair and access around both. Review the connection from the bed and room entrance as well as from the wardrobe.
The description of ALLURE's gray wood-grain wardrobe unit identifies a lower side partition used as a dressing table. That supports the configuration as a product reference. It does not establish the support method, allowable loading or dimensions for a new proposal; those belong in the supplier's project drawings.
Compare the Options Under the Same Room Assumptions
Use the same bed position, entrance, window and required clothing inventory when comparing layouts. Draw the table, occupied seat and relevant openings in each version. If an option needs a smaller wardrobe or relocated furniture, disclose that change rather than presenting the layouts as equivalent.
| Layout | Suitable room conditions | Effect on wardrobe storage | Chair and circulation | Mirror and lighting | When to reconsider |
|---|---|---|---|---|---|
| Recessed within the wardrobe | A dedicated opening fits while the remaining clothing arrangement meets the brief | Replaces identified compartments within the run | Check the occupied seat, drawers and neighboring wardrobe openings together | Coordinate the mirror and light positions within the opening | Clothing has no workable new home, or seating blocks required access |
| Connected at the wardrobe end | The adjoining area accommodates the lower unit and seated activity | May retain the main run while using additional room space | Check the bed route, entrance and movement around the extension | Assess available wall area and lighting around the new position | The extension narrows an important route or conflicts with a door |
| Adjacent wall or window side | A separate zone remains usable after furniture and window access are assessed | May retain the wardrobe compartments while occupying another zone | Check the chair in the whole room, not just against the wall | Review daylight, reflections, mirror mounting and evening use | Window operation, glare or circulation cannot be resolved |
Illustrative decision: suppose a bedroom needs its existing hanging allocation, and an in-run recess would remove part of it. The recess stays on the shortlist only if that clothing can be stored elsewhere in the revised plan. An end-connected option stays only if its occupied seat leaves the required route usable. If neither condition is met, reconsider the furniture arrangement or a separate suitable position instead of forcing the table into the wardrobe.
Plan Seating, Legroom and Everyday Access
A fitted dressing table should be assessed with a person using it. Review seated reach, the movement needed to stand up and the space occupied by opening components. A clear floor area on an empty-room image does not demonstrate those conditions.
Choose the Chair or Stool Before Finalizing the Opening
Use the intended chair or stool, or a representative model with known dimensions, before settling the dressing opening. Sit at a temporary surface and assess the relationship between the seat, work area and mirror. Include the user's preferred posture and any accessibility requirements in the brief.
Check what is below the surface: drawer boxes, support members and front panels may affect where the user can sit. A seat that tucks away neatly can still be unsuitable during use. Record the comfortable arrangement from the trial and have the design team translate it into coordinated dimensions rather than adopting an unsupported universal height.
Show the Chair, Drawers and Doors in Use
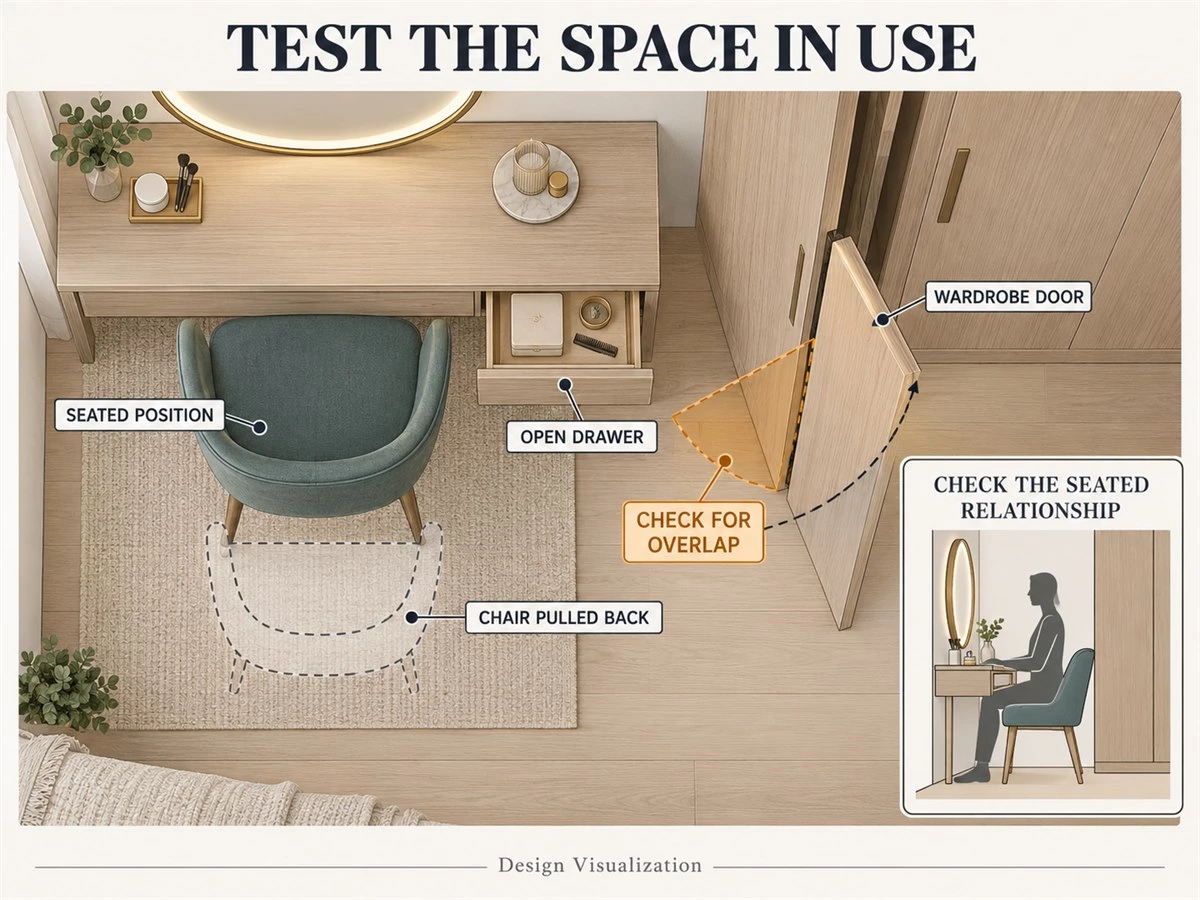
Ask for an operational plan as well as an elevation. Show the chair occupied, pulled out for entry and moved back for standing. Add the intended drawer extension and the movement of nearby wardrobe and room doors. For sliding doors, check which compartments remain accessible at each position.
Review the activities that realistically overlap. If clothing is retrieved while someone is seated, test that combination. Also check projecting handles and cable routes around the same area. Resolve a conflict by changing the relevant layout or component, not by relying on everyone to use an awkward sequence indefinitely.
Test a Complete Getting-Ready Sequence
Run through the whole task using a temporary setup or the proposed layout. Approach, pull out the seat, sit, use the mirror, retrieve daily products, open the main drawer, put items away and leave. Where shared access matters, include the second person rather than testing the table alone.
| Task | What to check | Example revision to assess |
|---|---|---|
| Sit and stand | Seat movement, body position and the route behind the chair | Reassess the seat, opening or table location |
| Retrieve daily items | Reach and whether another item must be moved first | Relocate the frequently used compartment |
| Open the main drawer | Drawer movement relative to the seated user | Review the drawer arrangement or storage location |
| Access clothing | Door position and access while the seat is occupied | Review the adjoining wardrobe layout |
| Put away and leave | Where contents and the seat go after use | Provide a defined return location without blocking access |
Record the observation, proposed revision and person responsible for checking it. A mock-up identifies questions to resolve; the final assembly still needs the relevant drawings and technical confirmation.
Organize Makeup, Jewelry and Daily Essentials
Useful bedroom dressing table storage starts with the contents, not a catalogue of accessories. Give frequently used objects a reachable home while preserving the working surface and seated opening.
Build an Inventory Before Specifying Drawers
Gather representative makeup containers, brushes, jewelry cases and other daily items. Record the dimensions that affect storage and whether containers should remain upright. Separate daily use from occasional use and identify which items belong elsewhere. Include the space occupied by a tray or organizer, not just the loose objects.
For two users, assign contents before drawing a symmetrical interior. One may need bottle storage while another needs divided space for small accessories. A shallow drawer is a configuration to evaluate against those contents, not a default answer for every grooming product.
Compare Shallow Drawers, Side Cabinets and Open Niches
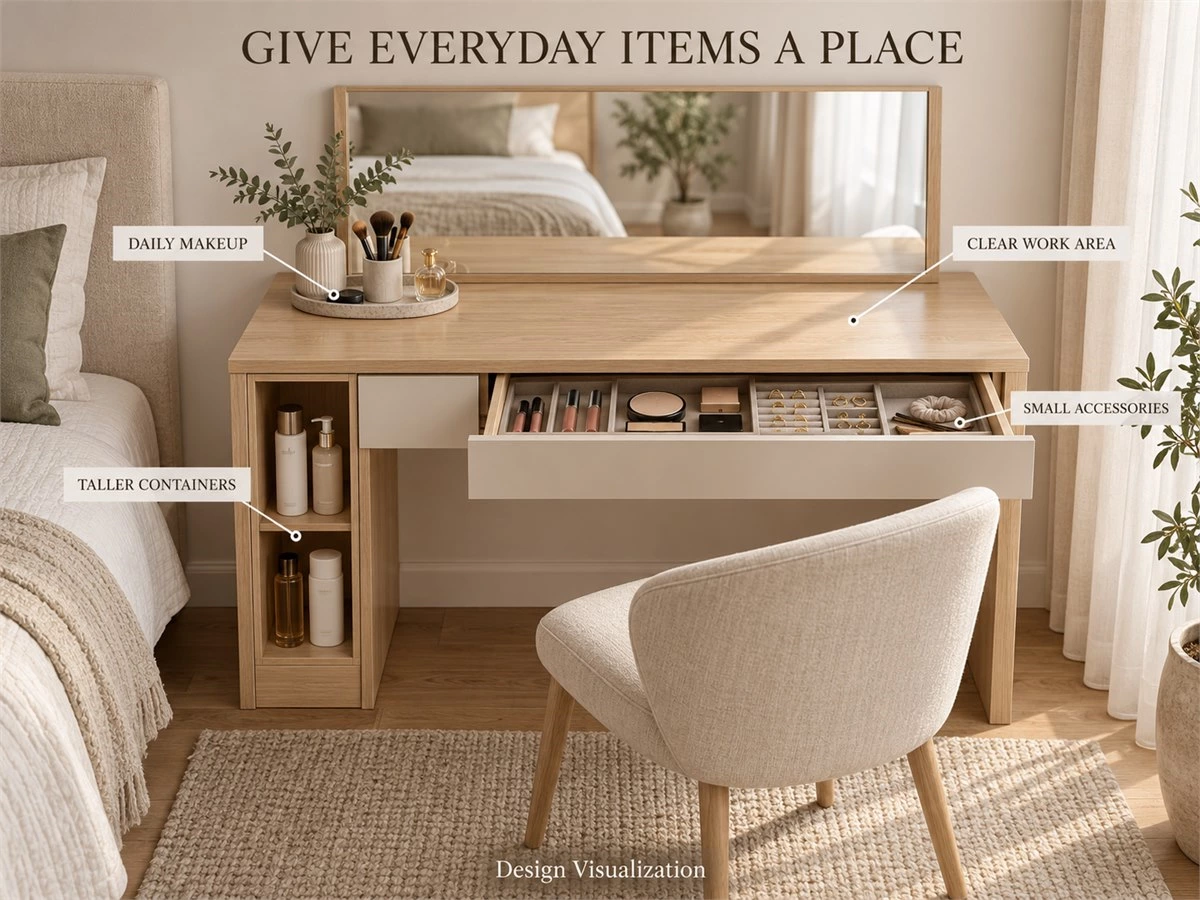
Compare each storage form with its intended task. A drawer can organize small items, a side compartment can accommodate a different arrangement, and an open niche may suit selected objects kept in view. Check actual internal space, retrieval and cleaning before choosing the mix.
| Contents | Configuration to assess | Practical check | Trade-off |
|---|---|---|---|
| Small daily makeup items | Drawer with suitable removable dividers | Check actual internal fit and access from the seat | The drawer assembly occupies space beneath the surface |
| Taller containers | Appropriately arranged side storage | Check container orientation, opening and reachable position | Side storage uses cabinet width or adjacent space |
| Jewelry and small accessories | Compartments matched to actual pieces or cases | Check separation, visibility and closure | A fixed organizer may limit future rearrangement |
| Selected display items | Limited open niche or tray | Check cleaning and interference with the work area | Permanent display reduces clear surface or enclosed storage |
| Personal-care devices | Storage assessed against the actual equipment | Distinguish storage from operation and follow device instructions | Equipment may require a different use location or arrangement |
Review any storage directly under the tabletop together with the seated position. Adding another drawer is not an improvement if it prevents the intended user from sitting comfortably.
Keep a Usable Work Surface
Set out the items used during a typical grooming session. Identify a clear working area and decide where each object returns afterward. A tray may help define a group, but its footprint still counts. The mirror base, lamp and decorative objects also need to be included in the surface review.
Keep permanent display to the amount that suits the routine. If daily products end up covering the table, revisit the storage allocation rather than adding another decorative shelf. Review cleaning around joints, mirror supports and trays so putting the area away remains practical.
Coordinate the Mirror, Daylight and Task Lighting
Review the mirror and illumination from where the user will actually sit. Treat their positions as a coordinated proposal, then assess it during the relevant daytime and evening conditions.
Position the Mirror for the Seated User
Use a temporary mirror position during the seating trial. Check whether the user can see the area needed for the task without repeatedly leaning around tabletop objects or changing posture. Include any freestanding mirror base in the available work area and assess its stability through the selected product's instructions.
A grooming mirror and a full-length dressing mirror serve different views. Decide whether both are needed and where each can be accessed. Alignment with wardrobe door lines can guide the appearance, but should follow the usable viewing position rather than determine it.
Review Daylight and Evening Use
Look at the face and reflected view with the actual window and proposed lights. Check for distracting reflections and areas that are difficult to see during the task. Repeat the review with the daylight reduced or absent instead of assuming the daytime arrangement covers evening use.
Assess ceiling, decorative and wardrobe lighting separately from the grooming requirement. An illuminated shelf shows a feature in the cabinetry; it does not demonstrate the lighting at the user's face. Use the mock-up to decide which positions need adjustment before finalizing the mirror and cabinet details.
Select Lighting from Actual Product Information
Once the proposed positions are understood, review real luminaire information with the lighting professional. Include the relevant output and color-quality criteria, controls, any dimming compatibility and installation conditions. A photograph of a lit mirror does not establish those specifications.
Coordinate wiring, drivers where applicable and access for servicing before cabinetry is finalized. Identify which party supplies each component and which professional confirms the installation. Select documented products for the specific arrangement rather than applying a universal brightness or color-temperature value to every room.
Keep Power and Personal-Care Devices Practical
Device planning begins with what will be used at the station. Distinguish an item stored nearby from equipment operated at the table, and coordinate the actual requirements before choosing concealed power features.
List the Devices That Will Be Used Here
Record each device model, intended activity and relevant manufacturer instructions. A charging accessory, illuminated mirror and hair-styling device have different functions; listing only “power point required” leaves the brief incomplete. Include the space taken by plugs, charging parts and cables.
Decide which tasks belong at this table and which have a more suitable location elsewhere. If hair preparation needs a different equipment arrangement from makeup, plan that distinction explicitly. It may be more workable than forcing every activity into a compact dressing opening.
Coordinate Power Locations and Cable Routes
Assess socket locations against the actual device and the user's position. Follow the likely cable route and check it against drawers, doors, the seat and nearby circulation. Confirm access to the connection and controls without assuming a hidden location is automatically convenient.
Have a qualified electrical professional confirm the design and installation for the project and location. The cabinetry drawing should identify the agreed interfaces, not substitute for electrical instructions. Avoid finalizing a panel or drawer arrangement while its cable route or service access remains unresolved.
Separate Device Storage from Safe Operation
A compartment that holds an appliance is not automatically suitable for operating it. Follow the actual device's instructions for use, placement, cooling and storage. Do not treat a closed drawer or cabinet as an operating enclosure unless an appropriately designed and approved arrangement establishes that use.
If a holder, protective surface or specialist accessory is proposed, check it against both the device and cabinet configuration. Keep the operating area and return location clear in the brief. Confirm the arrangement before representing it as a supplied feature or a safe method of use.
Match the Dressing Table to the Wardrobe and Room
After the activity and access work, coordinate the visible composition and technical detail. The aim is a dressing position that belongs in the room and can be specified clearly enough to review and quote.
Align the Visible Design Without Sacrificing Function
Review door profiles, visible surfaces, handles, mirror framing and drawer lines together. A lower dressing surface can connect visually with full-height cabinetry through selected repeated details without copying every proportion. Keep the seated opening and necessary access intact when adjusting the elevation.
ALLURE's Guangzhou apartment cabinet project describes a main-bedroom wardrobe combined with a dressing table and mentions hinged and sliding doors in the multifunctional arrangement. It is a documented integration reference. The page does not establish that each opening shown is part of the dressing-table section or that the configuration fits a different bedroom unchanged.
Specify the Surface, Support and Cleaning Details
Identify the actual surface assembly, edge treatment, supporting structure and fixing proposal. A slim or floating appearance does not show how the component is supported. Review the supplier's drawings and relevant material or hardware documents before accepting that detail for your project.
Check the care requirements for the selected finish against the products used at the table. Consider joints, exposed edges and cleaning around the mirror. Matching a wardrobe's color does not establish stain resistance, chemical resistance or structural capacity; those are separate specification questions.
Prepare a Complete Brief Before Requesting a Quote
Provide a dimensioned room plan, wardrobe interior requirements, bed and window positions, seat preference and representative storage contents. Add the mirror arrangement, proposed lighting, device models and preferred finishes. Mark unresolved items so an early proposal is not mistaken for a fully approved production design.
Ask the quotation to distinguish cabinet components, mirror, lighting, electrical work, delivery and installation responsibilities. Identify which are included, optional or outside the scope. Review custom wardrobe configurations for product direction while keeping the selected room and activity brief as the basis for the proposal.
FAQs About Built-In Dressing Tables
These questions help resolve the final choice between a visually appealing arrangement and one that suits the room's everyday use.
Is a Built-In Dressing Table Suitable for a Small Bedroom?
It can be, when the occupied seat, opening storage and remaining circulation work together. Compare the grooming function gained with the clothing storage or room space used. Test the arrangement with the actual furniture positions; a table fitting against the wall does not by itself demonstrate a usable bedroom layout.
Can a Dressing Table Be Integrated into a Wardrobe?
Yes. A dedicated recess and a lower end-connected unit are two configurations to assess. The recess replaces part of the wardrobe allocation, while an end connection uses adjacent room space. Confirm the remaining clothing layout, seat movement, mirror and supporting details before selecting either arrangement.
Can a Built-In Makeup Vanity Also Serve as a Desk?
Sometimes, but assess both activities separately. Computer equipment, writing space, cables, seating and lighting may change the brief. Show how grooming products are put away before work begins and where equipment is stored afterward. A shared surface is useful only when both intended tasks can be performed satisfactorily.
How Should I Choose the Mirror and Lighting?
Begin with the seated viewing position and intended grooming task. Test reflections and visibility with the actual window conditions and under evening lighting, then review the proposed fixtures using their technical information. Coordinate mounting, controls, wiring and service access rather than choosing the arrangement from an image alone.
What Is the Best Bedroom Dressing Table Storage Layout?
The appropriate mix depends on the contents and how often they are used. Compare drawers for small items, suitable side storage for other containers and limited open space for selected objects. Check actual internal dimensions and retrieval from the seat while preserving legroom and a clear work area.
What Information Is Needed for a Fitted Dressing Table Quote?
Send the room plan, wardrobe requirements, bed and window positions, seating preference, storage inventory, device information and finish references. Include the mirror and lighting direction and clarify the desired supply scope. Reference photographs help communicate intent, but final manufacture requires the relevant confirmed dimensions, drawings, specifications and approvals.
Plan the Dressing Position Before Finalizing the Cabinetry
Choose the location, compare the wardrobe allocation and test the seated routine before refining the finishes. Keep the mirror, storage and lighting connected to the user's actual task. When a layout looks attractive but fails the clothing or access check, revise that conflict while the proposal is still flexible.
Planning a wardrobe with a dressing table? Share your bedroom or dressing-room plan, room dimensions, wardrobe needs, bed and window positions, preferred chair, everyday contents and device models with ALLURE. Include your mirror, lighting and finish preferences to discuss a coordinated dressing-room layout and the information needed for a project-specific proposal.