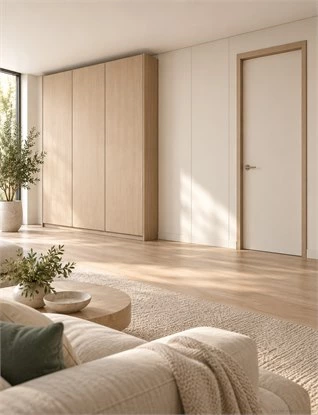
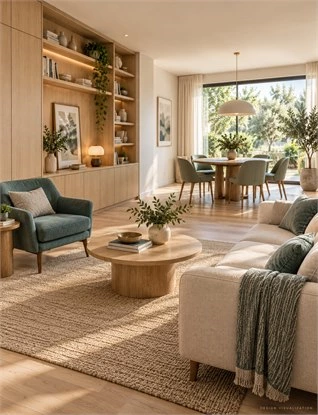
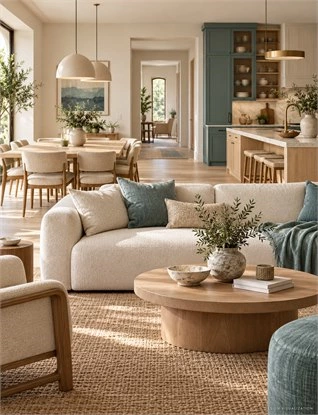
Matching interior doors and cabinets starts with the wall they share and the spaces they connect. Decide which proportions, lines and finishes should relate, then check how each room door, cabinet front and drawer operates. A coordinated interior can include deliberate differences in depth, construction and appearance.
Choosing the door and cabinets independently can leave their junction unresolved: a frame may compete with a cabinet side, a panel line may stop without explanation, or an attractive closed arrangement may become awkward when opened. Review those relationships before treating a shared finish as the solution.
This guide uses a complete elevation, connected-room views, and an operating-state review to explain the decisions. The illustrative schemes are design exercises rather than measured projects. Use the comparison tables to prepare a brief, then confirm the proposed systems and actual site conditions before ordering.
Matching Interior Doors and Cabinets Does Not Have to Mean Identical
Start with the effect you want someone to notice. A doorway may quietly belong to a paneled wall, or its frame may deliberately break up cabinetry. You can coordinate both when you choose the relationship rather than leave it unresolved.
Choose Between Blending In and Creating a Focal Point
A quiet treatment can be useful when several doors and cabinet fronts share one view, and you want the wall to read as a restrained background. A more distinct doorway can help establish an entrance as a separate element. Compare both in the actual room context, including the size and visual weight of nearby storage.
For example, a dark retained door frame might become a deliberate outline beside lighter cabinets. Trying to hide it with a nearly matching finish could be less convincing than acknowledging it. Decide what should lead the composition before choosing the surface treatment.
Decide Which Relationships Need to Repeat
Choose a small number of connections: related panel proportions, a selected top line, a finish family, or a repeated edge detail. Let other elements respond to their own functions. A room door does not need to copy every cabinet division to belong to the same interior.
Write those intentions down so that “matching” means something testable. Distinguish a preferred appearance from a confirmed construction detail. This prevents different suppliers from interpreting the same reference image in incompatible ways.
| Relationship | Design intention | What remains to confirm |
|---|---|---|
| Finish | Related appearance across adjacent faces | Actual samples, edges and lighting |
| Lines | Selected divisions repeat; others remain independent | Feasible openings, panel sizes and joints |
| Depth | A deliberate step or intended face relationship | Proposed assemblies and surrounding construction |
| Movement | Room and storage elements remain usable | Actual hardware, handles and opening relationships |
Distinguish Visual Integration from Product Integration
Integrated cabinetry design describes how the composition comes together visually and functionally; it does not prove that every element forms one manufactured system. A door assembly, a decorative wall panel,l and a cabinet front may each have different support, hardware,re and finishing requirements.
Ask for the proposed components behind the image. If the design depends on a particular flush junction or concealed treatment, identify it as a condition to verify. A product photograph can suggest a direction without establishing that the same construction suits your opening.
Read Doors, Wall Panels and Cabinets as One Elevation
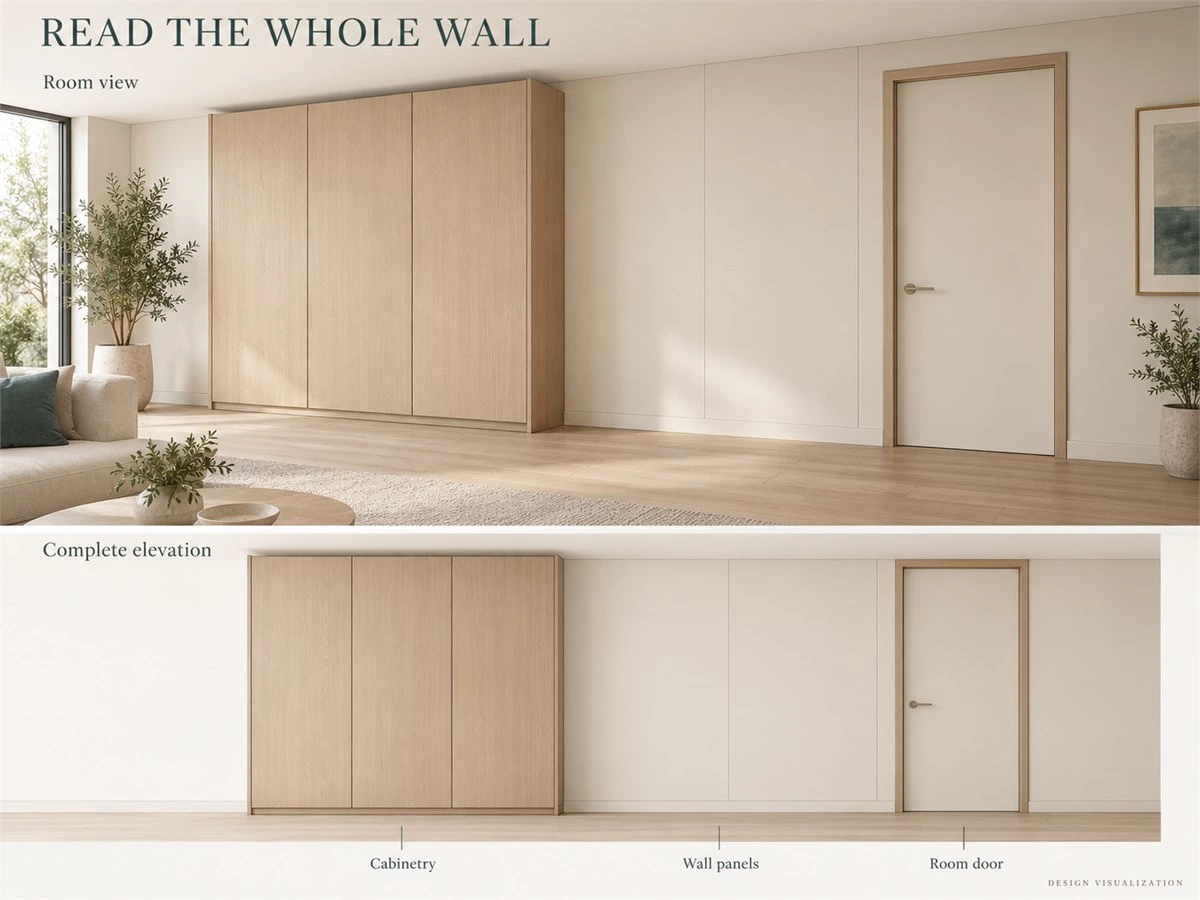
Individual samples cannot show how an entire wall is divided. Review the room perspective and the front elevation together: one explains the experience of the space, while the other makes the relationships between openings and surfaces easier to compare.
Begin with a Shared-Room View
Choose the views people actually use: arriving from the entrance, sitting in the living area, or looking along the corridor. Include the floor, ceiling, and neighboring furniture. A cabinet may look balanced in a close photograph while its side panel dominates the view toward a bedroom door.
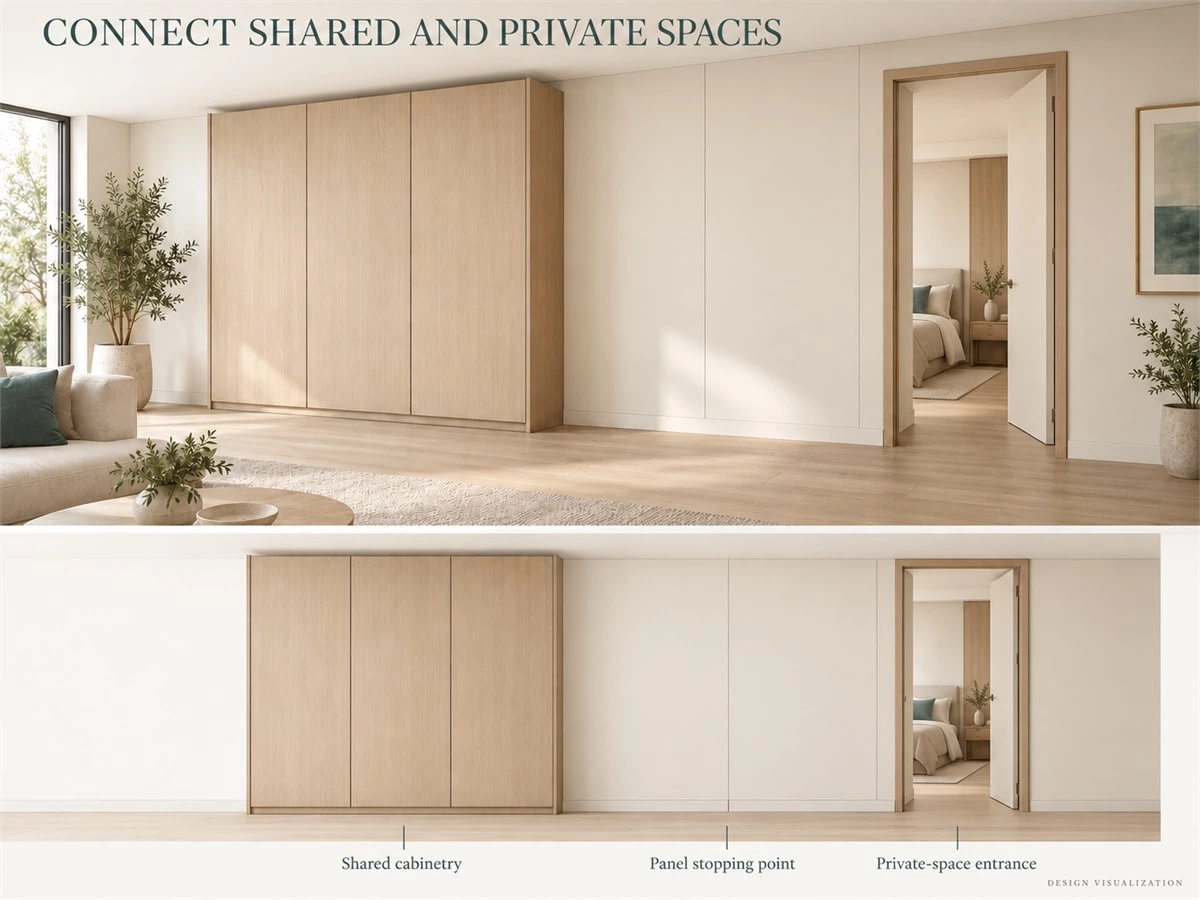
For the illustrative arrangement in this guide, place living-room cabinetry to the left, a decorative panel transition in the center, and a bedroom doorway to the right, approached through a corridor. Keep that arrangement consistent in every related view. It is a conceptual exercise, not a measured client project.
Translate the View into a Complete Front Elevation
Draw the full wall rather than separate product rectangles. Mark the doorway, frame or trim, cabinet boundaries, panel divisions,s and any visible returns. Add known switches, grilles and service points. Identify the floor and ceiling conditions that the proposal must meet.
Use the elevation to locate decisions, not to conceal missing information. If a frame treatment or wall depth is unresolved, record that condition. A conceptual front view can communicate the composition, but dimensions for ordering must come from the actual site and proposed systems.
Establish a Visual Hierarchy Without Forcing Alignment
Select the lines that organize the wall. A cabinet top, a door-head relationship,ip or a wall-panel band may provide a useful reference. Other divisions can remain independent if their different roles are clear. The purpose is a legible composition, not the largest possible number of aligned edges.
An existing doorway or equipment requirement may prevent a preferred alignment. First test a different proportion, an intentional offset, or a simpler transition. Do not add impractical cabinet compartments or assume an opening can be changed merely to make a drawing more symmetrical.
Coordinate Lines, Panel Divisions and Visible Edges
Once the overall composition is clear, review where surfaces meet. Small visible details can either explain the relationship between components or make the wall appear accidentally assembled.
Compare Vertical Divisions Across Adjacent Elements
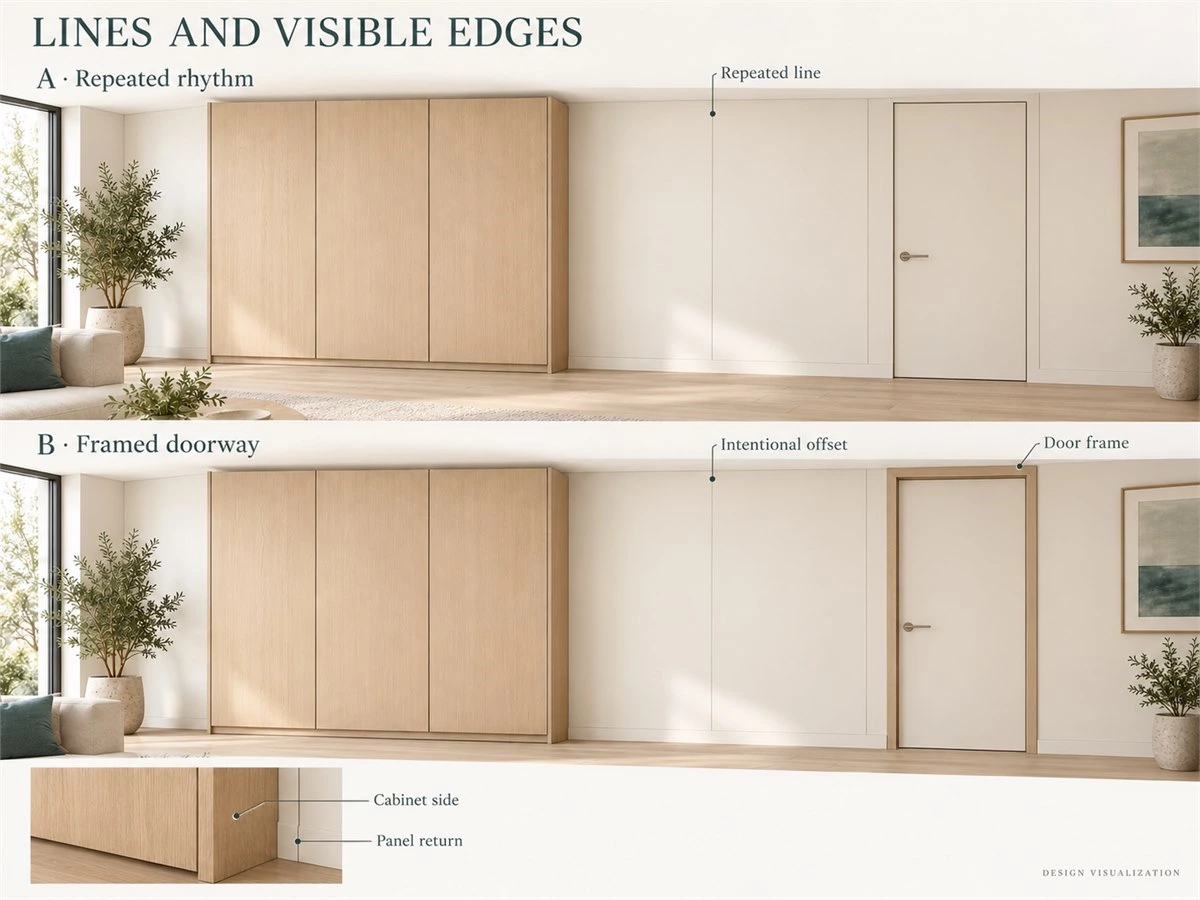
Read the cabinet edges, panel joints, and doorway together. A repeated vertical relationship may give the wall rhythm; a deliberate offset may distinguish the room entrance from storage. Neither choice requires identical panel widths throughout.
Identify the function of each line. A decorative joint, the edge of an opening door, and the gap between cabinet fronts have different roles. They may relate visually, but the selected systems determine their actual form. Agree the appearance without specifying one universal joint width.
Review Horizontal Lines Without Adding Unnecessary Seams
A drawer division does not automatically need to continue across a room door. Test whether extending it helps the whole wall, or simply adds a line that has no useful role on the neighboring surface. A quiet doorway can remain visually connected through its finish or frame treatment instead.
Similarly, a cabinet section above a door may establish a shared band only if the proposed arrangement supports it. Avoid presenting a decorative seam on a rendering as proof that a particular door can be divided or constructed that way.
Include Frames, Side Panels, Returns and Skirting
View the junction from an angle. The cabinet side, door trim, and return of a decorative panel may all be visible even when their front faces look aligned. Include where skirting stops, where a plinth changes, and how a wall finish terminates beside the frame.
These edges should have a deliberate relationship rather than relying on a front-on image to hide them. For the opening and trim questions behind the composition, use the interior door frame details guide. Keep this wall review focused on how the chosen elements meet.
Compare Two Treatments Under the Same Conditions
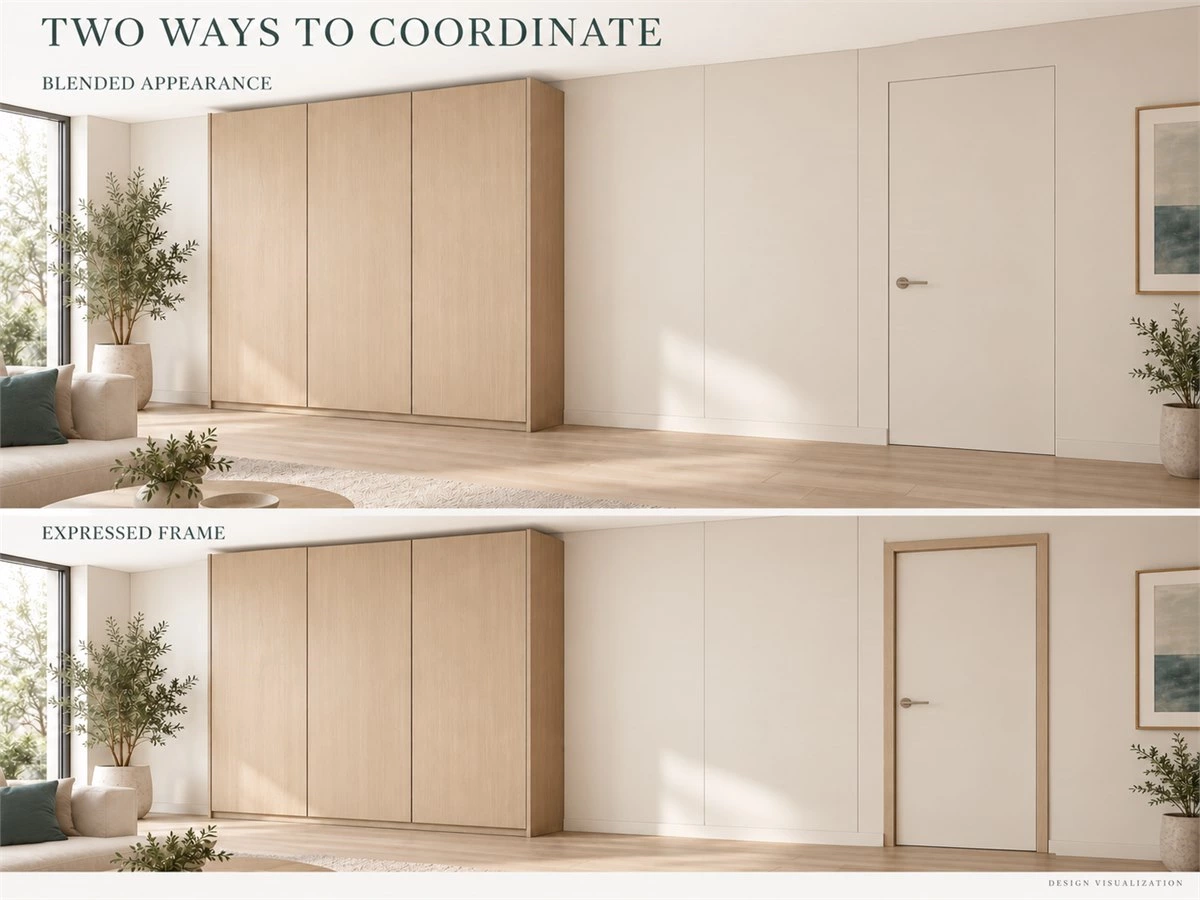
Use the same illustrative wall, doorway position, cabinet storage requirement,t and retained finishes for both schemes. In Scheme A, repeated panel relationships and a visually quiet doorway emphasize continuity. In Scheme B, an expressed frame identifies the doorway while cabinet divisions follow the storage layout.
| Decision | Scheme A: repeated rhythm | Scheme B: framed doorway |
|---|---|---|
| Door expression | Relates quietly to surrounding panels | Remains a distinct architectural element |
| Cabinet divisions | Repeat selected visual relationships | Follow storage needs within their own composition |
| Frame treatment | Restrained appearance, subject to system confirmation | Frame intentionally remains visible |
| Transition | Selected lines connect neighboring surfaces | A deliberate boundary separates the elements |
| Critical check | Feasible joints, edges and operation | Frame-to-panel and frame-to-cabinet relationship |
Choose between them by reviewing the shared-room view, oblique edges,es and opening state. A quiet scheme may require more careful system coordination; an expressed frame still needs a resolved junction. Neither is inherently the better option, and neither table column is a claim of product availability.
Check Depth, Door Movement and Access
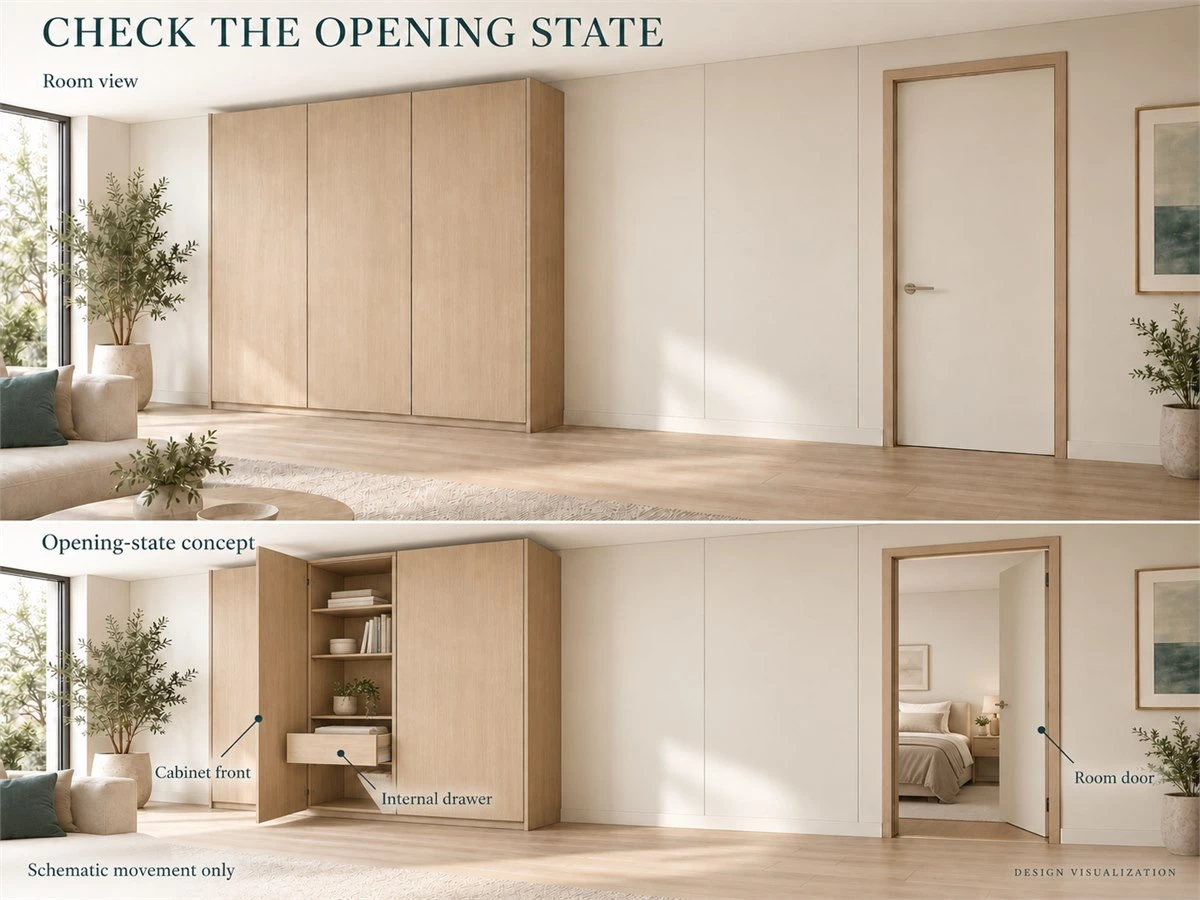
The closed composition is only one state of the wall. Coordinated doors and wall panels must also work with cabinet depths, projecting handles, and the way people move through the space.
Distinguish Aligned Faces from Equal Construction Depth
A room door, wall panel, and storage cabinet can have related front faces while their construction behind those faces differs. A cabinet may project beyond the wall treatment; the door frame may introduce another visible plane. Draw those differences rather than assuming equal depths.
A simplified plan or section can show an intended step, return,n or face relationship. Use it to ask how the components meet and what the site must accommodate. The proposed assemblies determine feasibility; a flush-looking perspective does not confirm a buildable flush junction.
Show Room Doors, Cabinet Doors and Drawers in Use
Plot each moving element in the same arrangement. Include the room-door swing, cabinet fronts, extended drawers and handle projections. Consider a person retrieving an item while someone passes through the doorway. Check likely combinations of use, not just each movement in isolation.
In the illustrative wall, a cabinet beside the doorway should be tested against the door’s actual operating direction. Reversing a swing, changing a front, or introducing a separation may be options to discuss, but each can affect other requirements. Keep the options conditional until the relevant components and site are confirmed.
Check Corners, Passage and Maintenance Access
Look around the corner and behind the closed composition. A switch, access panel, or replaceable device may become difficult to reach if the surrounding treatment is designed only for appearance. Identify how routine use and later maintenance will take place.
Check these relationships against the intended user and actual project requirements. A drawing with a clear-looking route is not a clearance verification. Where the proposal affects services or equipment, involve the responsible party rather than covering the issue with decorative panels.
Evaluate Concealed-Looking Doors as a System Choice
If a quiet doorway is preferred, ask which door assembly, frame, operating hardware,e and finish application are proposed. Review the surrounding construction, opening direction, and maintenance needs together. A similar surface finish cannot answer those questions.
Keep a visible-frame alternative available when the preferred treatment is unsuitable or unconfirmed. The design can still coordinate through proportions, finish relationships and edge decisions. Do not assume that any existing door can become concealed, handleless or flush.
Connect Finishes Without Assuming the Same Construction
Matching cabinets and wall panels involves more than selecting similar-looking faces. Examine how finishes behave beside one another and keep each component’s specification separate from its visual role.
Review Samples Together in Their Intended Relationships
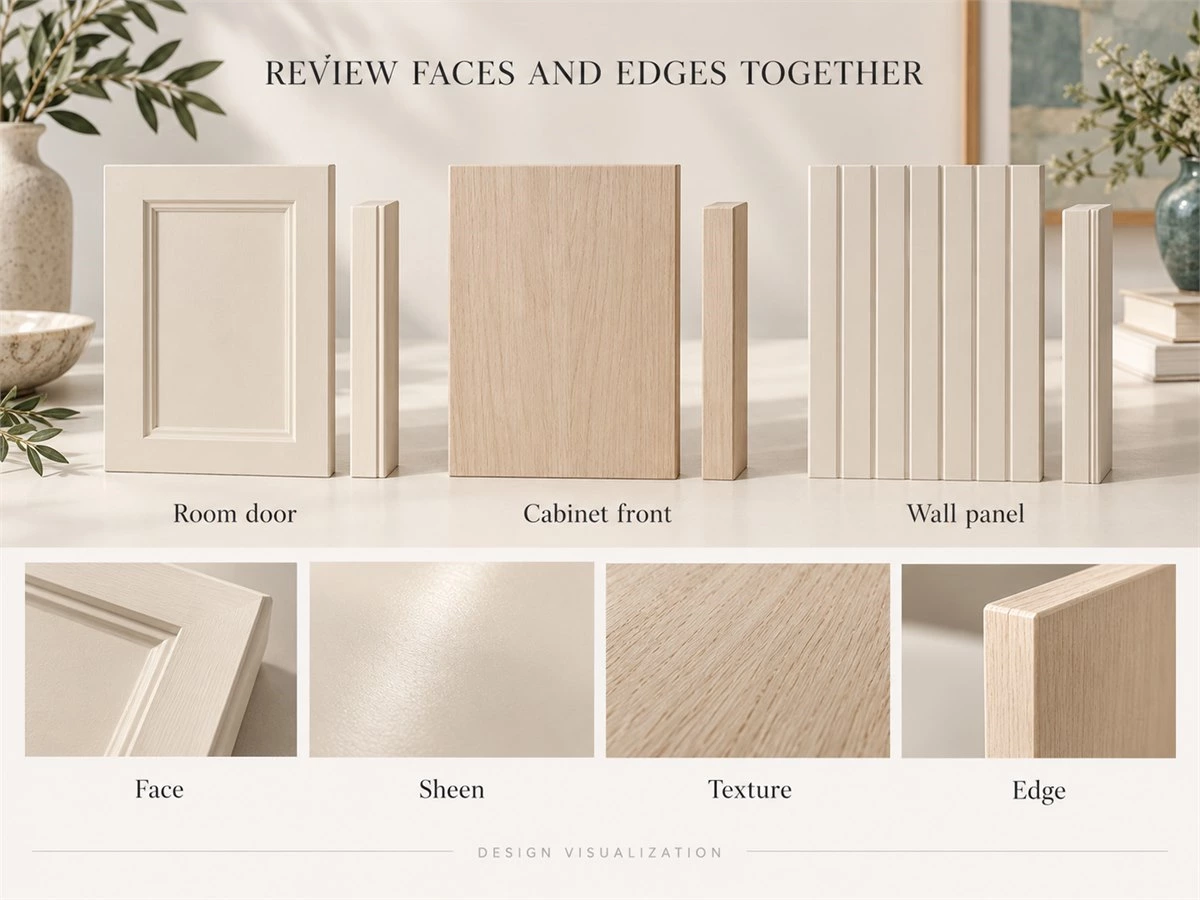
Place the proposed door, cabinet-front,t and wall-panel references together, including their exposed edges. Compare color, texture,re and sheen from the directions in which the wall will be seen. If an existing door stays, use it as a real reference rather than relying on a remembered color name.
Review the actual samples under relevant room lighting before agreeing to the relationship. A small flat sample may not communicate the scale of a large surface, so ask what additional reference is available. A generated sample board can explain this process but cannot approve a material or establish an exact match.
Define the Required Degree of Grain Continuity
State whether the goal is a related wood appearance, a consistent grain direction, or a deliberately sequenced pattern across selected faces. These are different expectations. Identify the set of surfaces that should be considered together and where that relationship is intended to stop.
A frame, return,n or change in wall direction can provide a deliberate boundary. If sequencing is important, carry the decision into the appropriate material and drawing review. The cabinet grain matching guide addresses that detailed task; a collection of product photographs cannot establish continuity across separate components.
Keep Component Specifications Separate
Record the proposed surface and construction for the door assembly, decorative panel, and cabinetry independently. Similar faces may cover different substrates, edge details, and supports. Request the actual information for each selected component instead of inferring it from the neighboring item.
Where the project requires particular moisture, acoustic, fire,e or other performance, obtain the relevant component or assembly documentation and project confirmation. A shared finish is a visual relationship, not evidence of equivalent performance. Keep the sample decision and the technical suitability decision linked but distinct.
Plan Transitions Across Shared and Private Spaces
Whole home interior coordination becomes visible between rooms. A wall that works in isolation may still end awkwardly at a corridor, or look unrelated when viewed from a bedroom entrance. Review the connections in both directions.
Connect the Entry and Living Area Through Shared Sightlines
Stand conceptually at the entry and identify which cabinet, doorway,ay and wall surfaces are visible together. Repeat selected relationships where they help that view: a frame treatment, a panel proportion, or a finish family. The entry does not need to reproduce the living-room wall in miniature.
Check the view with relevant doors open as well as closed. An opening can reveal a different wall or cabinet behind it. For broader decisions about which colors and materials repeat across rooms, use the whole house color scheme guide; here, focus on the geometry and junctions that make the transition intentional.
Let Corridors Provide a Deliberate Transition
Use corners, recesses, and changes in wall direction to decide where a treatment ends. In the illustrative arrangement, the panel beside the living cabinet can turn toward the corridor or stop at a defined boundary. Compare both from the living area and from the return view along the corridor.
A stopped finish needs a resolved edge, while a continued finish needs its surrounding doors and access points considered. Extending panels farther is not automatically more coordinated. Choose the extent that gives the transition a clear role without creating unnecessary complexity.
Coordinate Bedroom Entrances with Nearby Storage
Review the bedroom-facing side as well as the hallway-facing side of the entrance. A wardrobe side panel, door trim, nearby wall, and bed position may all affect the combination. Decide which relationships carry through and where the private room can change character.
The door can connect the spaces without requiring both sides of the home to share every finish. When neighboring storage opens, check its relationship to the entrance again. The same complete view should explain both the appearance and the practical conditions to confirm.
| Adjacent elements | Relationship to coordinate | Difference that may remain | Evidence or check |
|---|---|---|---|
| Entry storage and doorway | Frame, edge and finish relationship | Depth and construction | Site view and opening use |
| Living cabinet and room door | Selected lines and visual hierarchy | Door expression | Complete elevation and operating state |
| Corridor panels and bedroom entrance | Stopping point and transition | Private-room finish | Views in both directions |
| Wardrobe and bedroom door | Side panel, trim and neighboring surfaces | Storage arrangement and hardware | Plan, component details and opening relationship |
Review the Complete Combination Before Ordering
Before discussing the combination as an order, compare the appearance with the proposed components and supply boundaries. A short interface review is more useful at this stage than approving individual attractive images.
Review the Room View, Elevation and Opening Diagram Together
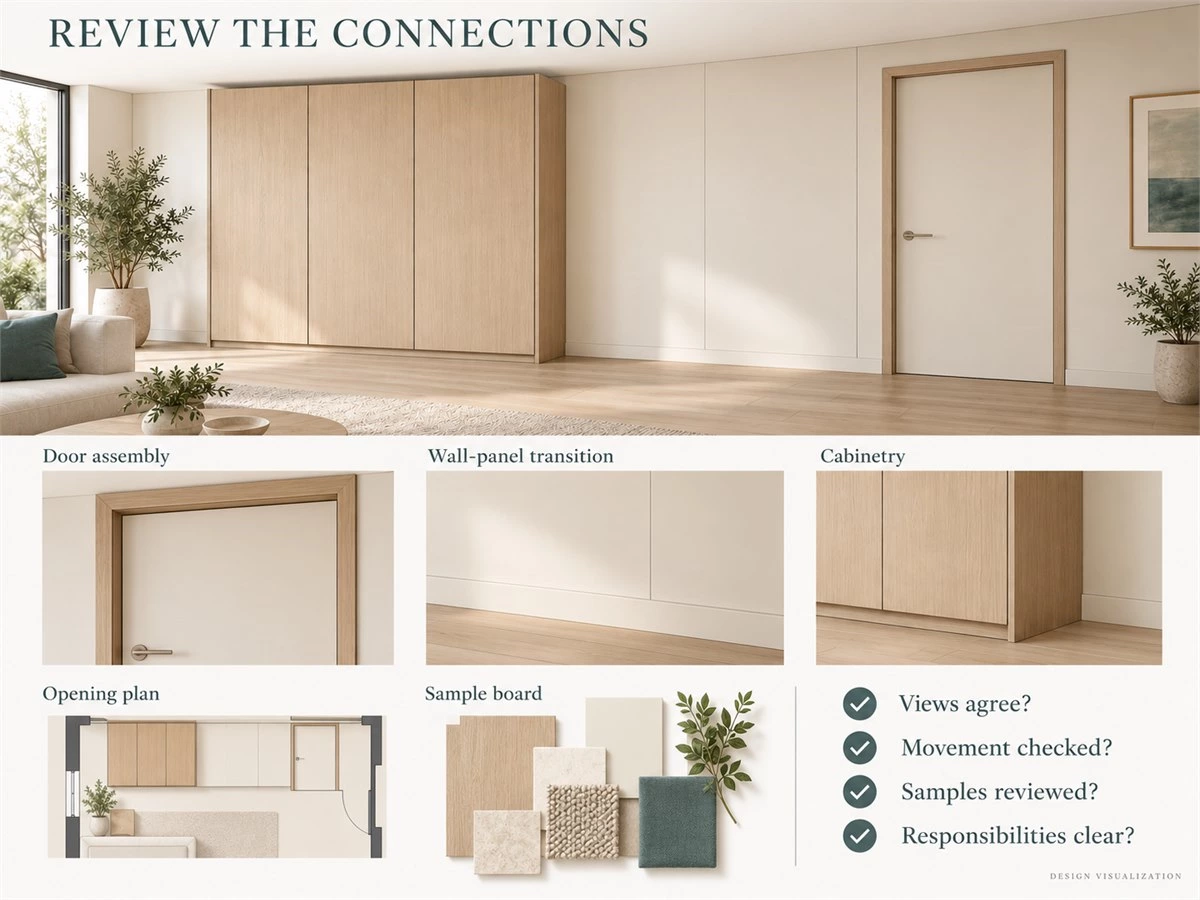
Check that all three describe the same door opening, cabinet arrangement, and panel divisions. A revision to a cabinet width or frame treatment should appear consistently in the related views. Otherwise, different people may be reviewing different versions of the intended result.
List what each view establishes. The perspective explains appearance; the elevation locates visible relationships; the plan or section explains movement and depth. None should be used to override an unresolved measurement or a component requirement. Keep unconfirmed conditions visible until the relevant information is available.
Confirm Junction Details and Finish References
Identify the frame-to-panel, panel-to-cabinet,t and cabinet-to-floor relationships that affect the design. Show intended face positions, returns, exposed edges,es and finish stopping points. Reference the actual samples under review so that a general description such as “matching wood” does not carry the entire decision.
Once the direction is established, use a cabinet finish schedule or the project’s corresponding record to connect the agreed references with their locations. This article establishes the relationships to confirm; it does not replace detailed component drawings or reproduce the full approval workflow.
Assign Component and Interface Responsibilities
Separate the door assembly, decorative wall panels, cabinetry, and associated site work in the proposal. Confirm who measures the relevant conditions, designs the junctions, supplies each part, and carries out the work. Pay particular attention to interfaces where one party’s component meets another’s.
| Item | Confirm in the proposal or review |
|---|---|
| Existing conditions | Retained openings, walls, doors and finishes are identified |
| Visual direction | Selected alignments, offsets and stopping points are understood |
| Components | Proposed door, panel and cabinet systems are identified |
| Movement and access | Relevant operating states and service access have been reviewed |
| Samples and edges | Actual references and visible junctions are agreed |
| Responsibilities | Supply, design, installation and interface ownership are clear |
A product entry page can provide options to discuss; it is not a commitment that every illustrated combination is available as one package. Record what remains unresolved and confirm the actual supply scope before treating the design as ready to order.
FAQs About Matching Interior Doors and Cabinets
Do Interior Doors and Cabinets Have to Be the Same Color?
No. They can coordinate through related proportions, selected lines, frame treatments, or compatible finishes. Identical color is one option. Review the entire elevation and adjoining spaces to decide whether a close relationship or a deliberate contrast gives the clearer result.
Can Doors, Wall Panels and Cabinets Use Different Materials?
Yes, different materials can form a coordinated composition. Review their visible faces, edges, and intended junctions together, while confirming each component’s construction and suitability separately. A similar appearance does not mean the materials or assemblies have equivalent performance.
Can Any Interior Door Be Made to Look Concealed?
Do not assume so. Suitability depends on the proposed door assembly, frame, hardware, finish application, and surrounding construction. Confirm the actual system and opening conditions. If that treatment is unsuitable, an expressed frame can still coordinate with neighboring panels and cabinets.
Should Panel Joints Line Up Across the Whole Wall?
Only where the alignment helps the composition and is feasible for the components. Selected repeated lines can provide structure while other divisions follow openings, storage,e or construction needs. Mark intentional differences so they are understood as design decisions rather than unresolved mismatches.
How Can I Coordinate New Cabinets with Existing Doors?
Begin with photographs, dimensions, the door’s condition, and an actual finish reference where possible. Compare the proposed cabinet beside the retained door and frame. If an exact match cannot be confirmed, consider a complementary finish or a deliberate boundary instead of relying on a near match.
What Should I Prepare Before Requesting a Coordinated Design?
Prepare a floor plan, photographs or elevations showing neighboring doors and cabinetry, details of retained elements and preferred visual references. Add any known door-system, equipment, or project requirements. These support an initial discussion; actual measurements and component confirmation are still required for the final proposal.
Coordinate the Connections Before Committing to the Components
A convincing combination connects the room view, complete elevation,n and operating arrangement. Decide what should repeat, make the differences deliberate, and confirm the edges, depth, and movement that the closed view cannot show.
Explore the interior doors and wall-panel options as directions to discuss alongside your cabinetry. Product selection becomes more useful when the shared wall and surrounding spaces already have a clear brief.
Planning matching interior doors and cabinets across your home? Share your floor plan with ALLURE, together with photographs or elevations of neighboring elements, the doors and surfaces you want to retain, and your preferred references. Discuss a coordinated direction within the proposed supply scope, and confirm component availability, technical suitability, and installation responsibilities for your project.