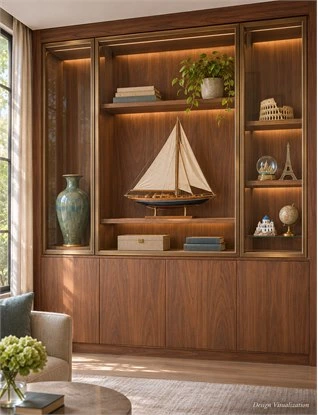
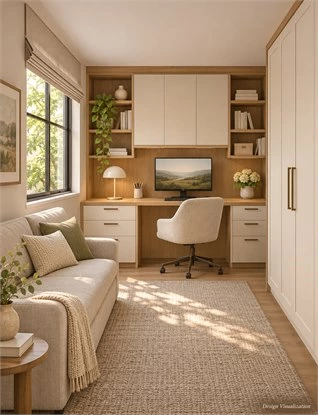
Plan display cabinets for collectibles around the objects, their supports, and the way you want to view and handle them. Record the collection first, then decide where it belongs, how it will be enclosed, and what each shelf must accommodate. Glass, lighting, and finishes should support those decisions.
The practical test extends beyond a tidy front elevation: can you see the important objects, remove them through the opening and clean the cabinet without leaving displaced pieces on the floor? A useful proposal also gives reserve objects, packaging, and everyday household storage a place.
This guide follows an illustrative model sailboat, a ceramic vessel and a small souvenir group through the planning process. Their suitability for display together is unverified, and no dimensions or weights have been supplied. Use the example to organise your own information; valuable or sensitive items may need specialist assessment beyond ordinary residential cabinetry.
Start with the Collection, Not the Cabinet Style
Measure Each Object with Its Base or Stand
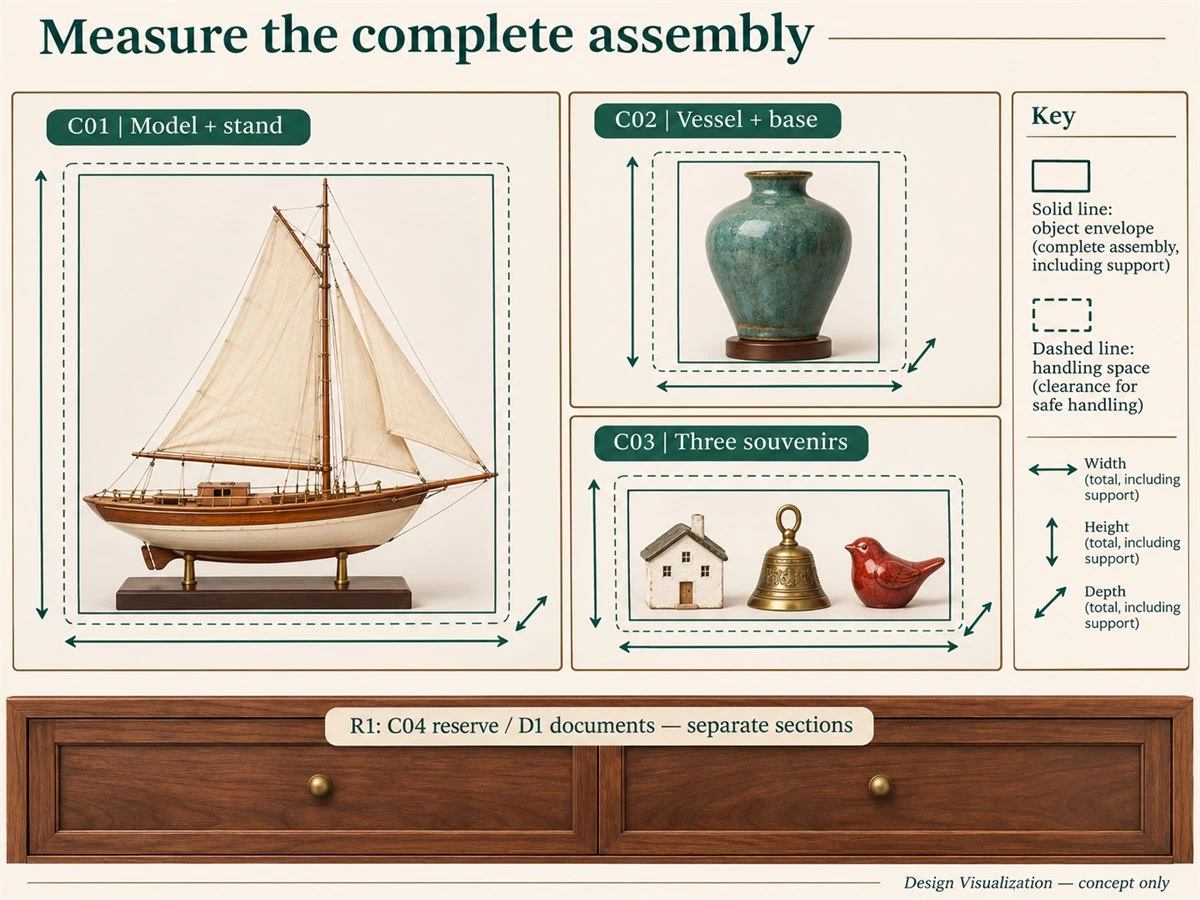
Measure the complete assembly in its intended orientation. For a model sailboat, that includes the stand, bowsprit, and mast; the hull alone is not a useful cabinet brief. Photograph the front and side, label the object C0,1, and record its widest, deepest,st and tallest points. Note whether any part can be removed and whether you actually want to remove it during normal handling.
Keep two questions separate: the space occupied while displayed, and the space needed to move the object through the door. Leave unknown dimensions marked for measurement. An external cabinet depth, attractive rendering or approximate model scale cannot establish either internal fit or a workable removal path.
Record Weight, Fragile Parts and Handling Needs
Provide a known weight or identify it as outstanding. Record the contact points between the object, its stand and the shelf, together with any manufacturer or specialist handling information. In this example, C01 has projecting components and C02 is a ceramic vessel; neither its appearance nor its material name establishes a suitable grip or safe lifting method.
Tell the supplier if handling requires two hands, assistance,nce or a separate support. That information affects access planning, while the shelf and cabinet still need their own configuration review. Ask for object-care advice when necessary rather than letting a cabinetry drawing become an assumed handling instruction.
Separate Permanent Display, Rotation and Reserve Storage
Choose which objects you want to see every day and which can rotate. Here, C01, C02 and the three small pieces grouped as C03 are proposed for display. Additional souvenirs C04 go into a named reserve location R1. Household documents D1 have a separate section within that closed-storage allocation. Packaging and spare stands also need recorded destinations.
This allocation is a planning example, not proof that the contents fit together or share suitable environmental conditions. Start with what exists, then identify specific expected additions. A future tall model may require a different bay; a vague request for flexibility cannot guarantee that every later purchase will fit.
| ID / task | Complete dimensions | Weight and support | Orientation / access | Allocation | Outstanding information |
|---|---|---|---|---|---|
| C01: model sailboat | Measure model plus stand and projections | Weight unknown; confirm stand contact points | Front/angled view; occasional removal | Main display | Clear door opening, handling path and shelf configuration |
| C02: ceramic vessel | Measure widest section and full height with base | Weight and base stability to confirm | Upright; infrequent handling | Separate display bay | Object condition, handling and environmental needs |
| C03: three travel souvenirs | Measure each piece and proposed grouping | Confirm each item and support | Grouped front view; periodic rearrangement | Grouped display bay | Visibility behind frames and neighbouring pieces |
| C04: reserve souvenirs and packaging | Inventory actual contents | Supports and packing suitability to confirm | Access when rotating display | R1 reserve section | Contents fit and appropriate storage conditions |
| D1: household documents | Measure actual files and folders | Confirm contents | Regular household access | Separate R1 document section | Keep independent of object handling |
Choose a Display Location in the Whole Room
Identify the Main Viewing Positions
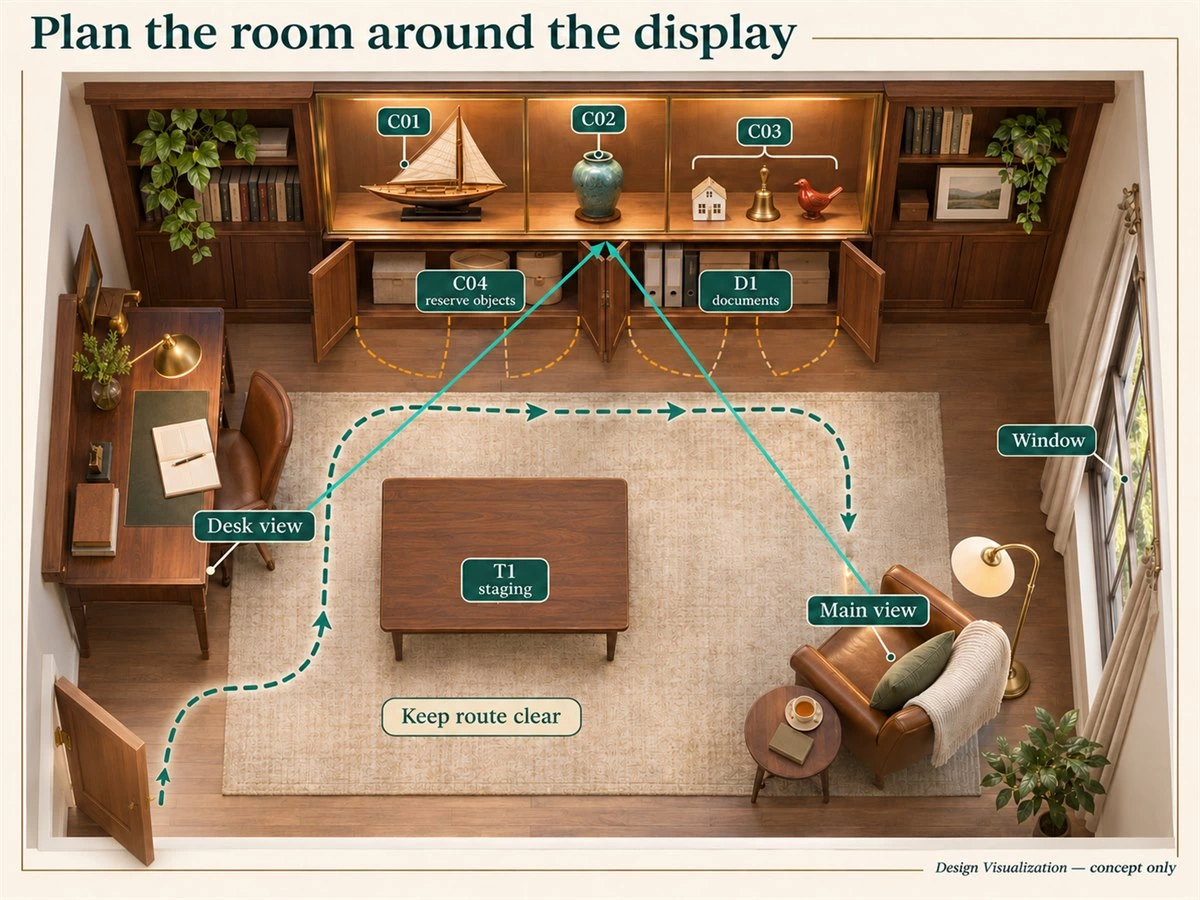
Mark where people actually look from: a reading chair, the desk, the dining table,e or the entrance. Choose a principal viewing position before centring a feature object. A model that is visible while standing directly in front of a cabinet may be interrupted by a frame from the sofa, or show mainly its underside when placed above the preferred sightline.
Use photographs taken from these positions and a simple elevation to discuss the difference. For the illustrative room, the main chair faces a north-wall display, with a secondary view from the desk. These are intended relationships to test, not fixed mounting heights for every household.
Check Windows, Screens and Nearby Activities
Place windows, existing lamps and screens on the room plan. Review the proposed display in daytime and after dark; a window reflected across the front can change what is visible from a particular seat. Also record direct sunlight and any known object-care restrictions before accepting that position.
Consider the room in use. Dining chairs may pull back toward the cabinet, desk equipment may obstruct a lower compartment, and a busy route may pass close to projecting doors. Record these conflicts early. Moving a display, adjusting furniture, or choosing another enclosure can be more useful than adding lighting to an unsuitable location.
Protect Everyday Storage and Circulation
Display space has to coexist with the room’s normal tasks. Keep D1 documents reachable without first moving C01 or opening a large display door across the desk chair. Draw fronts open and nearby seating occupied. Reserve a temporary staging surface T1 for handling objects, with its location checked against the same circulation plan.
If the wall cannot accommodate both the collection and household storage, compare a smaller visible selection with separate reserve storage. Do not turn every remaining gap into another compartment. The relevant question is whether the whole room still functions when the cabinet, furniture and people are in use.
Compare Open, Glazed and Mixed Display Cabinets for Collectibles
When Open Shelves Suit the Collection
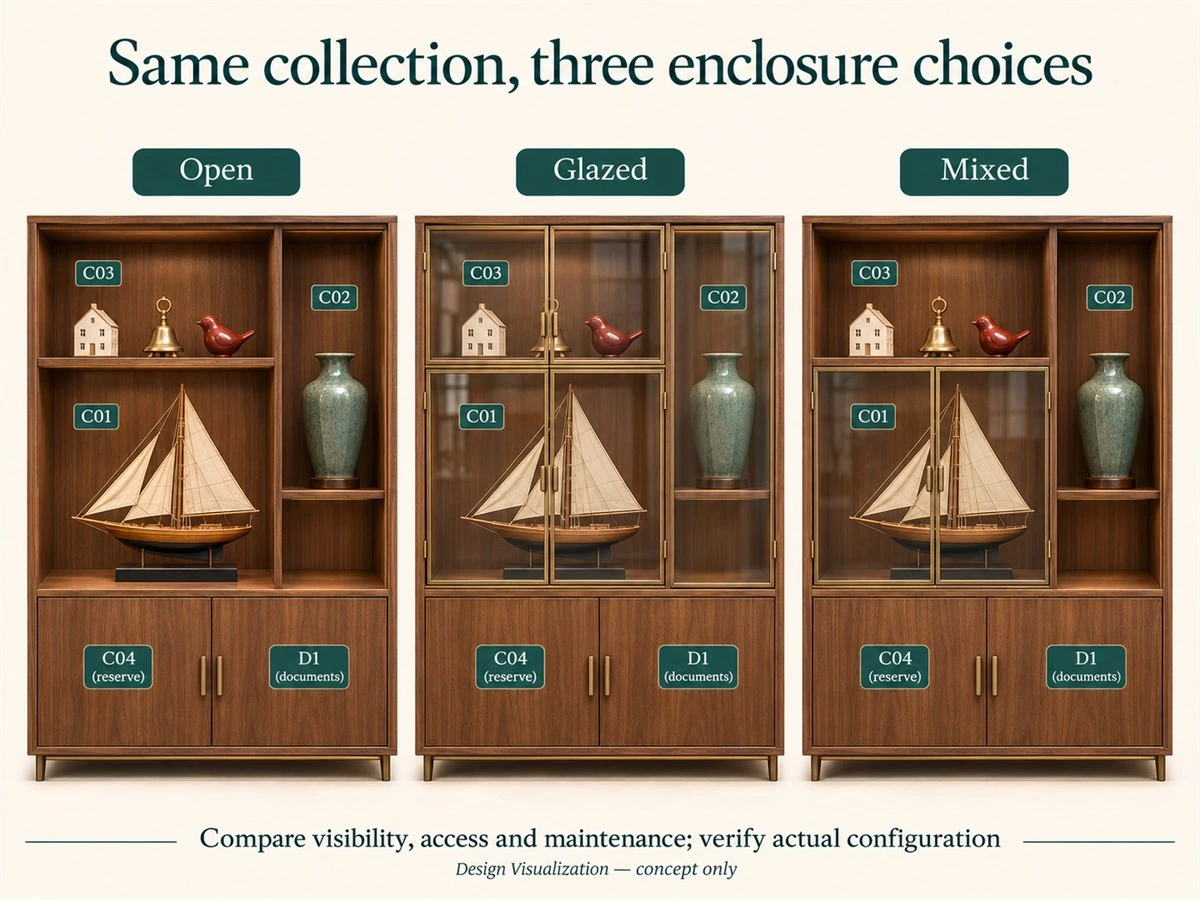
Open fronts offer direct access and remove front-door frames from the viewing position. They may be worth considering for suitable objects that are rearranged often. Test the actual group: can C03 be reached without brushing C01’s projecting parts, and can the shelf be cleaned without lifting everything at once?
Exposure and maintenance remain part of that decision. An open arrangement that works for one owner’s objects and routine may be unsuitable for another. For broader room-by-room choices, see open and closed cabinet layouts; this guide concentrates on how the collection changes those choices.
What Glass Doors Change
A glass display cabinet for collectibles introduces a front enclosure, an opening system, and an additional surface to clean. Review the glazing, frames, handles, and clear opening together. The proposal must allow the full C01 assembly to pass through, rather than simply fitting it behind the closed doors.
Ask which properties are actually specified. Ordinary glass fronts should not be treated as proof of dust-tightness, ultraviolet protection, theft resistance, or temperature and humidity control. If one of those outcomes matters, make it an explicit requirement and request supporting product information; it may require a different specialist solution.
When Mixed Display and Closed Storage Works Better
A mixed cabinet can assign selected pieces to open or glazed bays while keeping reserve objects and household contents behind separate fronts. In the example, C01–C03 remain the displayed inventory, and R1 still accommodates C04 and D1. The allocation prevents packaging from gradually consuming the display area.
Compare alternatives with the same room envelope and contents. If closed storage, frames,s or partitions reduce usable display space, show the consequence instead of silently removing objects from the comparison. You may need fewer displayed pieces, a changed grouping or a revised cabinet scope; each is a decision to make openly.
| Configuration | Viewing / retrieval | Maintenance task | Storage consequence | Confirm before selection |
|---|---|---|---|---|
| Open | No front glazing; direct reach to objects | Review exposed objects and shelf cleaning | Retain separate R1 reserve and document storage | Object suitability, supports and maintenance routine |
| Glazed | View through glass/frames; remove through doors | Reach internal glass as well as shelves | Allow for fronts, hardware and opening space | Actual glass specification, clear opening and handling path |
| Mixed | Select open or glazed bays for C01–C03 | Different tasks by compartment | Closed R1 uses part of the available envelope | All contents still accommodated; identify any changed grouping |
Set Shelf Layouts Around Objects and Supports
Establish Usable Internal Space
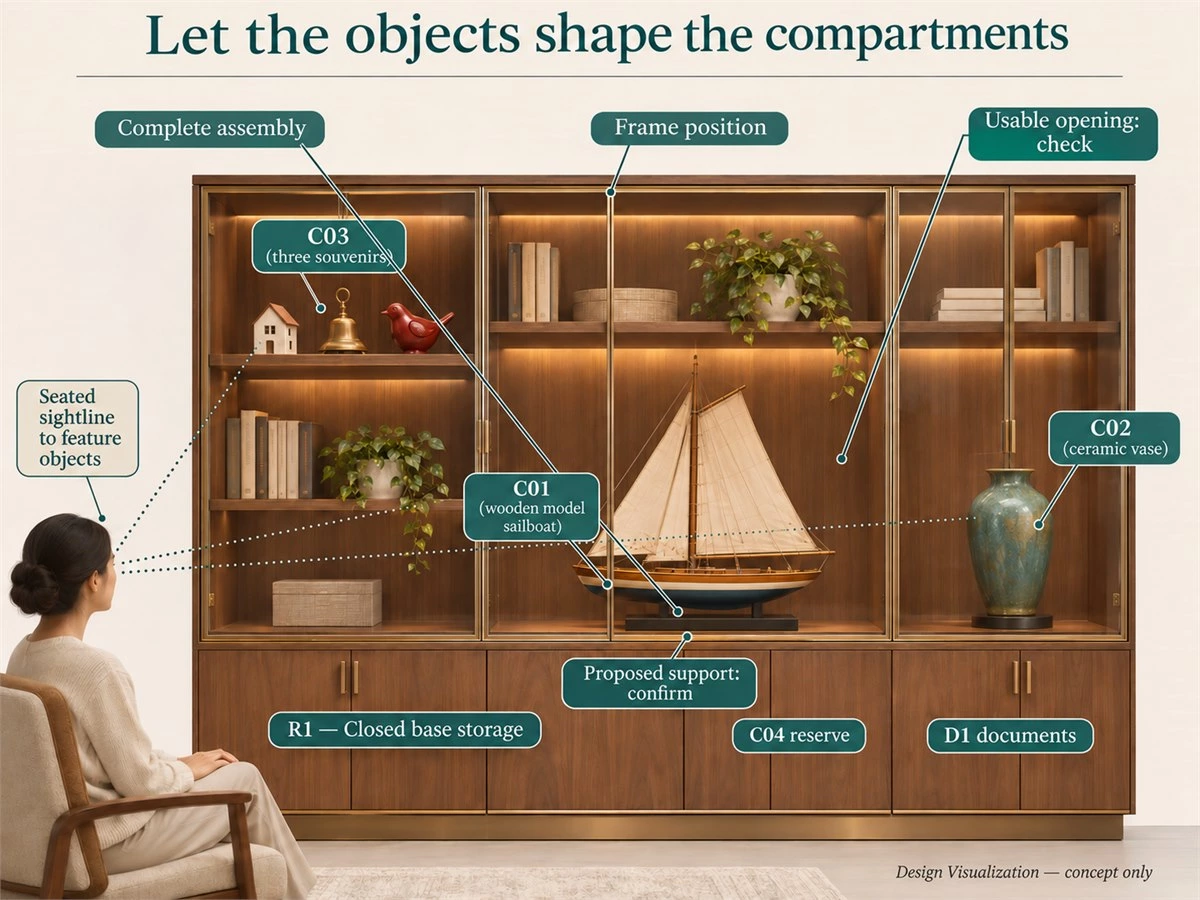
Build each proposed compartment around the complete object-and-support assembly. Account for the backing, shelf above, frame, hinges,s and other components that occupy internal space. Ask for usable dimensions at the relevant location, not only the external cabinet width and depth.
Then test insertion and removal. The sailboat may sit comfortably inside a wide bay yet fail to pass through its front opening in the intended orientation. Do not assume that turning it diagonally is acceptable. Show the proposed movement and have the owner confirm the handling constraints before finalising the bay.
Use Shelf Divisions to Support the Display Story
Give each division a reason. The example puts C01 in a broad lower-middle display bay for its horizontal form, gives C02 an upright bay,ay and groups C03 so the smaller pieces can be read together. Exact positions remain subject to measurements and the owner’s preferred view.
Check the composition with the objects present. A regularly spaced grid may split the sailboat’s outline or leave small souvenirs visually lost. Conversely, too many individually shaped compartments can constrain future rotation. Compare a populated elevation from the main seat before choosing the final divisions.
Confirm Shelf Support for the Actual Arrangement
Send the supplier the object schedule and marked placement. Shelf suitability depends on the complete proposed arrangement, including material, span, supports, and loading positions. A cluster on one stand is a different review from objects distributed across the same shelf; total weight alone does not describe the arrangement.
Request confirmation against the actual configuration and its documentation. Do not use a generic glass thickness, a rating for a different span,n or a rendering as approval. If C01 moves to another shelf later, check whether the existing confirmation still applies. Cabinet stability and installation also remain separate review items.
Decide What Needs to Be Adjustable
Identify the changes you realistically expect: a taller replacement object, a smaller group, or an altered viewing position. Adjustable sections can be considered where they support those changes, while some fixed divisions may remain necessary within the proposed system. Ask what adjustment is permitted rather than assuming every shelf can move freely.
Include lighting and cable routes in that conversation. Moving a shelf may affect a fitted light, wiring, or support arrangement. Keep a record of the agreed positions and applicable restrictions. Future flexibility is useful only when the resulting configuration remains suitable for the intended contents.
Check Glass, Reflections and Viewing Lines
Compare Glass Samples with Representative Objects
Review the proposed glazing with a representative object or suitable colour reference behind it, under the intended room conditions. Compare what you see directly with what you see through the sample. Look at the object’s appearance and reflected surroundings from the principal viewing position.
Use clear or tinted samples to discuss preferences, while asking separately about the specified product. A photograph or visualisation cannot verify colour fidelity, an anti-reflection treatment, or protective properties. Where those characteristics matter, request the relevant information and assess a suitable sample rather than relying on a finish name.
Position Frames and Divisions Around Important Objects
Overlay door frames, handles, seams, and shelf edges on the populated elevation. Check whether a vertical member crosses the model’s main feature or whether a shelf edge obscures part of the souvenir group. Repeat the review from an angled position and the seated view.
Resolve these relationships alongside opening and support requirements. A visually preferable uninterrupted bay may need a different configuration to be feasible. Keep both the desired view and the technical question on the drawing so that solving one does not silently compromise the other.
Confirm the Object Can Pass Through the Door Opening
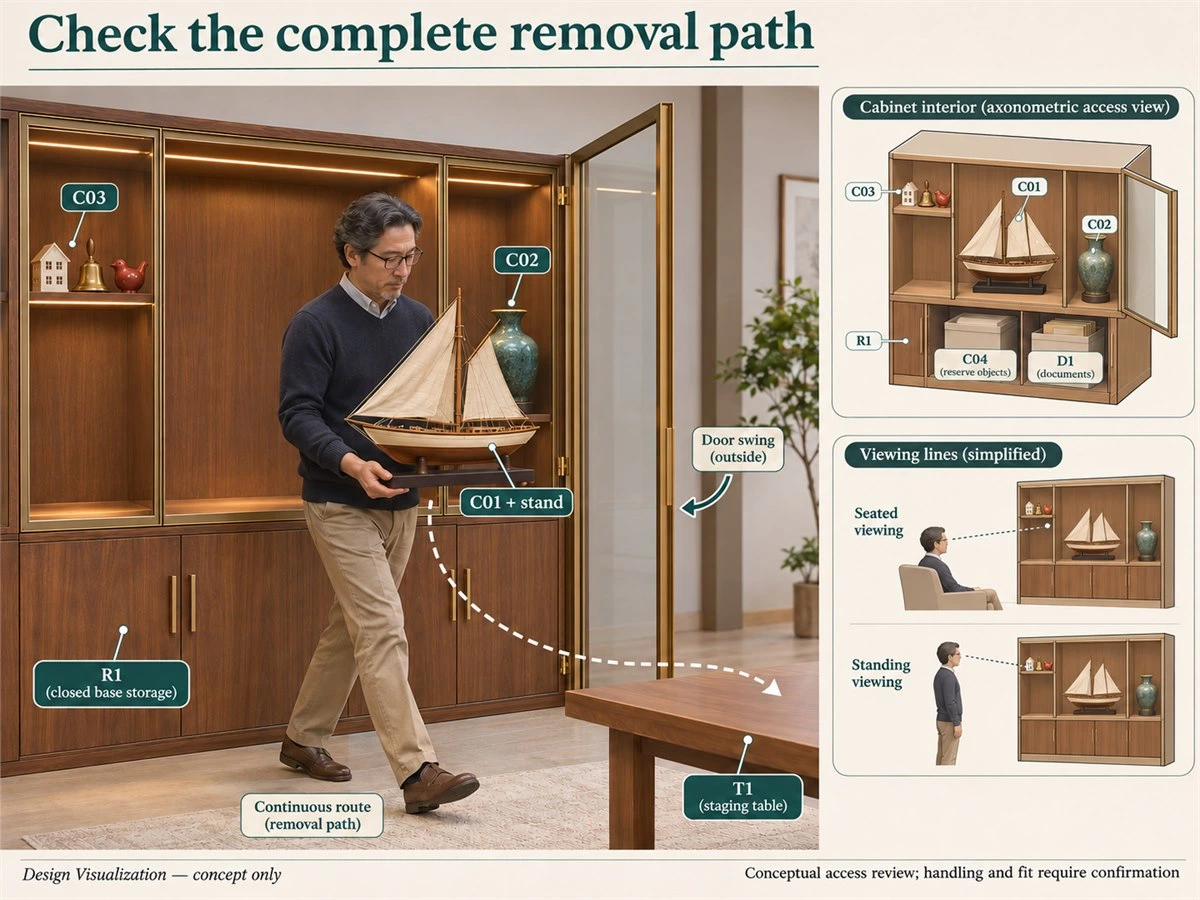
Trace C01 from its display position, through the actual clear opening and onto T1. Include its stand and projecting parts throughout. Identify where the person stands and whether neighbouring doors, furniture or objects obstruct the movement. If another item must move first, assign that item a temporary destination too.
For a large or delicate assembly, request an appropriate access review or mock-up before accepting the layout. The diagram identifies questions; it does not prove a safe grip, sufficient clearance, or suitable glass. If the path cannot be demonstrated, revise the opening, object position,n or proposed cabinet.
Plan Lighting Without Compromising Preservation
Compare Top, Side and Shelf-Level Lighting
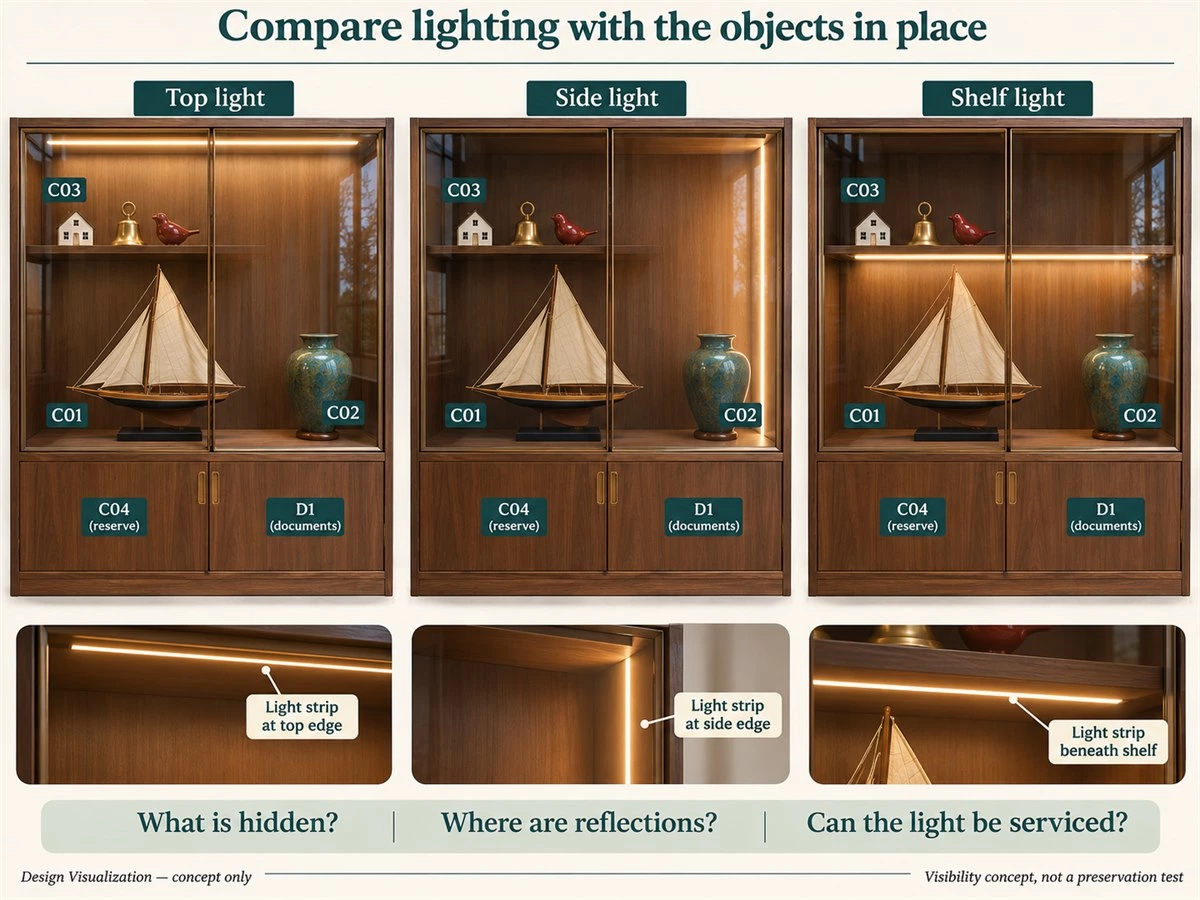
Hold the collection and shelf layout constant when comparing lighting positions. Top lighting may leave areas beneath a projecting object in shadow; side lighting and shelf-level lighting create other patterns to examine. Observe the front and angled views, including reflections in glazing and glossy objects, rather than judging only the brightness of an empty cabinet.
Use a representative sample arrangement to choose the effect. Note which parts of C01–C03 are difficult to see and whether a visible light source distracts from them. A conceptual lighting image is useful for discussing placement, but final visibility needs checking with the actual components and surroundings.
Plan Controls, Wiring and Maintenance Access
Explain when the display will be lit and how you want to control it. Mark proposed cable paths and accessible locations for associated components, subject to the selected lighting system. Ask how servicing can happen without dismantling the display or placing tools among the objects.
Coordinate shelf movement and future maintenance with the lighting proposal. Confirm the relevant product instructions, electrical requirements, and division of responsibilities before ordering. Do not assume that a cabinetry quotation includes every electrical component, connection, or local installation task; have the scope identify them separately.
Identify Objects That Need Specialist Assessment
The Canadian Conservation Institute’s guidance on light, ultraviolet and infrared explains that objects differ in light sensitivity and that exposure involves both intensity and duration. A pleasing appearance therefore does not establish an appropriate preservation arrangement. Identify known object-care restrictions before selecting the display location or lighting.
Paper, photographs, textiles, painted surfaces and mixed-material objects may raise different questions that need appropriate assessment. The label LED, or low heat, is not a complete suitability specification. For a valuable or sensitive collection, obtain relevant advice and communicate its requirements to the supplier; this residential planning guide does not prescribe universal exposure limits.
Make Retrieval, Cleaning and Rotation Practical
Walk Through Removing the Largest or Most Fragile Object
Start the review with the item that creates the most demanding access question, rather than the smallest ornament. Prepare T1, check its suitability for the complete assembly, and trace the agreed removal sequence. Keep the route available while the cabinet door is open.
In the illustrative arrangement, C02 and C03 occupy their own bays and are intended to remain in place during C01 removal. That intention still needs checking against the actual opening. If either has to move, revise the schedule to name its temporary location. An unresolved destination is a reason to revise the plan.
Plan Cleaning Without Unnecessary Handling
List the surfaces that need access: internal glazing, shelf tops, corners,s and backing. Decide which can be reached with the display in place and which require temporary object removal. Plan this around the actual objects and relevant care instructions, with suitable temporary storage prepared first.
Keep cleaning equipment and products out of the collection’s storage allocation unless specifically appropriate. Follow the cabinet, glass, and object-care instructions for their respective surfaces. One cleaner or method should not be assumed suitable for every finish, stand, and collectible in the same cabinet.
Review Stability and Household Use
Describe the household conditions that affect the proposal: children, pets, regular activity nearby, and who will retrieve objects. Share those conditions with the responsible supplier and installer. Confirm the relevant stability, fixing, glass,s and hardware provisions against the actual product and site.
A lock, tall cabinet or unobtrusive fixing detail in a picture is not evidence that a particular risk has been resolved. Identify who checks the wall or supporting construction and who approves the installation arrangement. Keep these questions in the brief rather than trying to settle them from a styling image.
Give Rotated Objects and Packaging a Defined Home
Assign C04 and associated packaging to the reserve section of R1, with D1 documents in their separate area. Record the contents so that a later addition does not quietly occupy T1 or the removal route. Confirm packing and storage suitability for the actual objects, especially where object-care requirements are known.
If reserve storage is insufficient, compare reducing the displayed selection, revising the cabinet, or providing a separate suitable location. Each changes the brief. Rotation should be a repeatable process with named destinations, not a promise to find space somewhere when the cabinet arrives.
| Task | Items moved | Destination | Access to review | Outstanding confirmation |
|---|---|---|---|---|
| Remove C01 | Complete model and stand; any affected neighbours recorded separately | Suitable T1 staging surface | Cabinet opening, standing position and continuous movement | Actual dimensions, handling method and support |
| Clean internal glazing | Only items that prevent appropriate access | Assigned temporary location on T1 or another confirmed surface | Access to glazing without contacting remaining objects | Product and object-care instructions |
| Rotate C03 / C04 | Selected display and reserve pieces | Prepared display bay and separate R1 reserve section | Access to both locations; packaging handling | Contents fit and storage suitability |
| Service display lighting | Objects in the service area if required | Suitable confirmed temporary storage | Components and cable access under product instructions | Responsible personnel and electrical scope |
Prepare a Collectible Display Cabinet Brief
Submit the Collection Inventory and Room Information
Send labelled photographs with the object schedule, complete dimensions, known weights, bases and preferred orientations. Include the room plan, current furniture, windows, lighting and principal viewing positions. Identify the objects you want displayed now and the contents assigned to reserve and household storage.
Provide enough context to discuss access as well as appearance. A photograph of a blank wall leaves the desk chair, staging surface, and door movements unknown. Mark missing measurements openly and agree how they will be verified before production information is approved.
Separate Appearance Preferences from Performance Requirements
Record the preferred cabinet finish, backing, glass appearance, and lighting effect as design preferences. List any required preservation, security or environmental performance in a separate part of the brief, with relevant supporting advice or documentation. Ask which requirements the proposed system can actually address.
This distinction helps compare proposals fairly. Two cabinets can look similar while differing in their confirmed construction and provisions. Request explicit inclusions, exclusions,s and outstanding questions. If specialist requirements cannot be met by the proposed cabinetry, assess a different solution before approving the appearance.
Use Published Product References Carefully
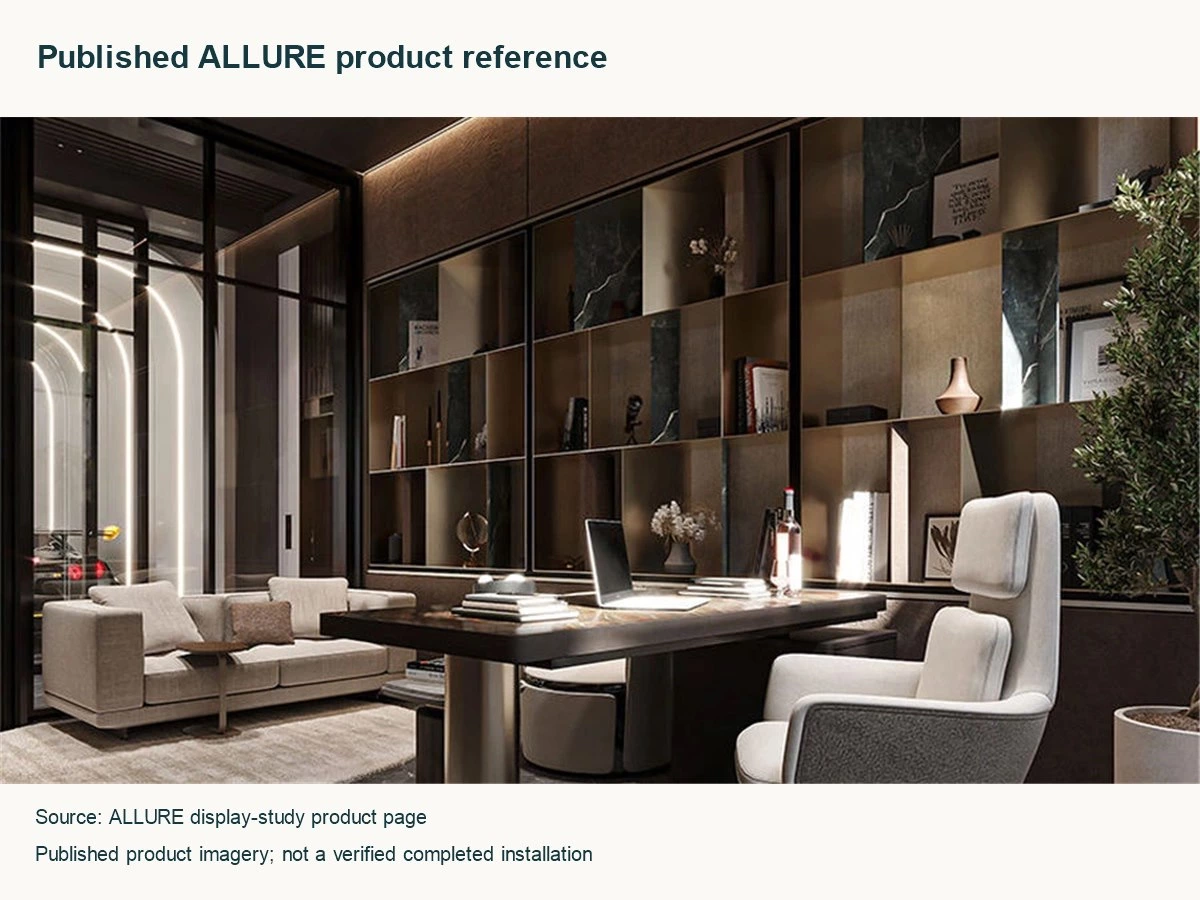
ALLURE’s published study display cabinet configuration describes open shelving, glazed display, and closed storage arranged with a workspace. It offers a reference for combining visible objects with a room’s other tasks. Use it to discuss the relationship between display and household storage.
It does not establish that C01 fits through an opening or that a particular shelf supports C02. Keep the illustrative collection separate from that reference and request confirmation for your own inventory. The custom bookcase and display cabinetry range provides another starting point for discussing the room-specific scope.
Confirm the Proposed Scope Before Ordering
Review the populated elevation, internal dimensions, opening arrangement,t and agreed object schedule together. Identify supplied cabinetry, shelves, glazing, lighting components and accessories. Clarify measurement, electrical work, transport, installation and fixing responsibilities rather than assuming they are all included in one cabinet price.
Before approval, resolve the object fit, access and configuration questions recorded in the schedule. Keep required samples and relevant supplier information with the proposal. A custom collectible display cabinet should be specified against an agreed brief, with later collection changes reviewed where they affect that arrangement.
FAQs About Display Cabinets for Collectibles
Are Glass Doors Necessary for Collectible Display Cabinets?
Not for every collection. Compare the objects, room exposure, access frequency, and cleaning routine. Open fronts remove a layer between the viewer and objects, while glazing adds an enclosure and opening system to consider. Neither choice establishes specialist preservation performance without appropriate specifications.
Can a Built-In Display Cabinet Accommodate Different Object Sizes?
A built-in display cabinet can be planned with differentiated bays and suitable adjustable sections, subject to the actual system. Measure each complete object with its stand and check the internal space, door opening, and removal path. A varied elevation is useful only if its configuration and supports are confirmed.
How Much Weight Can Display Cabinet Shelves Hold?
There is no single rating that applies to all shelves. Ask the supplier to confirm the actual material, span, supports, and loading arrangement, using the object weights and placement schedule. Do not substitute a rating from another configuration or assume a rendering demonstrates adequate support.
How Should Lighting Be Selected for a Home Collection?
Compare proposed lighting with representative objects, the intended shelf layout and actual viewing positions. Review shadows, reflections, controls and service access. Obtain appropriate advice for light-sensitive or valuable objects; the appearance of a lit cabinet and an LED label do not establish a preservation arrangement.
Can a Glass Display Cabinet Keep Collectibles Dust-Free?
Do not assume that ordinary glass doors create a dust-tight enclosure. Confirm the actual cabinet construction and any documented sealing provisions when that outcome matters. Include internal cleaning and object access in the maintenance plan, even when the display has glazed fronts.
What Information Is Needed for a Custom Display Cabinet Proposal?
Provide labelled object photographs, dimensions with bases, known weights, display orientation, and access frequency. Add the room plan, viewing positions, reserve-storage requirements, lighting preferences, and project location. State specialist needs separately and identify missing information so the proposal can address it explicitly.
Turn the Collection into a Clear Cabinetry Brief
The strongest starting point is a collection schedule linked to a populated elevation and a workable handling plan. Choose the location and enclosure, confirm internal space and supports, then review lighting, cleaning and rotation together. Keep each outstanding question connected to the object or task it affects.
Planning a display cabinet for your collection? Share photos, item dimensions, known weights and your room layout with ALLURE to discuss display arrangements, cabinetry options and the details that need confirming. Include any specialist preservation or security requirements for separate review. If the brief spans several rooms, explore coordinated cabinetry across your home and confirm the relevant supply scope.