Cabinet lighting wiring should be planned before cabinet production, not treated as a final installation detail. A reliable plan identifies every lighting zone, confirms where each driver will sit, shows how low-voltage cables run through the cabinetry, and provides a practical way to replace serviceable components later. For custom cabinet projects, this coordination should be completed with the project designer and a qualified local electrician before shop drawings are approved.
Start With a Cabinet Lighting Plan, Not Individual Fixtures
Lighting works best when planned as a single cabinet system. Selecting a strip light, shelf light, or sensor is only one part of the decision. The project team also needs to know how the fixture is controlled, where its driver is located, how the cable reaches it,t and how the component can be serviced after the cabinets, wall panels, appliances,es and countertops are in place.
List every lighting zone
Begin by marking each lighting zone on the cabinet plan. Common zones include under-cabinet task lighting, pantry lighting, glass display cabinet lighting, wardrobe hanging-rail lighting, toe-kick lighting,ing and interior drawer lighting. Each zone may have a different control method and a different route back to its driver, so they should not be treated as one undefined “LED lighting” item.
Confirm the control method before production
Wall switches, door sensors, motion sensors, dimmers, and smart-control interfaces affect the lighting specification. A door sensor inside a wardrobe, for example, needs its sensor position, cable route, and driver compatibility confirmed before drilling and assembly. If a dimmer or control system is selected after production, the original driver or wiring route may no longer be suitable.
Use a lighting schedule in the shop-drawing package
A lighting schedule gives the factory, electrician, and installation team one shared reference. It should be reviewed together with cabinet elevations, electrical points, and appliance locations.
| Lighting Zone | Control Method | Driver Location | Cable Route and Access |
|---|---|---|---|
| Under-cabinet task light | Wall switch or dimmer | Upper-cabinet service zone or tall cabinet | Through the top panel or the back service channel |
| Glass display lighting | Wall switch, dimmer, or smart control | Adjacent tall cabinet service bay | Concealed vertical side channel with removable access |
| Wardrobe rail light | Door sensor | Top shelf service compartment | Through the side panel, clear of hinges and runners |

Where Should Cabinet Lighting Drivers Be Located?
A cabinet lighting driver should be located in a planned, reachable, and suitable service position. The exact installation conditions must follow the driver manufacturer’s instructions and local electrical requirements, but the cabinet design should always answer one practical question: can this component be reached and replaced without dismantling finished cabinetry?
Use an accessible space above wall cabinets
A top void or coordinated ceiling service zone can work for upper-cabinet lighting when the project has a defined access method. The location should be shown in the drawing set, and the final design should not leave the driver permanently enclosed behind a fixed ceiling, wall panel,l or cabinet top with no service route.
Use a tall cabinet or utility cabinet service compartment
A dedicated compartment within a tall pantry, appliance cabinet, or utility cabinet is often a clear solution for grouped lighting zones. It can hold drivers for pantry, display, wardrobe, or adjacent cabinet lighting while keeping components organised. The compartment should be planned around the cabinet layout, not created as an afterthought that takes away usable storage or blocks appliance ventilation.
Use a removable cabinet component where appropriate
A removable upper shelf, false back, top infill, or purpose-made service panel can provide access without changing the visual design of the cabinetry. The important point is that the part is intentionally removable and explained in the installation information. A fixed panel is not a service panel simply because it could theoretically be cut open later.
Use a separate electrical service area for larger projects
In villas, hospitality projects,s or larger whole-house installations, multiple cabinet lighting zones may be coordinated from a separate service cupboard or electrical area. This can make future maintenance easier, but it also requires early coordination of cable runs, electrical points and the route through ceilings, walls or cabinetry.
Locations to avoid
Avoid placing a driver behind permanently fixed panels, inside an inaccessible ceiling cavity, in an area exposed to unsuitable moisture conditions, or beside heat-generating equipment without checking the component requirements. Avoid any location where access would require removing countertops, appliances, finished wall panels, or complete cabinet units.
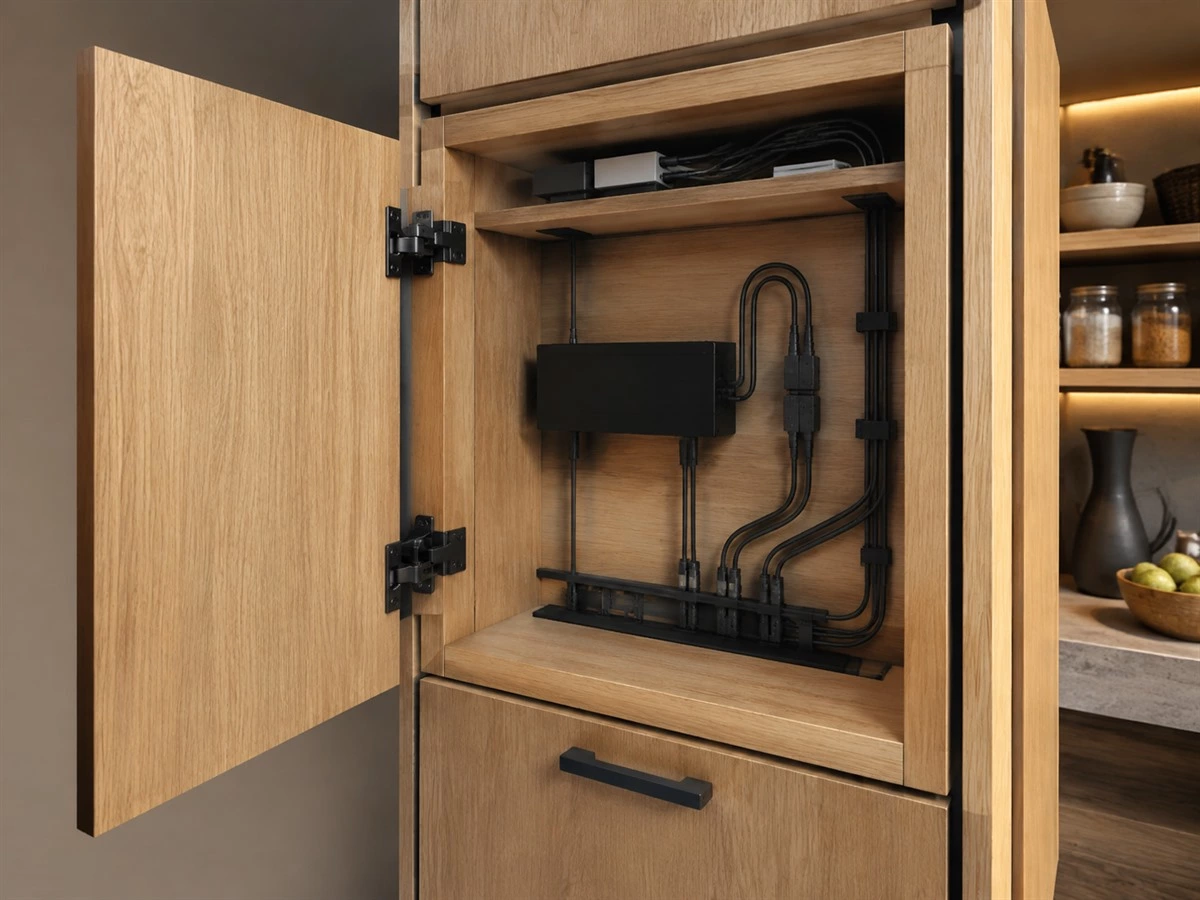
Plan Cable Routes Before Cabinet Fabrication
Cabinet lighting wiring includes more than the visible fixture. A cable route must be coordinated with the cabinet structure, appliance positions, moving hardware,e and electrical connection points before cutting, drilling,ng and assembly begin. This gives the factory defined drilling locations and prevents visible wiring, improvised holes, or damaged cabinet finishes at the site.
Separate electrical supply work from cabinet low-voltage wiring
The project scope should clearly distinguish the cabinet supplier’s work from the electrician’s work. Local electrical connection, protection, compliance, and final commissioning should be handled according to local requirements by the appropriate qualified professional. Cabinet drawings should focus on fixture positions, cable exit points, drilling locations, service routes and access details.
Use concealed but traceable cable paths
Low-voltage cables can be routed through cabinet top panels, vertical side panels, back-panel service channels, toe-kick cavities, or tall-cabinet service spaces. Concealment should not make the route impossible to understand. The approved drawings should identify which route belongs to which lighting zone, particularly when several display units, wardrobes, or kitchen runs are connected.
Coordinate drilling points and cable protection
Drilling locations should be approved before production so that cable exits align with fixtures, shelves,s and channels. Depending on the cabinet material and route, the design may require suitable edge protection, grommets or sleeves to help keep cables clear of sharp panel edges and finished surfaces.
Keep wiring clear of moving hardware
Hinges, lift-up fittings, sliding-door mechanisms, pull-out systems, and drawer runners all need their own operating space. A cable that crosses a moving component may be pinched, rubbed,d or pulled during daily use. Review the lighting route together with the selected cabinet hardware before the cabinet construction is released.
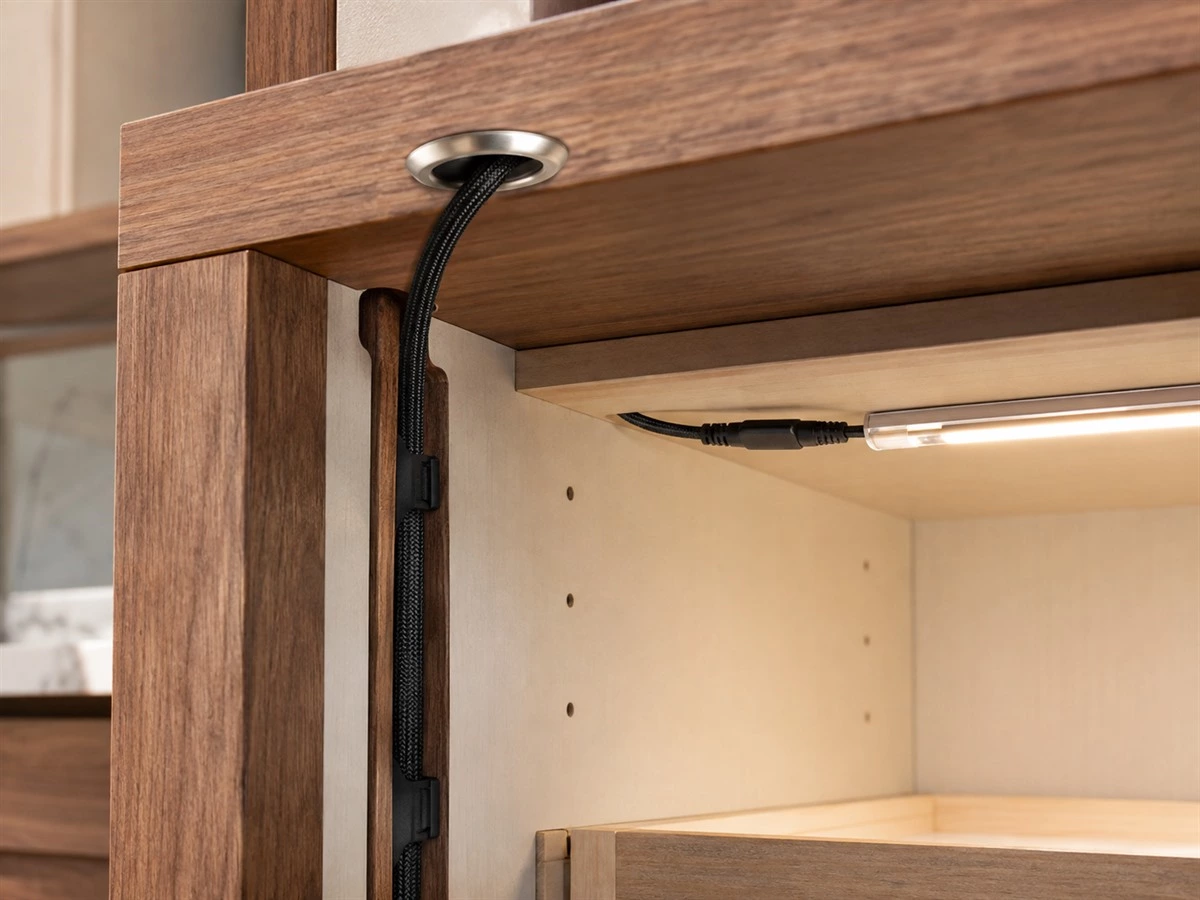
Design Service Access for the Life of the Cabinet
Drivers, sensors, connectors,rs and dimming components may require maintenance or replacement over the life of a cabinet. Service access is therefore a design decision, not merely an electrical detail. A well-planned access method protects the finished appearance while allowing a technician to identify and reach the correct component.
Define which components must be serviceable
During the drawing review, identify every component that may need future access. This commonly includes drivers, sensor modules, connectors, and dimming interfaces. The approved solution should allow maintenance without disturbing stone worktops, fixed panels, appliances, or completed cabinet installations.
Choose an access method that matches the design
Possible solutions include a magnetic removable panel, screw-fixed service panel, lift-out shelf, removable cabinet top infill, or a dedicated electrical compartment door. The best option depends on the room, cabinet construction, and access direction. The goal is not to make the opening obvious; it is to make the service method practical and documented.
Label circuits and service points
Simple labels can save considerable time during commissioning and future maintenance. A project handover pack can identify the lighting zone, driver reference, component model, and access location. This is especially helpful when a project includes several rooms, multiple display areas,s or repeated cabinetry layouts.
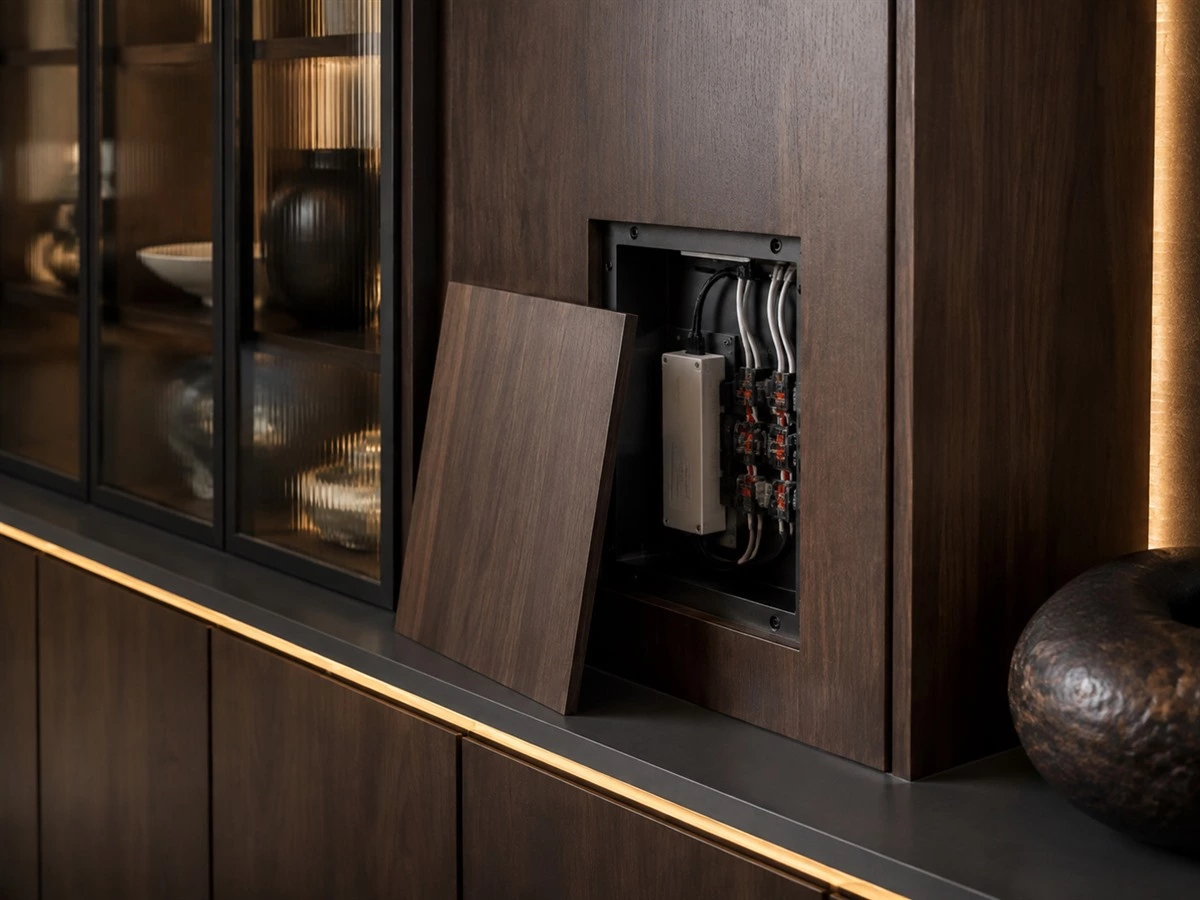
Wiring Checks Before Production, Packing, and Installation
Before shop-drawing approval
Before production begins, confirm the lighting zones, fixture positions, switch and sensor method, driver quantity, driver locations, cable routes, drilling points and service-access details. The custom cabinet order process is more reliable when lighting coordination is included before fabrication rather than left for site discussion.
Before packing
Confirm whether lighting fixtures, drivers, connectors and cable harnesses are factory-fitted, packed separately or supplied by another project party. This avoids an installation delay caused by a missing driver, incompatible connector, or unassigned wiring component.
Before installation handover
The installation team should receive the approved lighting schedule, cabinet layout drawings, driver locations, cable-entry positions, access-panel instructions, and relevant product information. These details should sit alongside the project’s cabinet installation guidance, rather than being held only in informal messages or site notes.

Common Cabinet Lighting Wiring Mistakes
| Common Mistake | What Can Happen | Better Project Decision |
|---|---|---|
| Driver hidden behind a fixed panel | Replacement may require dismantling finished cabinetry | Add a documented removable access method |
| Cable route decided after installation | Visible wiring, unplanned drilling,ing or surface damage | Confirm routes in the approved shop drawings |
| Fixture selected before controls are confirmed | Driver or sensor compatibility problems | Confirm the control method first |
| Cable routed beside moving hardware. The cable | The cable can be pinched or damaged during use | Reserve a protected route clear of moving parts |
| No labels for lighting zones | Troubleshooting takes longer after handover | Label zones, drivers, and access locations |
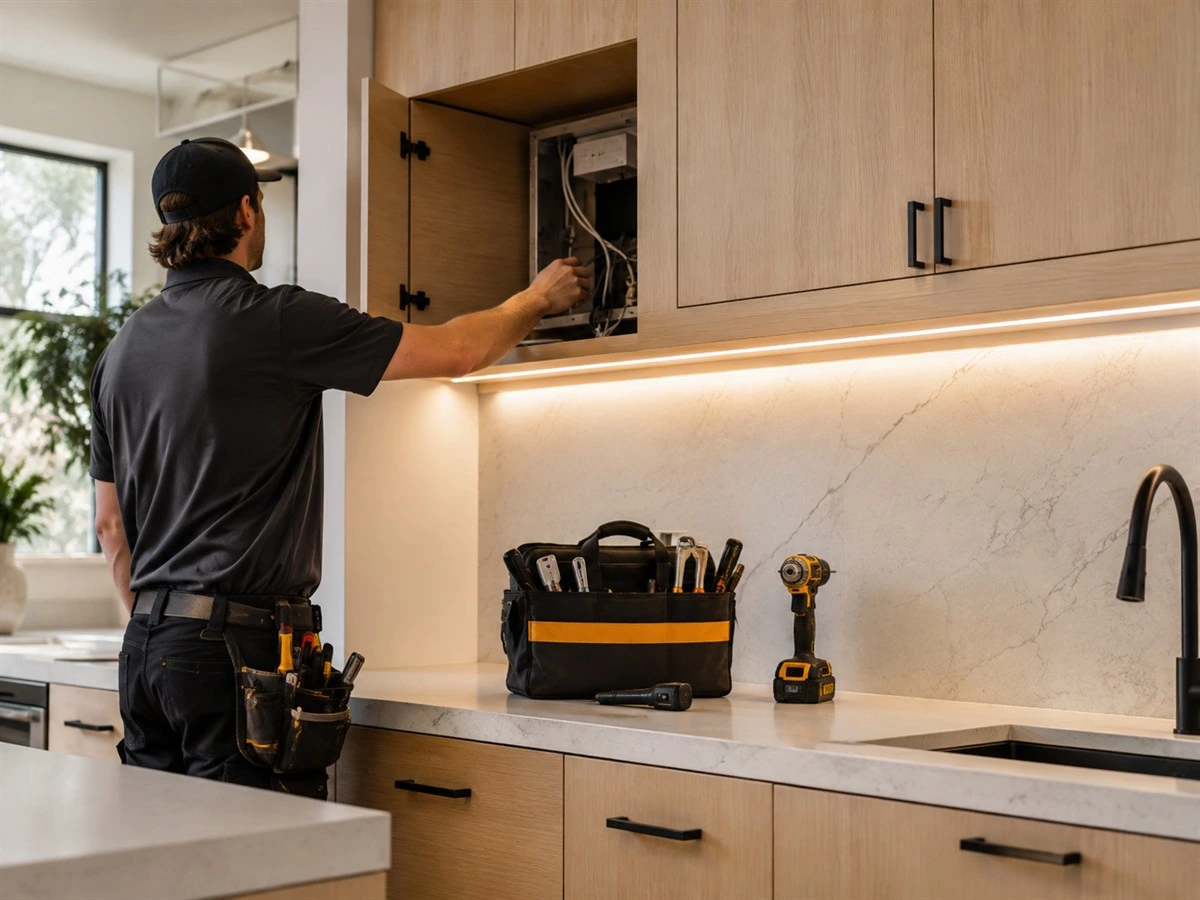
A Practical Cabinet Lighting Wiring Checklist for Buyers
Before approving a custom cabinet project, ask these questions:
- Where will every lighting driver be installed?
- How can each driver be reached after installation?
- Are lighting zones, control methods, and cable routes shown in the shop drawings?
- Which party supplies fixtures, drivers, connectors, and final electrical connections?
- Are cable routes coordinated with appliances, countertops, wall panels,s and moving hardware?
- Does the handover package identify access locations and lighting-zone references?
For lighting appearance, fixture placement,nt and room-by-room applications, see our guide to kitchen cabinet lighting ideas. That article addresses visual and functional lighting choices; this wiring guide addresses the coordination needed to make those choices serviceable in a custom cabinet project.

Conclusion
The best cabinet lighting wiring plan is not the one with the most fixtures. It is the one in which every lighting zone has a clear power path, an accessible driver, a protected cable route, and a documented service method. When driver locations, cabroutestes, and access points are coordinated before production, cabinet lighting becomes a dependable part of the finished cabinetry system instead of a late-stage site problem.
Frequently Asked Questions
Where should cabinet lighting drivers be installed?
Install drivers in a planned, accessible location that suits the component specification and cabinet design. Common options include a service zone above wall cabinets, a tall cabinet service compartment, or a separate electrical service area.
Can a cabinet lighting driver be hidden behind a fixed panel?
A fixed panel should not block all future access. If the driver is concealed, the project should include a defined and practical access method for maintenance or replacement.
Should cable routes be shown in cabinet shop drawings?
Yes. Shop drawings should identify lighting zones, driver locations, cable exits, drilling points and service-access details before fabrication begins.
Who is responsible for cabinet lighting wiring?
The cabinet and electrical scopes should be defined clearly. Cabinet drawings coordinate fixtures, cable routes and access details, while final electrical work should follow local requirements and be completed by the appropriate qualified professional.
How can service access be added without changing the cabinet's appearance?
A removable shelf, magnetic panel, top infill, false back, or dedicated service compartment can provide access while preserving the finished cabinet appearance.