Key Takeaways
Built-in sideboard cabinets work best when the dining table, chair pull-back zone, cabinet depth, intended storage, appliance positions, power outlets, and finish samples are planned together. A seamless cabinet wall is not useful if open drawers block chairs, a coffee machine cannot be serviced, or the cabinet makes the dining room feel narrow. Approve a dimensioned elevation and section drawing before production.
A built-in sideboard can make a dining room feel organized, generous, and ready for everyday meals or entertaining. It can also become an expensive inconvenience when cabinet doors hit dining chairs, bottles have no suitable storage, countertop appliances crowd the serving surface, or the cabinet depth takes too much room from the dining area. The difference is rarely the door style alone. It is usually decided during planning.
This guide explains how to plan built-in sideboard cabinets for homeowners, designers, builders, hospitality buyers, and whole-house cabinet projects. It covers dining clearance, storage zones, countertop use, appliance niches, wine display, electrical coordination, finish selection, and the drawing checks that should happen before manufacturing. The measurements below are practical planning references; final structural, electrical, appliance, and installation requirements must follow the confirmed project and applicable local requirements.
Built-In Sideboard Cabinet Dimensions at a Glance
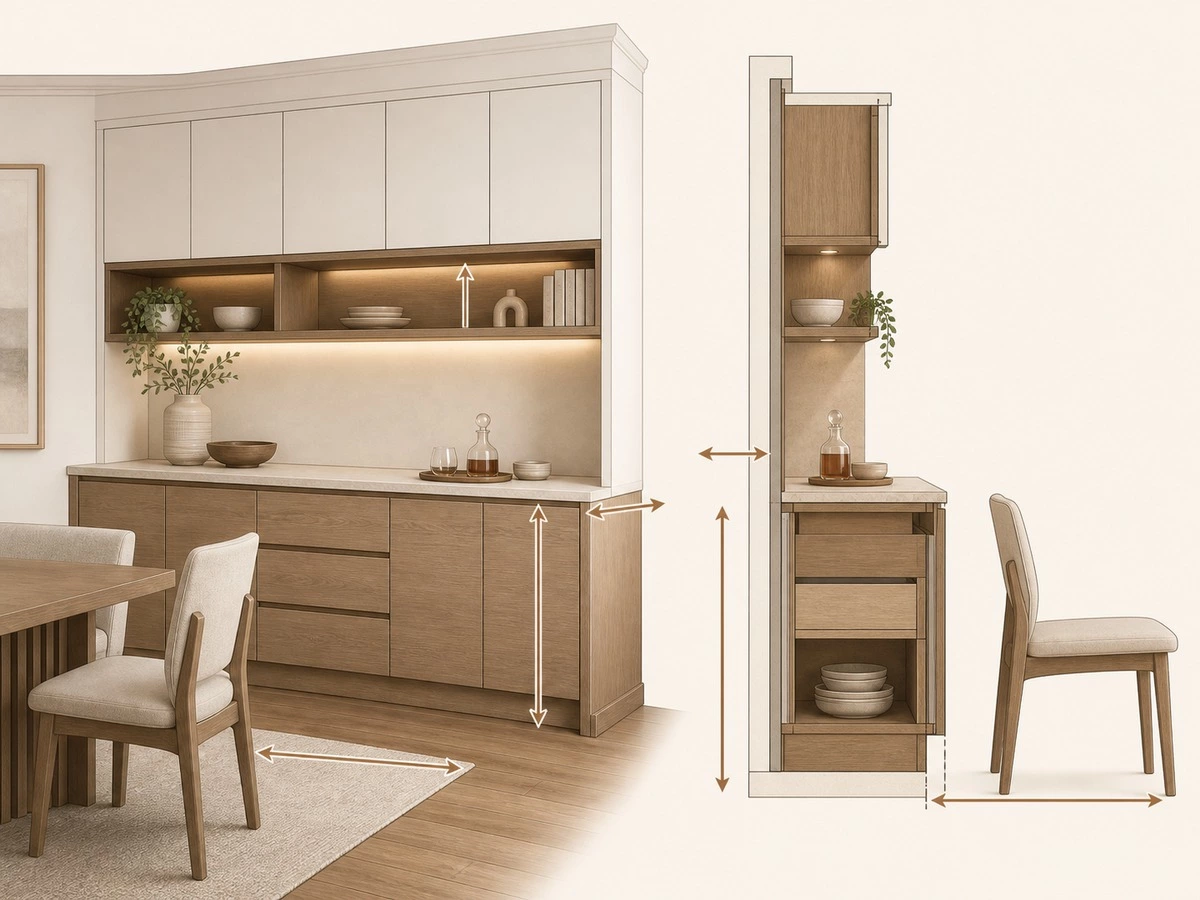
A dining sideboard should be measured as part of the complete room, not as an isolated wall unit. The cabinet may fit the available wall width, but it must also work when dining chairs are pulled back, drawers are open, food is being served, and appliances need power or access for cleaning.
| Planning Item | What It Controls | Buyer Check Before Approval | Risk if Missed |
|---|---|---|---|
| Wall width and height | Cabinet proportion, fillers, and storage division | Measure finished walls, columns, skirting,g and ceiling conditions | Poor fit or unbalanced composition |
| Base cabinet depth | Storage capacity and dining circulation. Check the | k table position and chairs when pulled back | Narrow or blocked dining space |
| Counter zone | Serving comfort, coffee station, and appliance use | Confirm user needs, appliance size,e and outlet access | Awkward or unusable surface |
| Upper cabinet or shelf depth | Display capacity and visual weight | Check sightline, countertop clearance,ce and room width | Heavy-looking or intrusive upper storage |
| Appliance niche | Coffee machine, wine appliance,nce or serving equipment | Include device, plugs, cable bend, ventilation, and cleaning space | Late-stage rework |
| Door and drawer clearance | Access to tableware and stored items | Check against dining chairs and table edge | Blocked daily use |
Start With the Dining Table, Chairs, and Walking Route
Measure the Room in Use, Not When It Is Empty
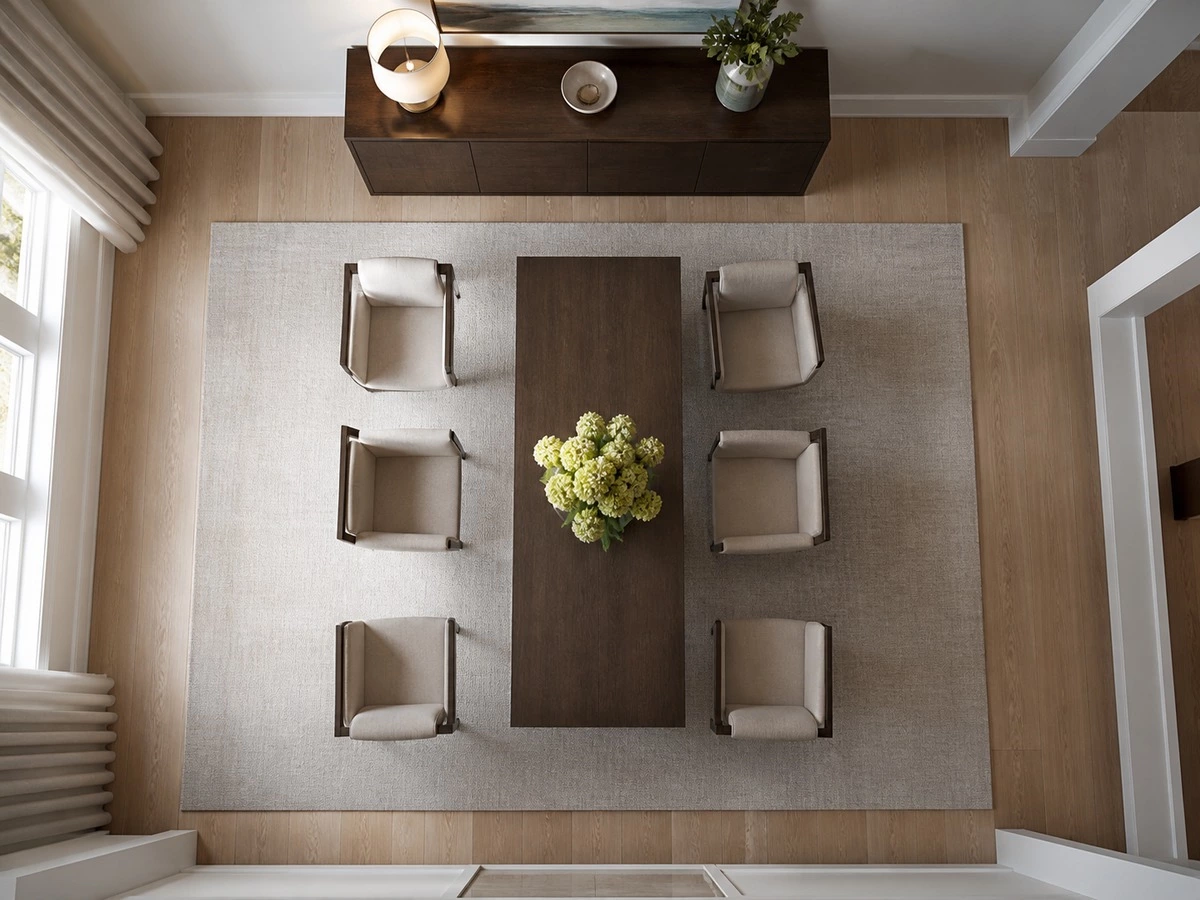
A dining room has two different footprints: the quiet footprint when chairs are tucked under the table, and the active footprint when people pull chairs back, stand, serve food, or walk behind seated guests. Built-inn sideboard cabinets should be planned around the active condition. A cabinet that looks shallow enough on an empty plan can still interfere with the room once the dining set is in place.
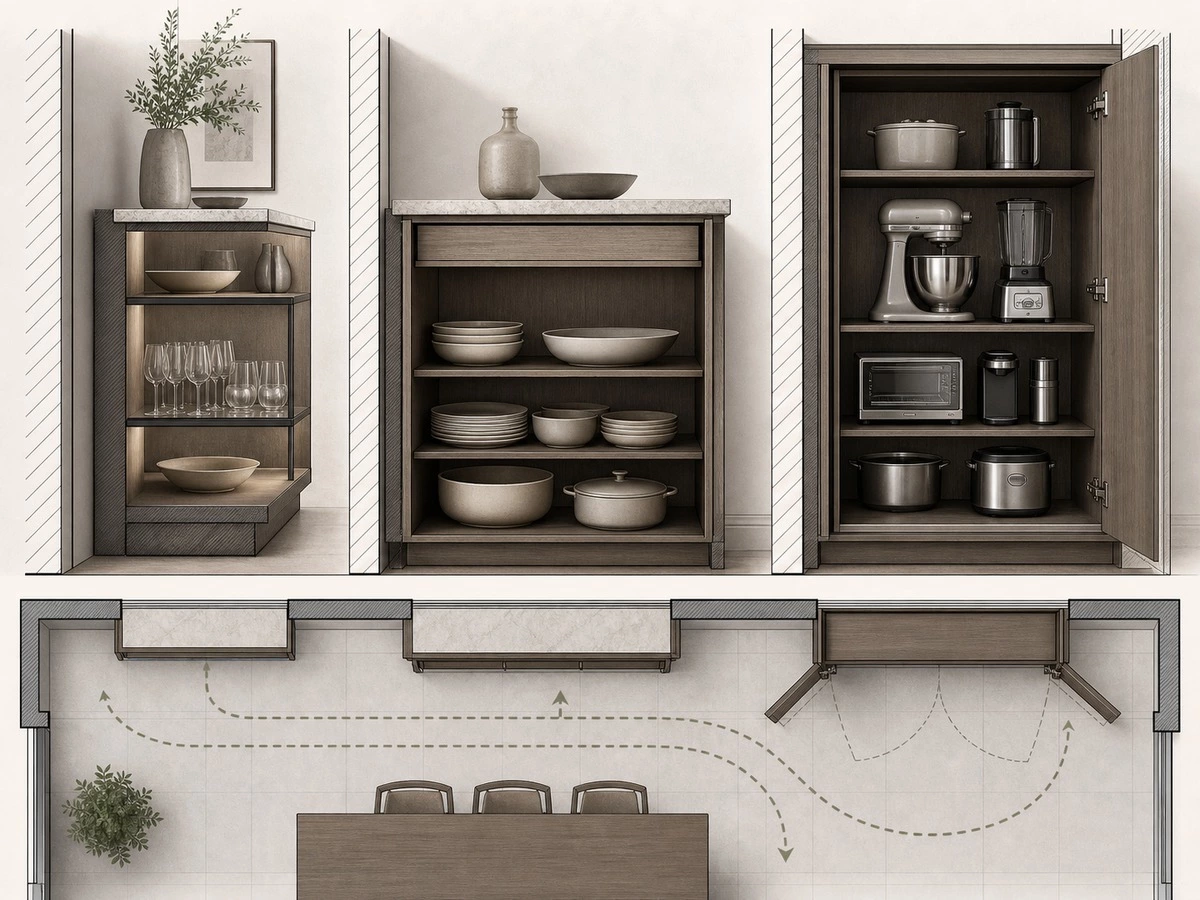
Place the dining table and chair dimensions on the room plan. Then show the chairs in their pulled-out position and test the remaining route between the chair backs and the sideboard. Doors and drawers should also be shown open. This simple exercise often reveals whether a full-depth cabinet, a shallower display cabinet, or a different drawer layout is appropriate.
Coordinate Doors, Windows, Columns, and Switches
Built-in cabinetry can turn a wall recess, unused niche, or awkward column into useful storage. However, it must not cover a window opening, wall vent, service panel, switch, or required access point without a project-specific solution. Record finished floor level, skirting, wall irregularities, ceiling drops, and nearby doors before the production drawing is approved.
Best for:
Dining-room renovations, open-plan kitchen-dining spaces, apartments, villas, and hospitality projects.
Check:
Table size, chair pull-back, main walking route, wall recesses, columns, outlets, switches, windows, doors, and skirting.
Risk:
A cabinet can fit the wall but still block chairs, restrict circulation, or hide essential building access after installation.
Choose the Right Built-In Sideboard Cabinet Layout
Full-Height Sideboard Wall
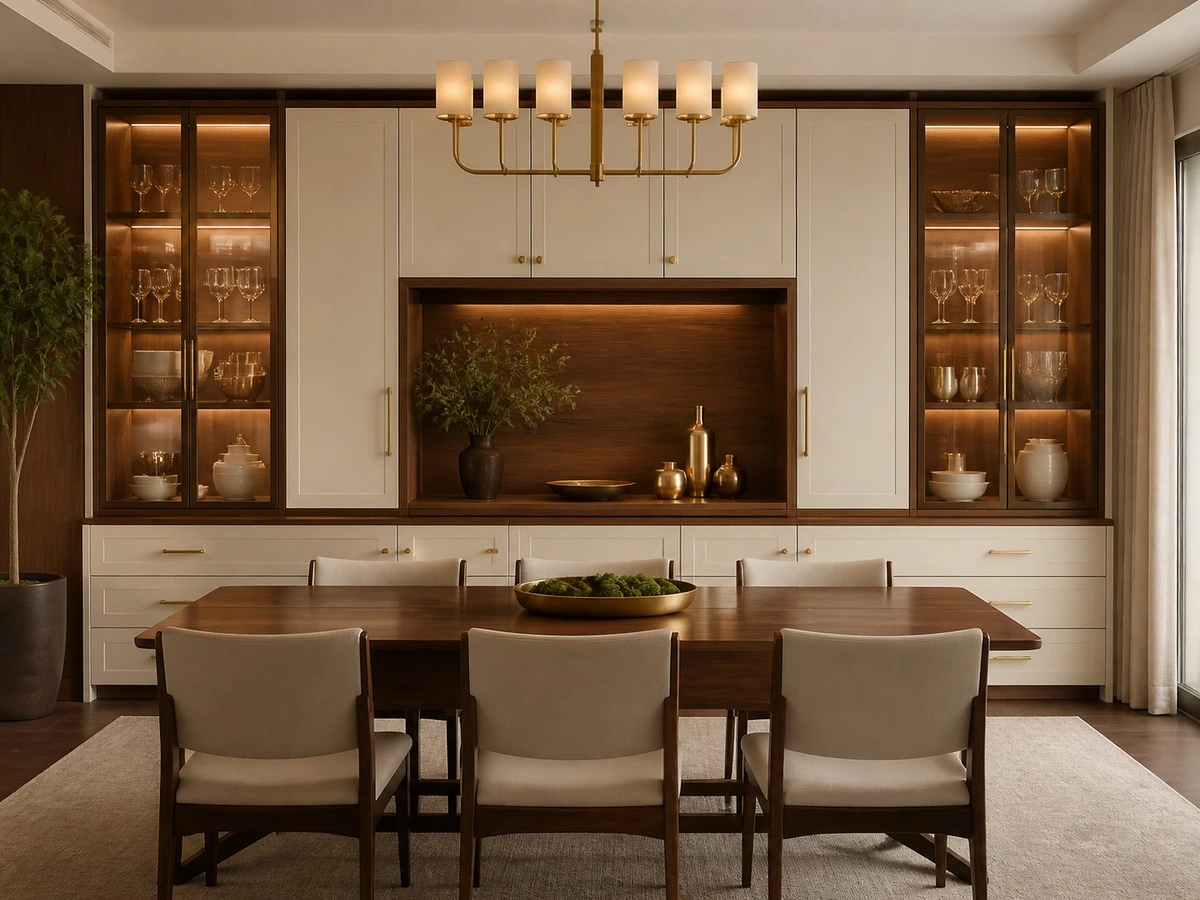
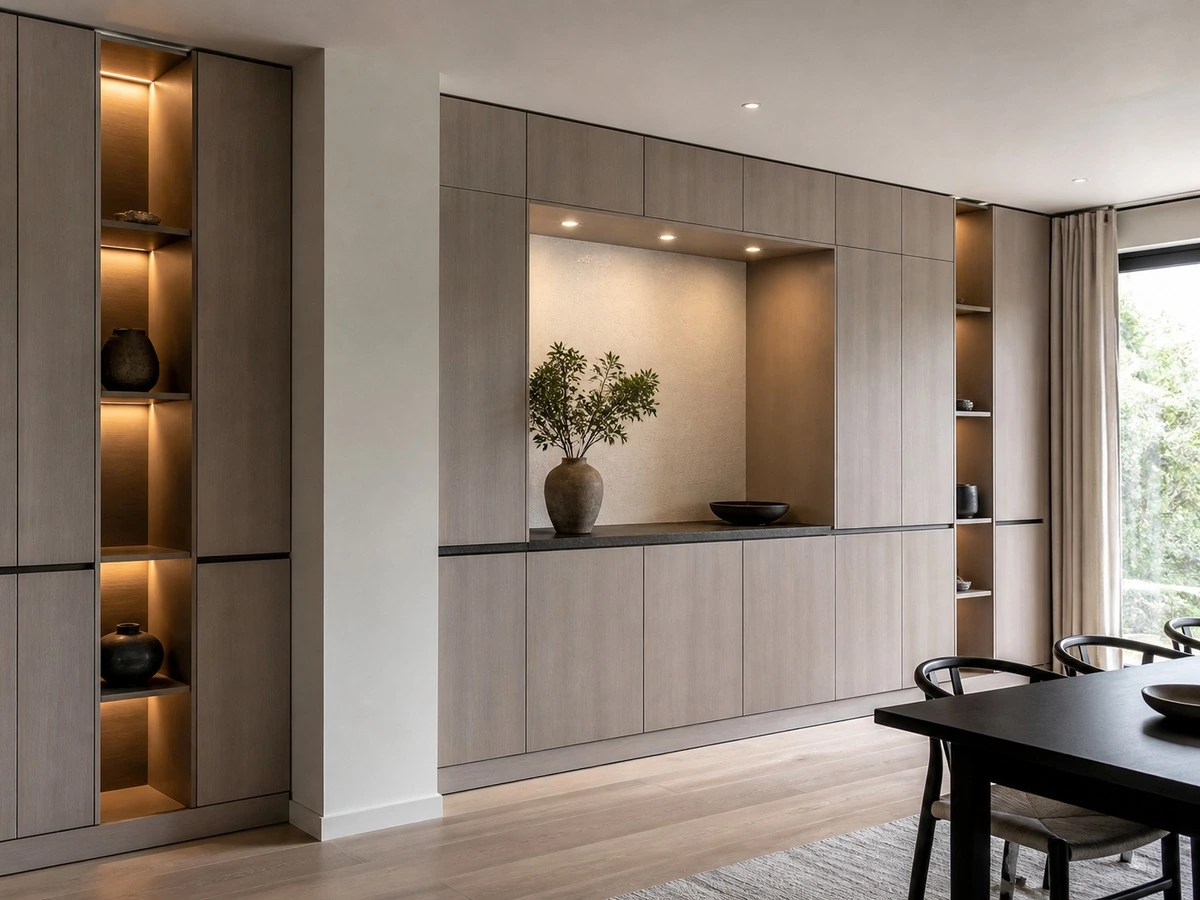
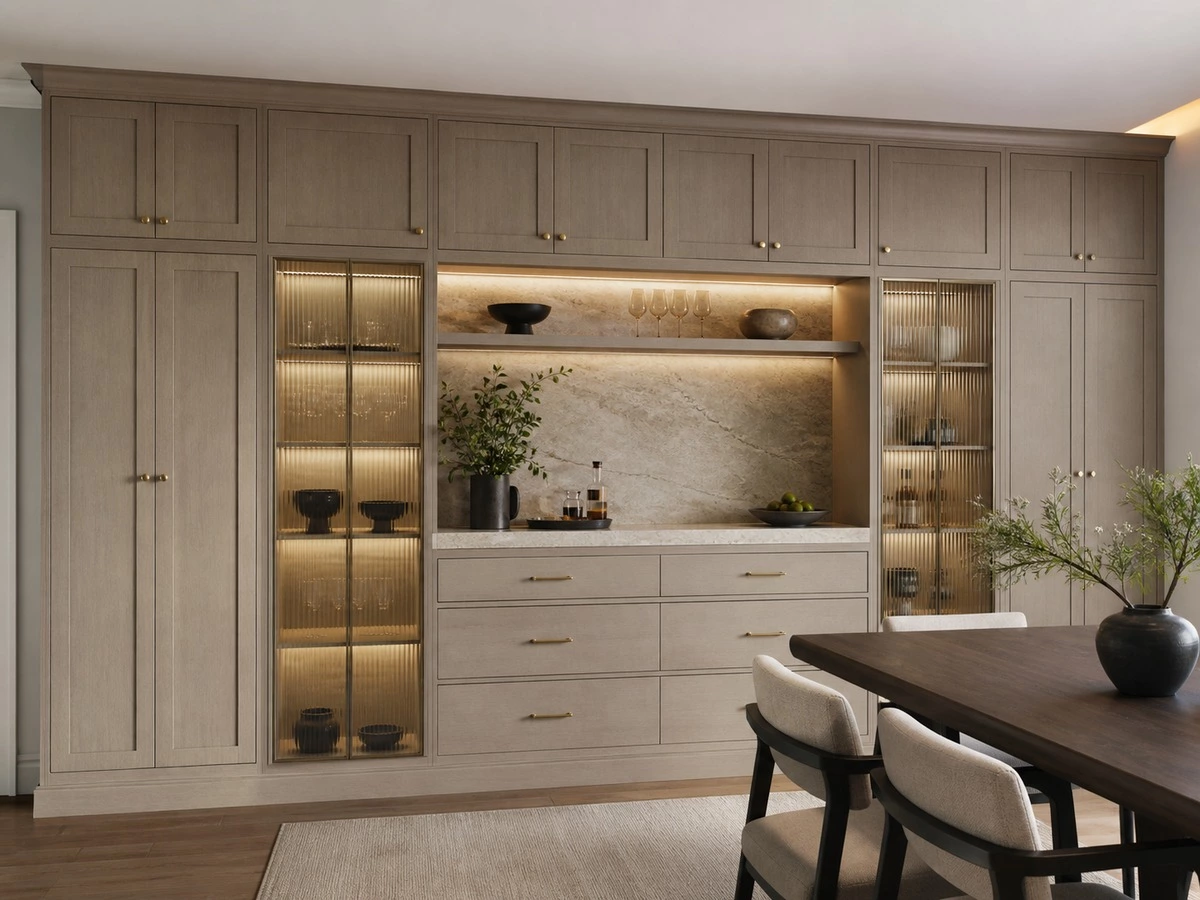
A full-height sideboard wall can combine tall storage, a serving counter, glass display sections, drawers, closed cupboards, and a dedicated appliance zone. It is useful when a dining room needs to hold tableware, pantry items, small appliances, entertaining accessories, and display items in one organized location. The design should balance closed storage with carefully chosen open or glass-front sections so the wall does not become visually heavy.
Counter-Height Sideboard With Wall Cabinets
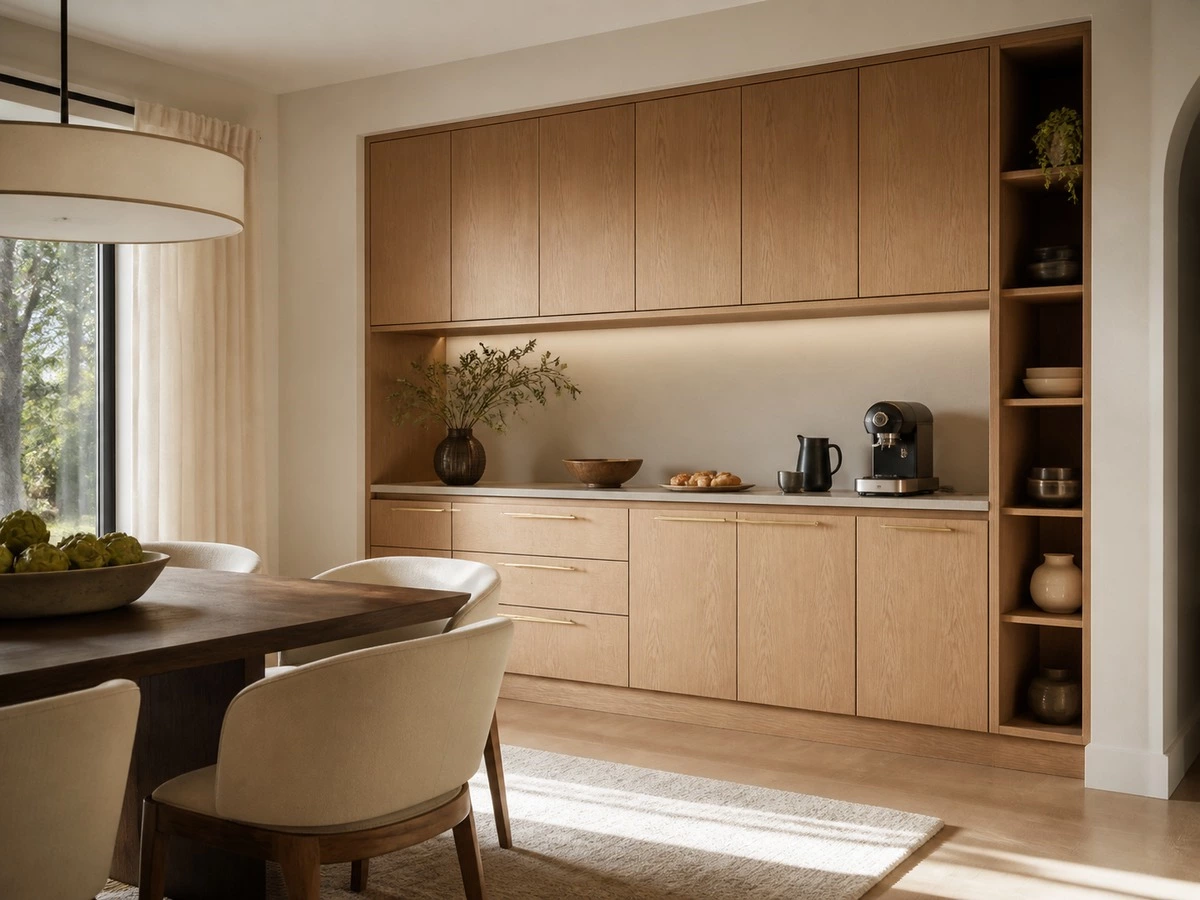
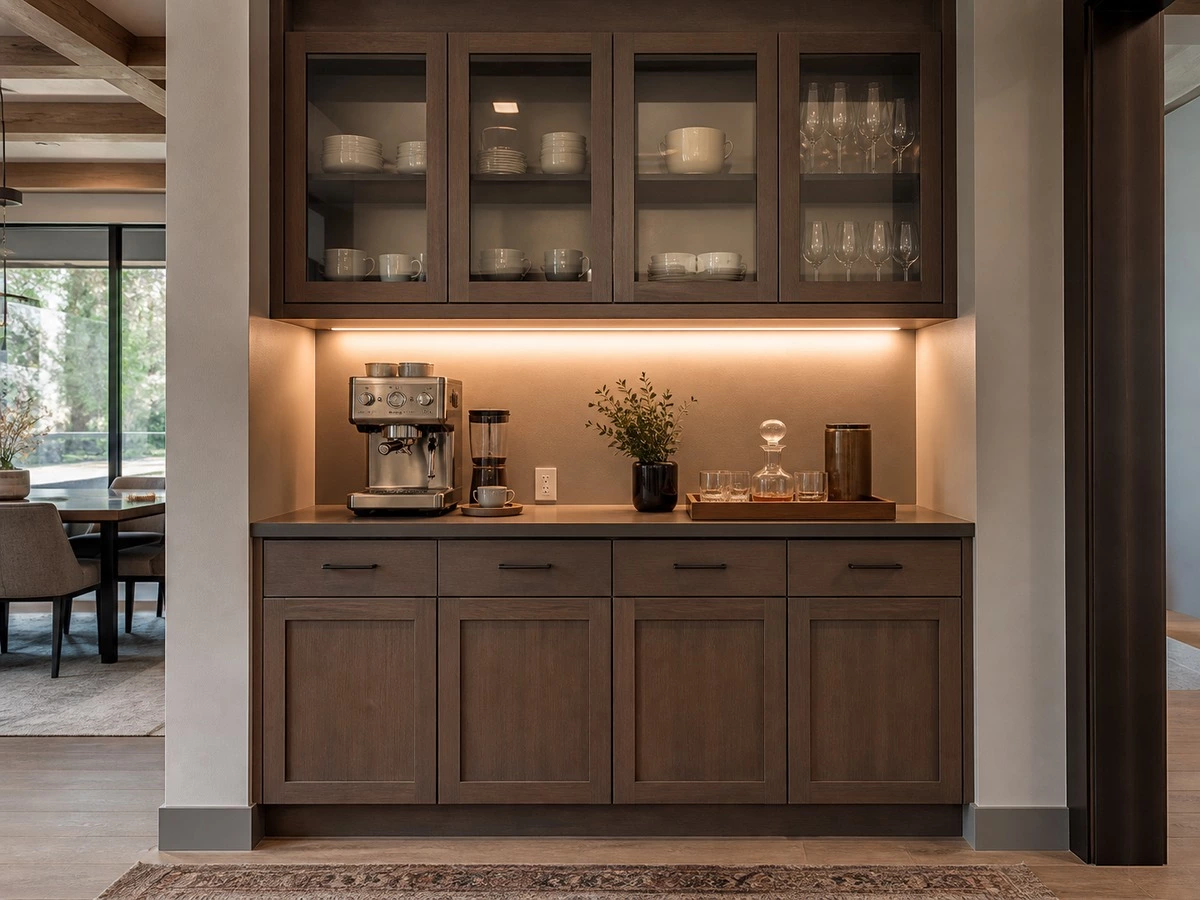
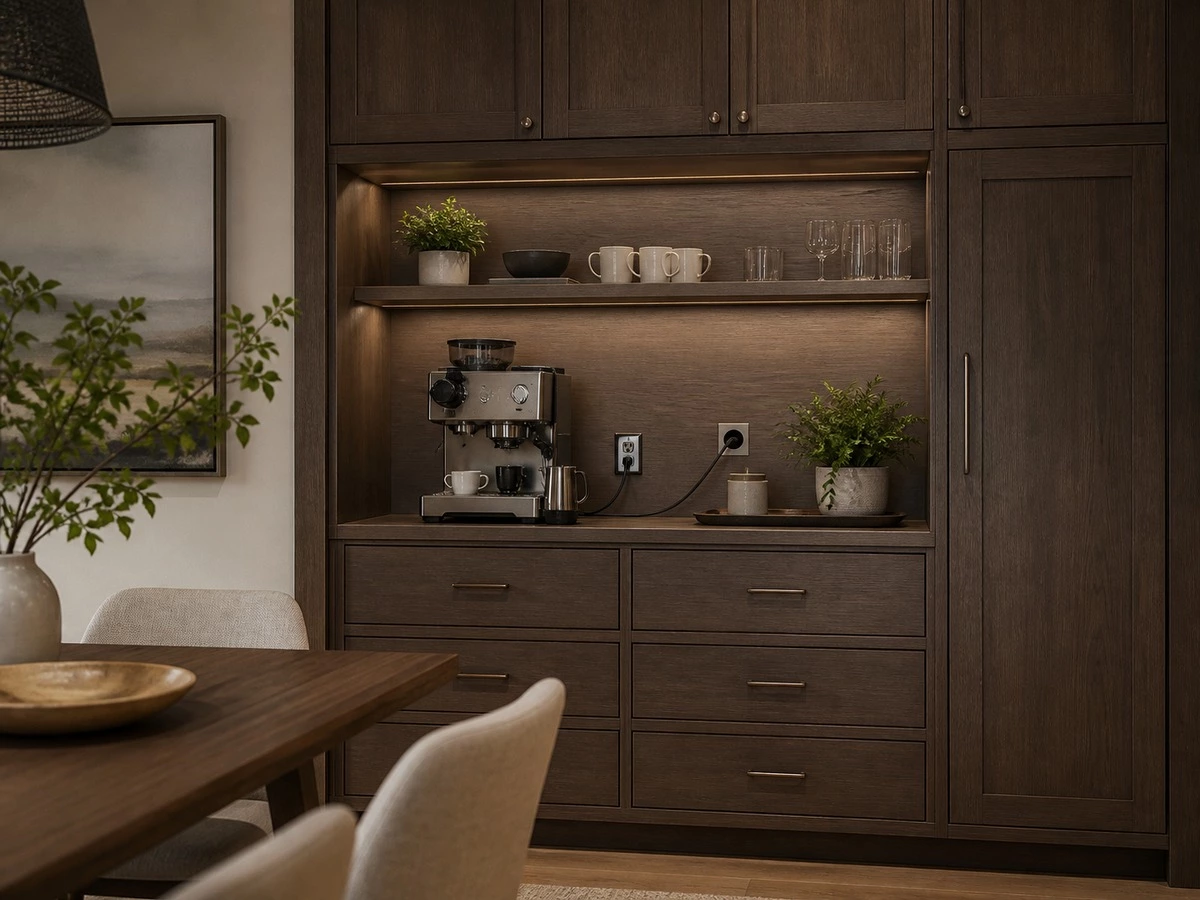
A counter-height lower cabinet can act as a buffet, coffee station, drink-preparation surface, and temporary serving zone. Wall cabinets or shelves above can increase storage, while a central open niche keeps frequently used items accessible. The open zone should be planned around the actual items it will hold rather than treated as a purely decorative gap.
Sideboard Combined With Wine Storage
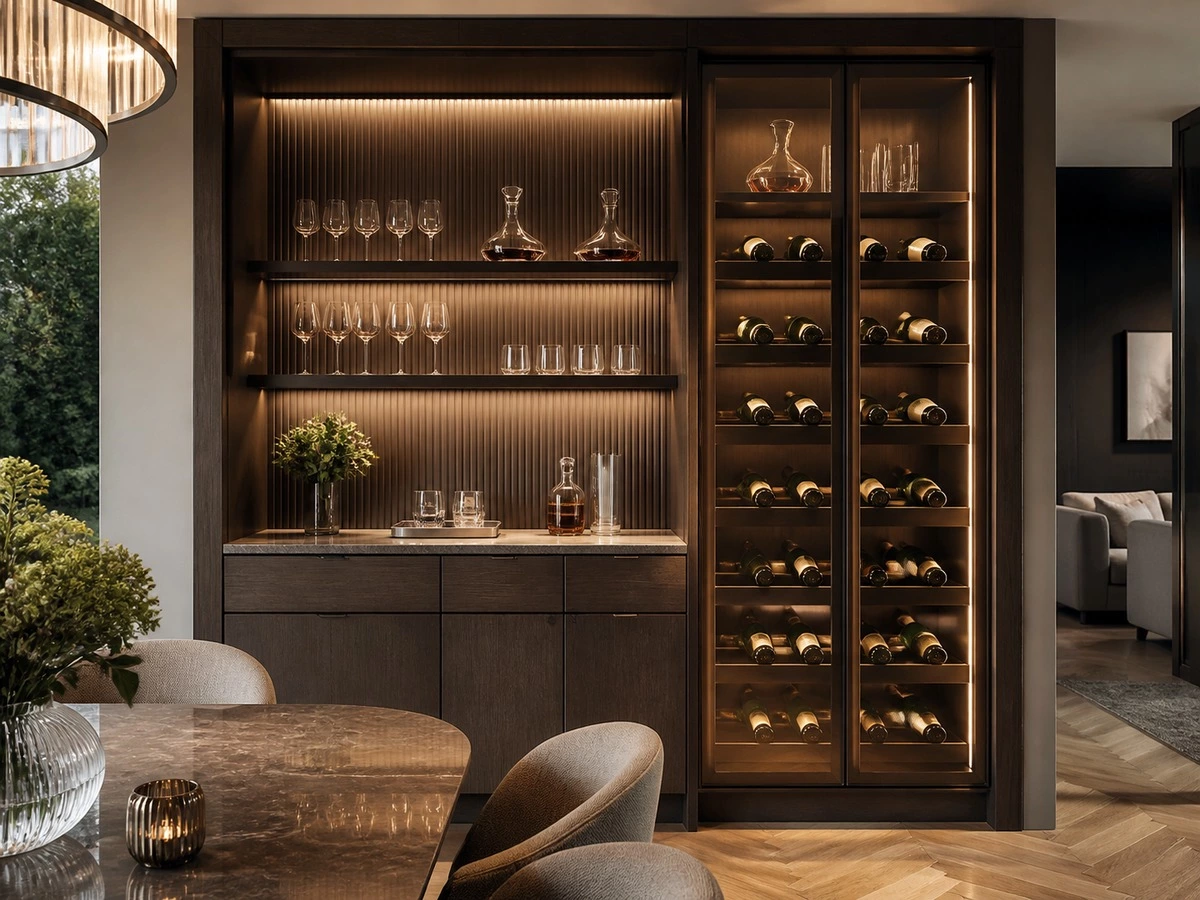
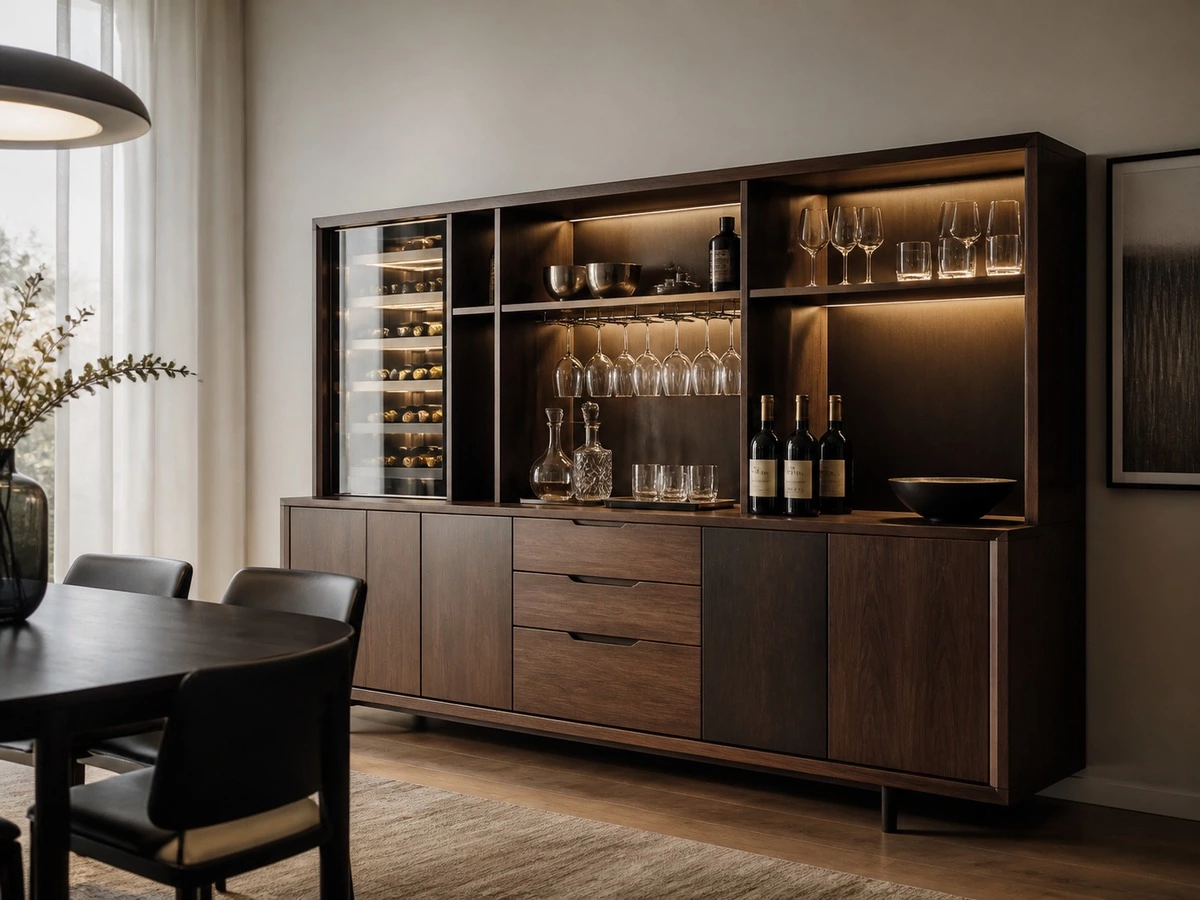
Glass doors, bottle storage, stemware racks, and integrated lighting can make a sideboard a focal point for entertaining. However, a decorative bottle display is not automatically temperature-controlled wine storage. If the project includes a wine appliance, confirm the equipment dimensions, power, airflow, service access, and the manufacturer’s installation instructions before the cabinet is built around it.
Sideboard Combined With an Entry Cabinet
In compact homes, a continuous or double-sided custom composition can connect entry storage and dining storage. One side can manage shoes, bags, and daily items, while the dining-facing side stores tableware, bar accessories, and serving pieces. The design should make the functional separation clear, even when both zones share finishes and construction details.
Sideboard Depth and Counter Height: Storage Without Reducing Dining Comfort
The best depth forbuilt-inn sideboard cabinets depends on the items being stored and the room around them. Plates, platters, linens, trays, small appliances, bottle storage, and glassware do not all need the same cabinet depth. Deeper cabinetry can increase capacity, but it may take valuable space from the chair pull-back zone or from the walking route behind the dining table.
Base Cabinet Depth
Review the storage brief before choosing a standard depth. Shallow storage can work for display objects, small dishes, cutlery, and linens. A deeper base unit may be appropriate for serving platters, coffee equipment, or larger appliance storage. The external measurement is not the same as the usable internal depth: door thickness, back-panel construction, hardware, and service space all reduce the final storage volume.
Counter Height and Serving Comfort
A sideboard counter should support the way the household entertains and eats. It may be used for placing serving dishes, setting up a coffee machine, mixing drinks, displaying flowers, or holding a temporary buffet. Check its relationship to the dining table, kitchen cabinetry, user height, and outlet positions. The correct final height comes from the complete room and user brief, not from copying an unrelated furniture item.
Upper Cabinet and Open Shelf Depth
Upper cabinets and shelves add capacity, but they need visual restraint. Deep upper storage can make a dining room feel top-heavy, particularly in a narrow space. Shallow display shelves, glass-front cabinets, recessed lighting, and a carefully proportioned open serving niche can provide storage while keeping the composition open.
Best for:
Small dining rooms, open-plan homes, dining spaces with a coffee station, and walls requiring additional tableware storage.
Check:
Chair clearance, stored-item sizes, appliance depth, cabinet-door projection, countertop use, and upper-cabinet visual weight.
Risk:
Excess depth can make a dining room feel narrow, while insufficient depth can leave equipment, trays, and serving pieces without a workable home.
Plan Storage Zones by What the Household Actually Uses
Tableware and Serving Pieces
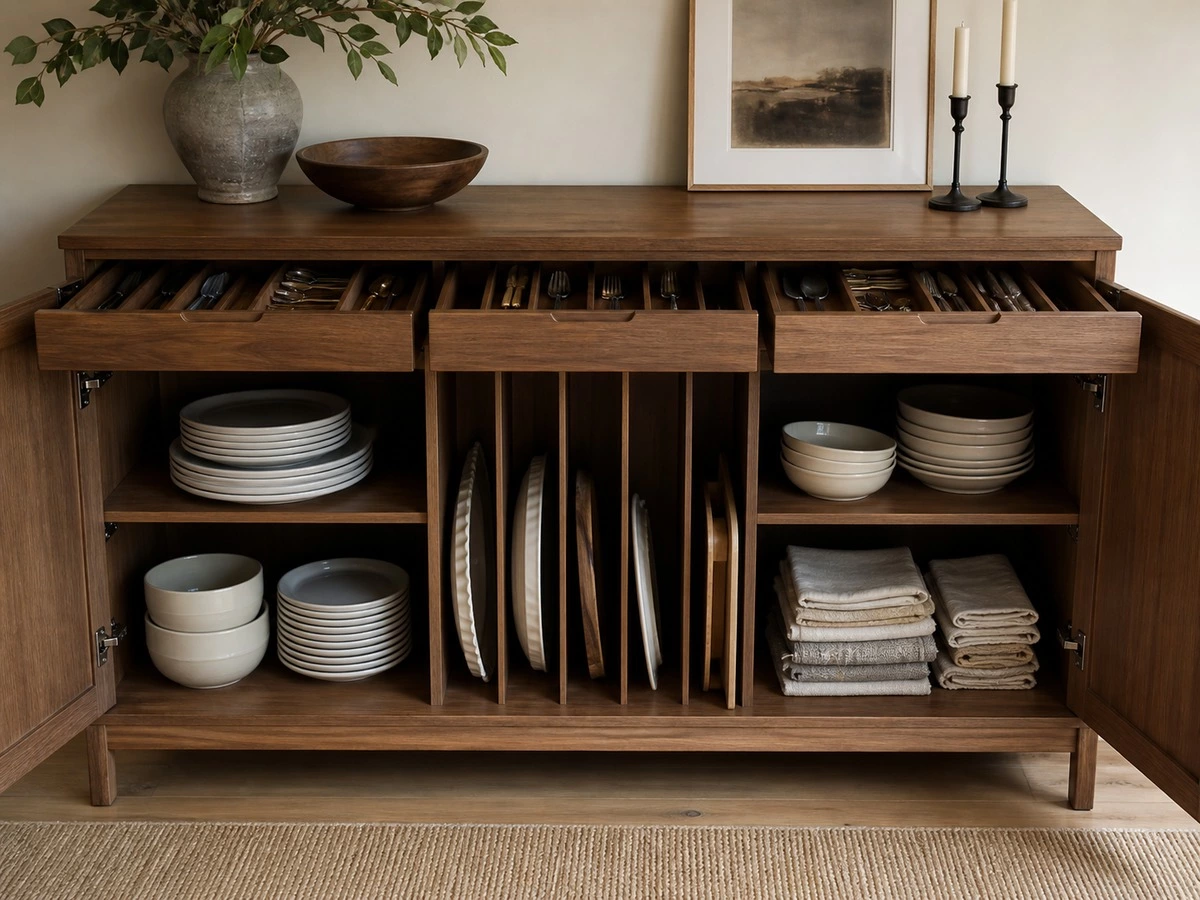
Tableware needs more than a large empty cupboard. Dinner plates, bowls, platters, trays, cutlery, linens, candles, and seasonal pieces are easier to manage when the cabinet uses shelves, drawers, vertical tray dividers, and pull-out storage intentionally. Keep daily-use items in the most accessible areas and reserve upper or deeper zones for occasional entertaining pieces.
Coffee, Tea and Small Appliances
A coffee station can be open, concealed behind doors, or housed in an appliance niche. The choice depends on the appliance size, steam or heat considerations, cleaning routine, power access, and the desired visual effect. Confirm the appliance dimensions before finalizing the niche. A coffee machine should not be forced into a decorative opening that leaves no room for plugs, cable movement, filling with water, or cleaning.
Wine, Glassware and Bar Storage
Wine and bar storage should follow the user’s collection and habits. Some households only need a few display bottles and glassware; others need a dedicated appliance or larger collection zone. Glass racks, drawers, bottle compartments, and low-glare lighting can support daily use. The design should distinguish clearly between decorative storage and a controlled appliance environment.
Closed Storage Versus Open Display
Open shelves work best for selected objects that contribute to the room: a few books, ceramics, art pieces, and glassware. Closed doors and drawers are better for cables, packaged food, cleaning items, paperwork, spare linens, and visual clutter. A balanced mix keeps the sideboard useful without turning the dining room into a permanent display of daily household items.
Electrical, Appliance, and Lighting Coordination
Plan Power Points Before Cabinet Installation
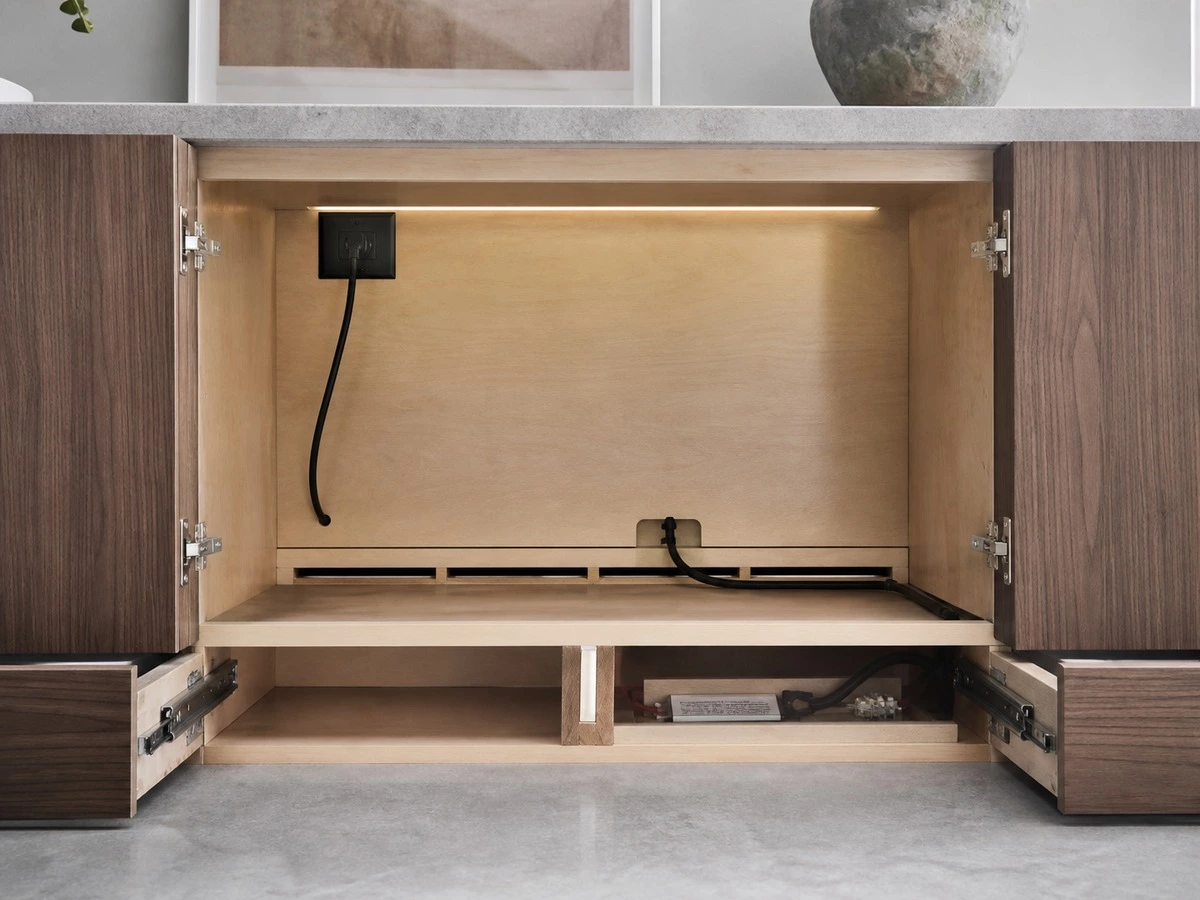
Power outlets, LED drivers, switches, and cable paths should be coordinated before cabinetry covers the wall. An outlet placed behind a fixed shelf may not be useful for a coffee machine, wine appliance, or display light. Show the intended power points and accessible service locations on the cabinet drawing. The final electrical installation must be coordinated with qualified local professionals and the project requirements.
Allow Appliance Ventilation and Cleaning Access
Appliances need more than a front opening. Their dimensions, plugs, cable bends, ventilation requirements, door clearance, and cleaning access must be reviewed as a system. Do not place heat- or steam-producing equipment in a sealed niche simply because the cabinet opening looks neat. Verify the appliance manufacturer’s installation instructions before the cabinet size is released.
Use Lighting for Serving, Display, and Atmosphere
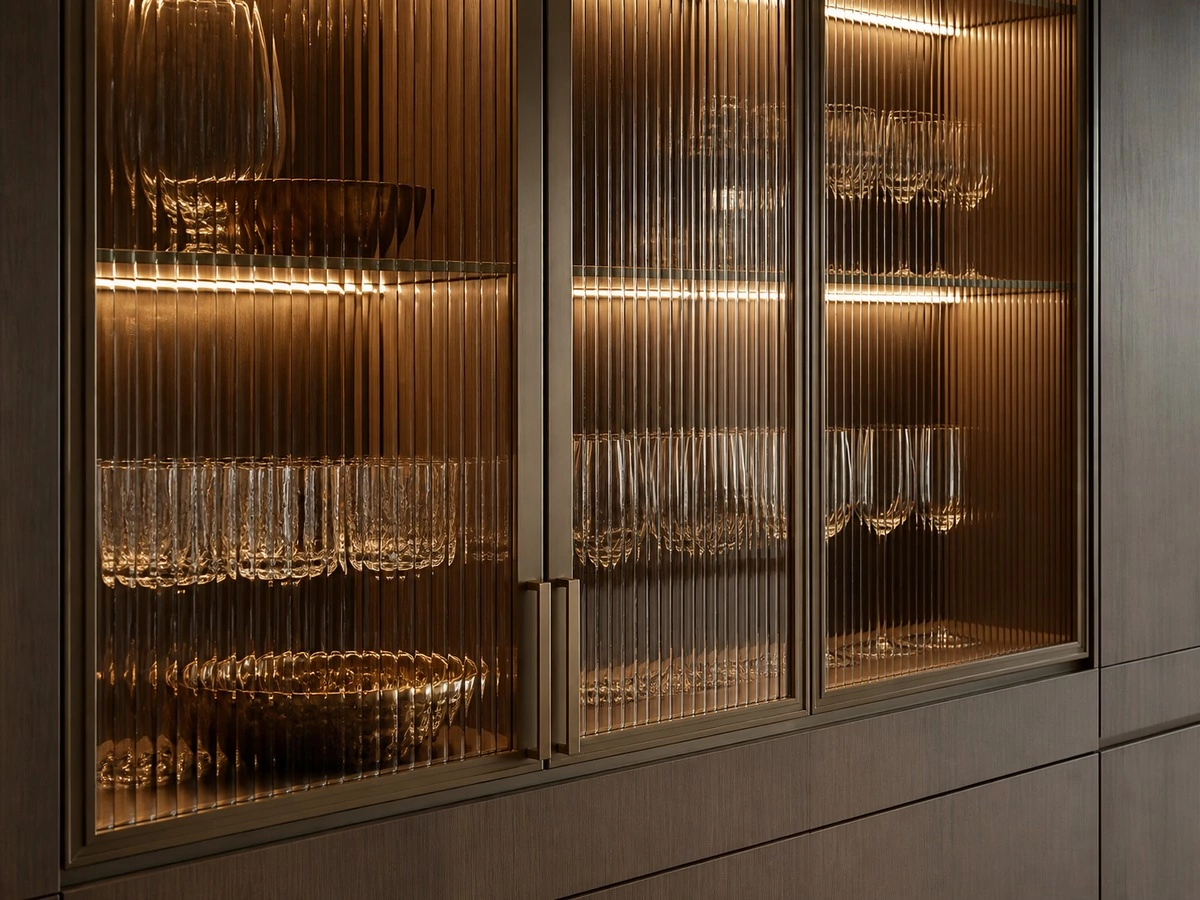
Integrated lighting can make a sideboard more useful for serving and more attractive in the evening. Task lighting supports a coffee or buffet zone; interior lighting helps identify glassware and display objects; ambient lighting can give a glass-front cabinet depth. Position lights to avoid harsh glare on reflective glass, polished stone, or glossy doors.
Coordinate the Sideboard Finish With the Dining Room and Kitchen
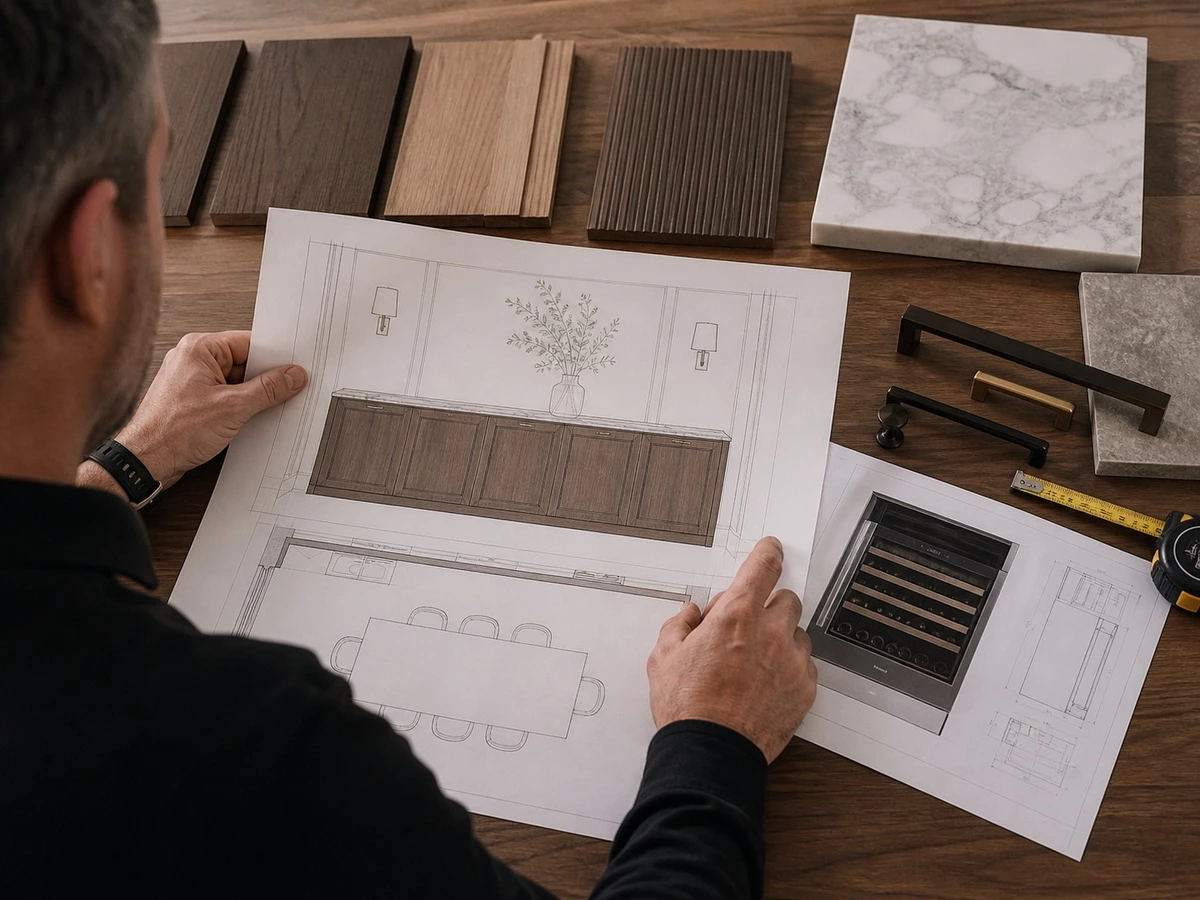
A built-in sideboard often connects visually to the kitchen, living room, entryway, or wine area. The cabinet should not feel like a separate piece placed against the wall. Coordinate door style, wood grain direction, hardware finish, glass type, countertop edge, wall paneling, and lighting temperature with the adjoining spaces.
Contrast can create a dining-room focal point, while repeated materials maintain continuity. For example, a wood veneer from the kitchen may reappear in the sideboard, while stone or metal creates a distinct serving zone. Glass-front cabinets can lighten a full-height wall; fluted glass can reduce the visibility of daily items; handleless doors can create a quieter background. Material selection should be reviewed under the project’s actual light, not only from a small showroom sample.
Best for:
Whole-house cabinet projects and open-plan kitchen-dining-living spaces.
Check:
Door samples, countertop sample, hardware, adjacent floor and wall colors, glass transparency, and lighting temperature.
Risk:
Selecting each cabinet zone independently can produce a fragmented room with mismatched finishes and inconsistent visual weight.

Regional and Project Planning Before Manufacturing
International projects require more than a standard sideboard drawing. For United States projects, confirm wall condition, electrical coordination, appliance requirements, and any applicable composite-wood documentation. The U.S. Environmental Protection Agency identifies finished goods containing regulated composite wood products within its composite wood framework; review the current EPA composite wood products guidance for the destination-market context.
For Australia and New Zealand, review humidity, wall construction, ventilation, and the heating/cooling conditions around the dining room. For Middle East projects, consider heat, sunlight, air-conditioning cycles, and equipment storage conditions. For European projects, match material and emissions documentation, appliance requirements, and installation details to the written project specification. For tall or freestanding elements within a composition, review the relevant anchoring and stability requirements; the CPSC Anchor It guidance is a useful safety reference, not a replacement for local project requirements.
Built-In Sideboard Cabinet Approval Checklist
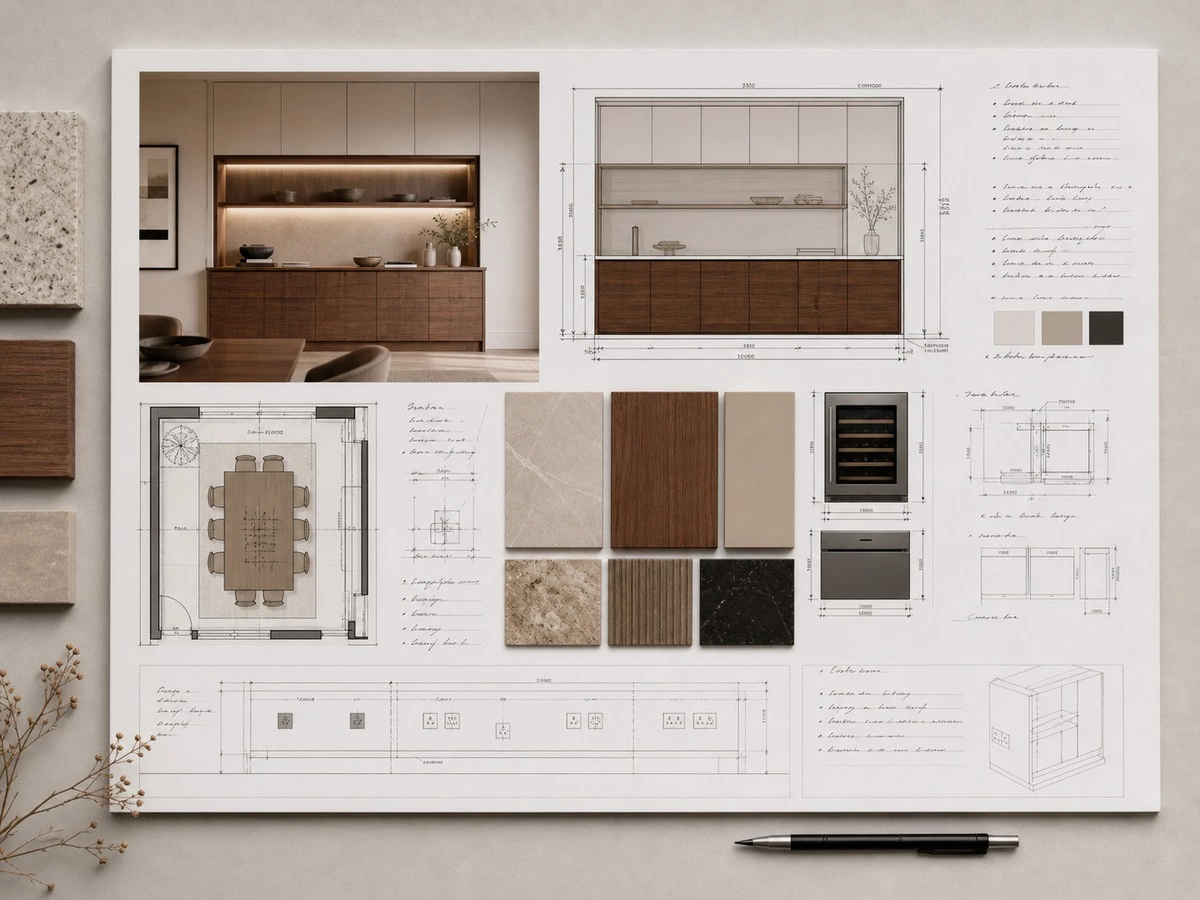
The final production drawing should prove that the sideboard works in the actual room. Use this checklist before the cabinet moves from design approval to manufacturing.
| Inspection Item | What to Approve | Buyer Acceptance Question | Risk if Missed |
|---|---|---|---|
| Site measurement | Wall width, height, recesses, columns, and finished levels | Does the drawing use final site dimensions? | Poor fit and visible fillers |
| Dining clearance | Chair pull-back and walking route | Can guests move behind pulled-out chairs? | Congested room |
| Cabinet depth | Internal and external depth by storage zone | Will the contents fit without reducing circulation? | Unusable storage or narrow passage |
| Counter zone | Height, depth, and serving surface | Does it suit how the household serves food and drinks? | Awkward daily use |
| Appliance niche | Equipment, plugs, cable bends, ventilation,n and cleaning access | Can the appliance be installed and maintained? | Late-stage rework |
| Wine zone | Bottle, glassware, lighting,ng and appliance requirements | Is it a display zone or a dedicated appliance zone? | Misleading or impractical storage |
| Doors and drawers | Open positions against dining furniture | Can every door and drawer open fully? | Collision with chairs or a table |
| Electrical plan | Outlets, switches, LED drivers, and cable route | Are active components accessible after installation? | Visible wires and maintenance difficulty |
| Finish sample | Door, countertop, glass,s and hardware selection | Does it coordinate under actual lighting? | Visual mismatch |
Common Built-In Sideboard Cabinet Mistakes
Designing Before Measuring Chair Clearance
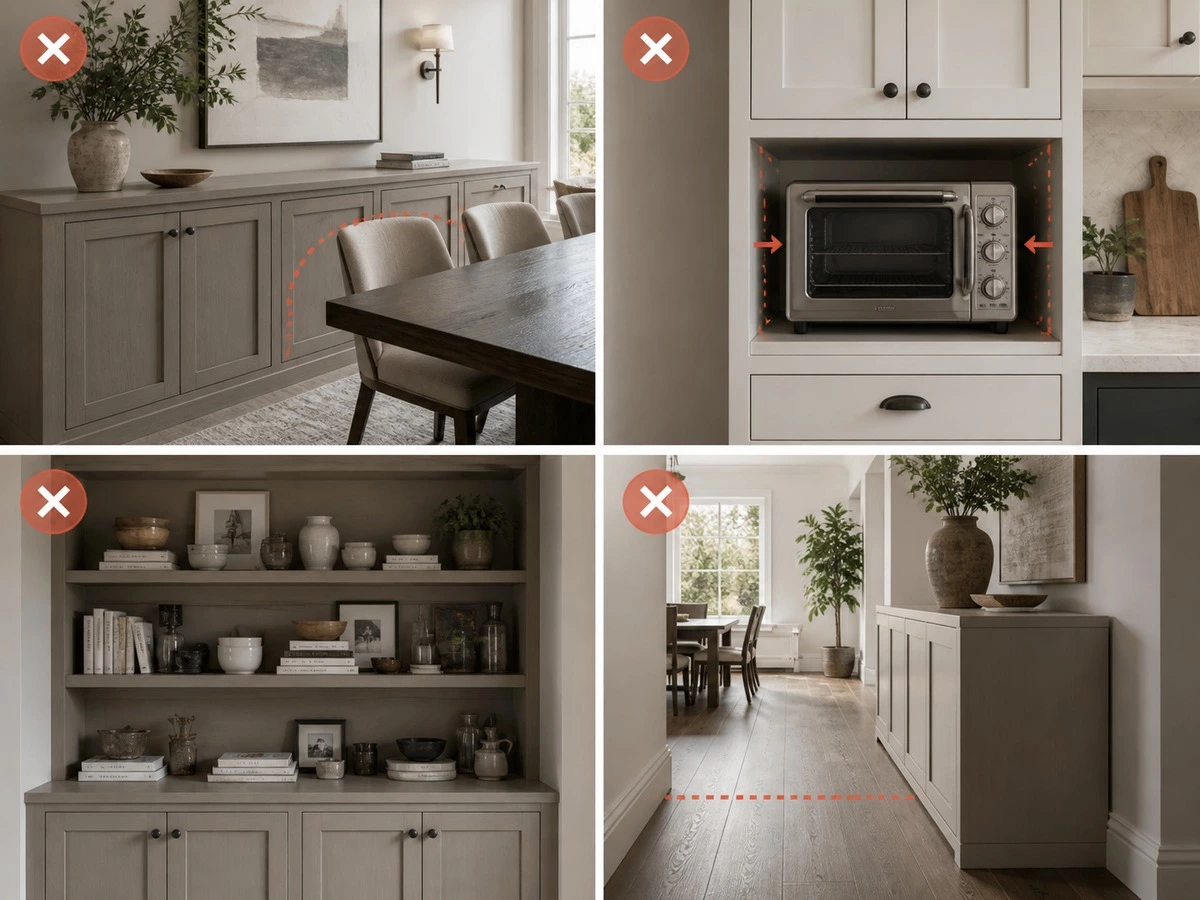
The dining table and chairs should be placed on the room plan before the cabinet depth is finalized. A sideboard that is comfortable in an empty room can become inconvenient when guests pull out chairs or walk behind a seated diner.
Creating an Appliance Niche Without Confirming the Appliance
A decorative niche is not automatically suitable for a coffee machine, wine appliance, microwave, or other active equipment. Confirm actual dimensions, plugs, cable direction, ventilation requirements, water filling, cleaning access, and service route before production.
Filling Every Zone With Open Shelving
Open shelves add visual interest, but too many can become permanent visible storage for packaging, cables, documents, and daily clutter. Keep display areas intentional and give the household enough closed storage for items that should remain out of sight.
Making the Cabinet Too Deep for the Room
More cabinet depth does not always mean better storage. In a narrow dining room, the lost circulation can be more damaging than the extra storage is useful. Review the cabinet with the full dining furniture layout before approval.
Treating Lighting as a Final Decoration
Lighting needs drivers, wiring paths, switching, service access, and reflection control. If it is added after the cabinet construction is fixed, it may reduce usable storage space or require visible cables and late rework.
How ALLURE Coordinates a Built-In Sideboard Cabinet Project
A custom sideboard project begins with final room dimensions, dining furniture, storage needs, selected appliances, power points, and finish direction. The next step is a cabinet elevation and section drawing that shows the serving zone, storage zones, appliance niche, lighting, door and drawer clearances, materials, and installation interfaces. Approving this drawing before manufacturing is the clearest way to prevent a sideboard that looks good but does not work well in the finished room.
For related planning ideas, see ALLURE’s custom dining sideboard ideas, dining sideboard ideas for small spaces, and living room cabinet trends. For project coordination, review the order process and factory video.
Frequently Asked Questions About Built-In Sideboard Cabinets
1. What is the best depth for built-in sideboard cabinets?
The best depth depends on what the cabinet needs to store and how much dining-room clearance is available. Tableware, linens, trays, books, bottles, small appliances, and display objects require different internal dimensions. Check the cabinet in the full furniture plan, including the dining table, chairs in their pulled-out position, and the walking route. Do not choose depth from a generic cabinet module without confirming both the stored items and the remaining room circulation.
2. How much space should be left between a dining table and a sideboard?
The required space depends on chair dimensions, how far guests need to pull chairs back, the route behind seated people, and whether the sideboard has opening doors or drawers. Test the active dining condition rather than only measuring chairs when tucked under the table. The cabinet should remain accessible while guests can stand, sit, and pass through the room. Show pulled-out chairs and opened drawers on the approved room plan before production.
3. What height should a built-in sideboard counter be?
The final sideboard counter height should suit its intended use: serving dishes, preparing drinks, operating a coffee machine, displaying décor, or storing items below. It should also relate visually to the dining table, kitchen cabinetry, wall panels, and user preferences. There is no single height that suits every project. Review the counter zone together with the user brief, appliance dimensions, outlet position, and the overall room composition before approving the drawing.
4. Can a built-in sideboard include a coffee machine or microwave?
Yes, if the cabinet niche is planned around the actual appliance. Confirm the appliance dimensions, plugs, cable direction, ventilation requirements, heat or steam considerations, door clearance, filling and cleaning access, and future replacement route. Do not build an appliance niche based only on a marketing image or estimate. Electrical work should be coordinated with qualified local professionals, and the selected appliance manufacturer’s installation instructions should guide the final cabinet interface.
5. Does a sideboard wine cabinet need ventilation?
A decorative bottle display may not need the same treatment as an active wine appliance, but a wine refrigerator or other powered unit can require ventilation and service access according to the manufacturer’s instructions. Confirm whether the design is intended for displaying bottles, storing glassware, or housing a dedicated appliance. The cabinet depth, power outlet, airflow route, appliance door clearance, and replacement path should be drawn before the surrounding cabinetry is released for production.
6. Are glass doors suitable for a dining sideboard?
Glass doors can make a built-in sideboard feel lighter and can display glassware, ceramics, bottles, or curated collections. They work best when the visible items are organized and when interior lighting is controlled. Clear glass provides maximum visibility, while fluted or tinted glass can soften visual clutter. Confirm glass type, frame finish, lighting position, cleaning needs, and the level of privacy desired before choosing glass-front storage for the project.
7. How should tableware be organized inside a built-in sideboard?
Organize tableware by frequency of use and item type. Daily plates, bowls, glasses, and cutlery should be easy to reach; occasional platters, seasonal linens, candles, and serving pieces can use upper or deeper zones. Drawers, adjustable shelves, vertical tray dividers, pull-out shelves, and small internal organizers can make the cabinet more useful than one large empty compartment. The best internal layout follows the household’s actual dining and entertaining routine.
8. Can a sideboard be built around a column or wall recess?
Yes. A custom sideboard can absorb a column, use a wall recess, or create a more balanced wall composition around an architectural irregularity. The key is accurate site measurement and a drawing that shows the finished wall, floor, ceiling, skirting, access panels, windows, vents, and switches. Do not assume a column can simply be hidden without considering its projection, adjacent circulation, installation tolerance, and any building-service access that must remain available.
Final Takeaway
The best built-in sideboard cabinets are planned around the way the dining room is actually used: chairs pulled back, dishes served, appliances plugged in, storage accessed, and finishes viewed under real light. Approve the cabinet elevation, section, appliance schedule, finish samples, and chair-clearance plan before manufacturing. That process creates a sideboard that improves storage and entertaining without making the room feel crowded.